In Trino, a catalog is what other databases call a database — it’s a configured connection to an underlying data source (such as Iceberg, Hive, Postgres, or Snowflake). A Trino cluster can expose multiple catalogs, each containing schemas and tables. Throughout this guide, the Omni connection field labeled Database refers to a Trino catalog.
Requirements
To follow the steps in this guide, you’ll need:- Organization Admin permissions in Omni
- In Starburst Galaxy:
- Permissions that allow you to create roles, users, and assign privileges. The
accountadminrole includes all these permissions. - An existing Galaxy cluster
- Permissions that allow you to create roles, users, and assign privileges. The
Setup
Create a Galaxy role for Omni
In this step, you’ll create a dedicated Galaxy role for Omni. You’ll assign privileges to the role in a later step.
- In Galaxy, navigate to Access > Roles and privileges.
- Click Create role.
- Enter a name (for example,
omni) and an optional description. - Check the Grant to the creating role checkbox. This grants the new role to your current role so that you can continue to administer it.
- Click Create role.
Grant privileges to the role
Next, you’ll grant privileges to the Omni role that will allow it to access the cluster and the catalogs and schemas it contains.
1
Grant cluster access to the role
Start by granting the role permission to run queries on the cluster Omni will connect to.
-
On the Roles and privileges page, click the
omnirole you just created. - Open the Privileges tab.
- Click Add privileges.
- Click the Cluster tab.
- In the Cluster alias dropdown, select the cluster Omni will connect to.
- Set Do you want to allow access? to Allow.
-
Under What can they do?, select Use cluster. The dialog should look like the following:
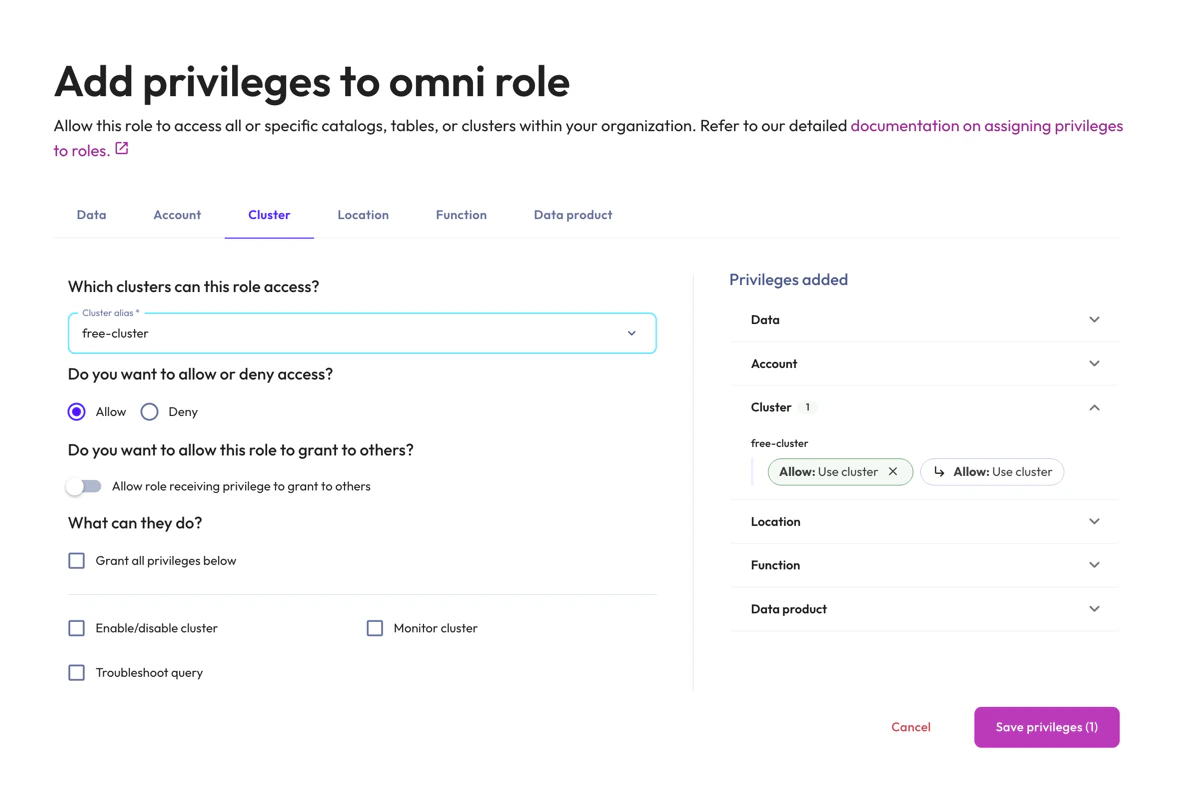
Configured cluster privileges for the Omni role
2
Grant data privileges to the role
Next, grant the role access to the catalogs and schemas you want to model in Omni.
- Still on the Add privileges dialog, click the Data tab.
-
In the Scope dropdown, select a catalog you want Omni to access.
You can also toggle a catalog open to grant access on a per-schema basis:
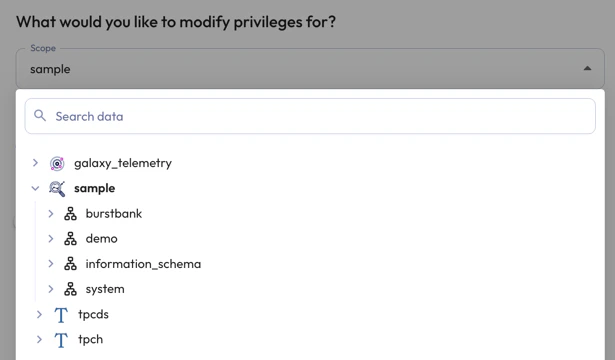
Toggle open a catalog to selectively grant schema access
- Set Do you want to allow access? to Allow.
-
Under What can they do?, select Select from table. The dialog should look like the following:
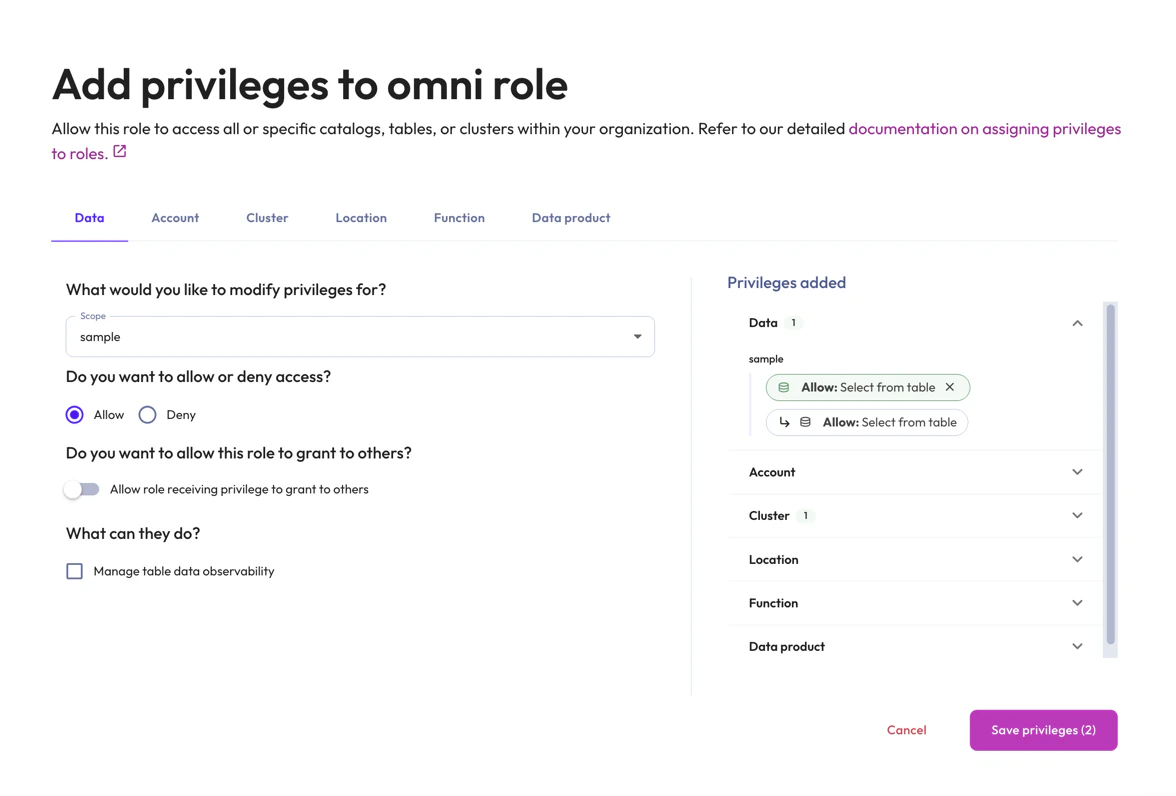
Configured data privileges for the Omni role
- Repeat this for every catalog and schema you want Omni to query.
- Click Save privileges.
Create the Omni user in Galaxy
Next, you’ll create a dedicated Galaxy user for Omni and assign it the role you configured.
- In Galaxy, navigate to Access > Users.
- Click Create user.
-
Enter an email address for the new user (for example,
omni@yourcompany.com).Galaxy will send an invitation email to this address. You’ll need access to the inbox to complete the account setup and set a password. -
In Roles, select the
omnirole you created earlier. -
In Default role, select the
omnirole. The dialog should look like the following: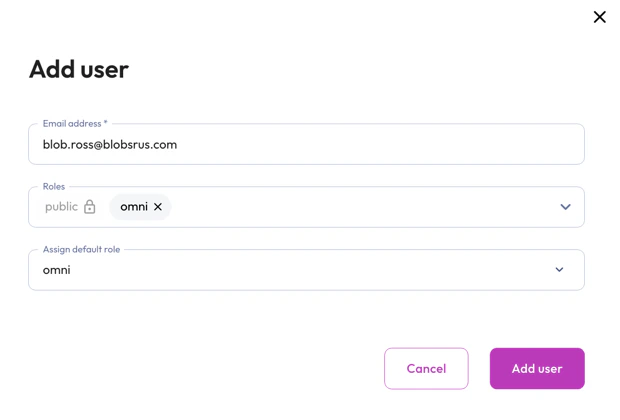
Create Omni user settings
- Click Add user.
- Open the invitation email and follow the link to set the user’s password. Save the password somewhere secure — you’ll need it when configuring the Omni connection.
Set up a table upload schema
This step is optional. However, we recommend completing it as part of the initial set up or you won’t be able to use uploaded files like CSVs in joins.
omni role needs write access to a dedicated schema in a writable catalog. This schema can’t be used for other modeled tables.Generally, the steps to set up a table upload schema will look like:- Verify that the Galaxy connector (data source) associated with the catalog supports write operations. Some connectors - like Google Sheets and Salesforce - are read-only and can’t be used for table uploads.
- In the underlying data source (e.g., Postgres, MySQL), create a schema in a catalog that the Galaxy
omnirole has access to. - Verify that the new schema is accessible to Galaxy.
- In Galaxy, add privileges to the Galaxy
omnirole that will allow the Omni Galaxy user to:- Access the catalog and schema used for table uploads
- Create new tables in the schema
- Select from, insert into, update, and delete from tables in the schema
Get the connection details from Galaxy
- In Galaxy, navigate to Partner connect.
- Click the Connection info section to open it.
- Select the cluster you want to connect to Omni.
- In the Other clients section, note the Host and Port values — you’ll need these in the next step. The port for Galaxy is always
443.
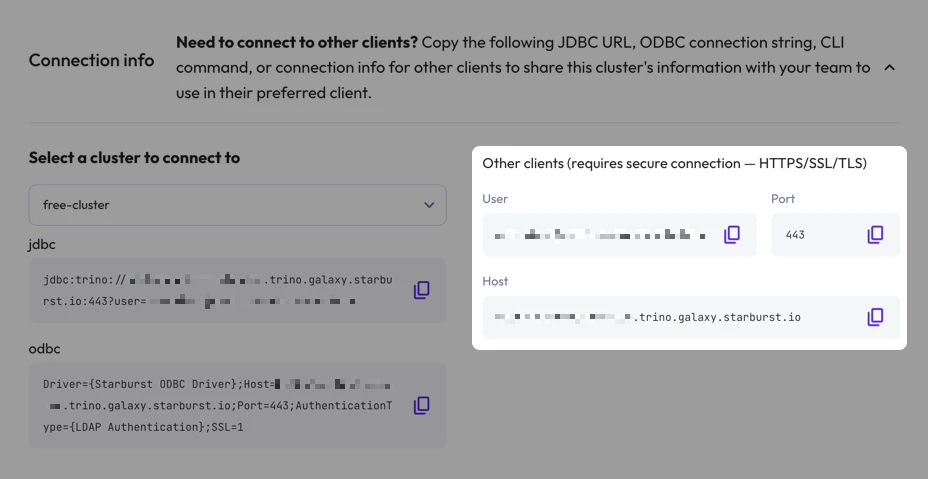
Note the Host and Port values in the Other clients section
Allowlist Omni's IP addresses
If your Galaxy cluster restricts access by IP address, add Omni’s IPs to the allowlist.Omni’s IP addresses can be found on an individual connection’s page in Omni, accessed by navigating to Settings > Connections and clicking a connection.If your cluster doesn’t restrict access by IP, skip this step.
Create the connection in Omni
- In Omni, click Settings > Connections.
- Click the Trino option.
-
On the connection setup page, fill in the connection details:
The name of the Trino catalog Omni should connect to.The Omni Starburst user’s email address, followed by
/and the role name. The role suffix tells Galaxy which role to use for the session. Theomnirole should be the default for this user, but adding the role suffix explicitly sets the role.For example, if the user isomni@yourcompany.comand the role isomni, enteromni@yourcompany.com/omni. - When finished, click Create connection.
Galaxy clusters auto-suspend after an idle period (configurable per cluster). The first query Omni runs after suspension will be slower while Galaxy resumes the cluster. This is expected behavior and doesn’t require any additional setup.
What’s next?
Now that your database is set up, you can:- Use the Omni Agent’s quickstart skill to create your first topic from business questions
- Configure user permissions, schema refreshes, environments and timezone settings
- Learn how Omni generates the model associated with the connection