Requirements
To follow the steps in this guide, you’ll need:- Organization Admin permissions in Omni
- Permissions in ClickHouse that allow you to access connection credentials
Setup
Retrieve ClickHouse connection details
- In ClickHouse, navigate to the warehouse you want to connect to Omni.
- Click Connect in the side navigation.
-
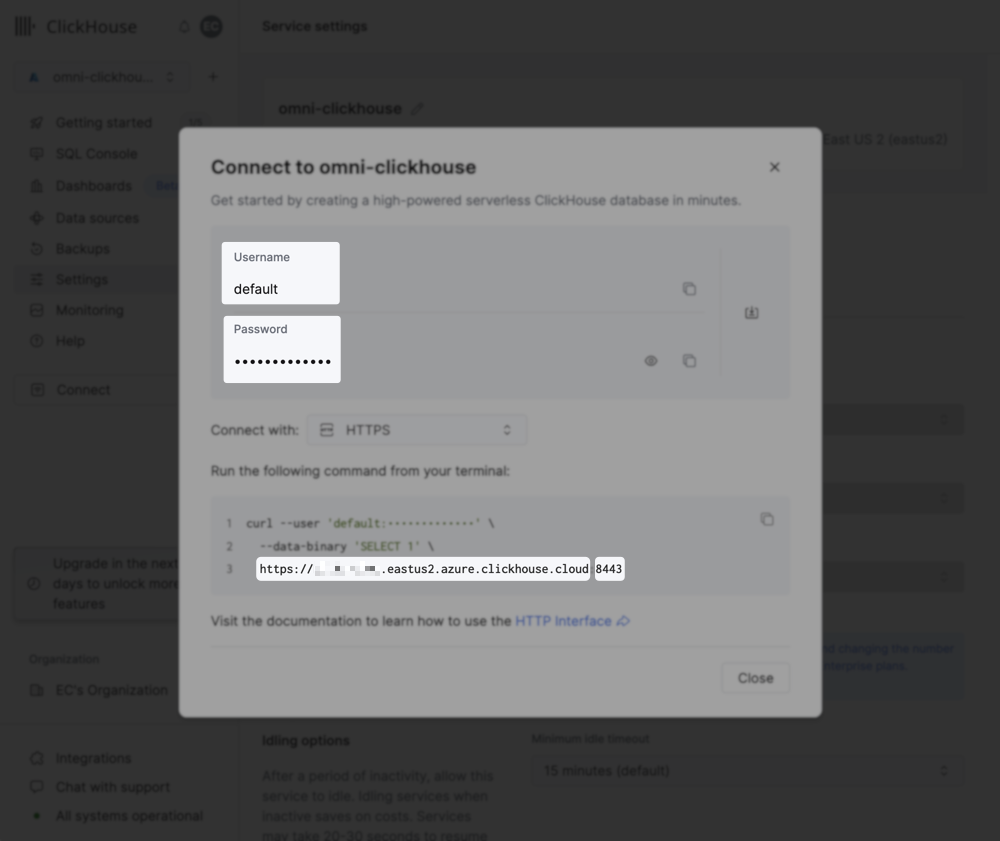
A dialog like the following will display:
-
Username - In the above image, the username is ClickHouse’s default (
default), but this may differ for you.If you want to use a different (non-default) Clickhouse user, verify that the user has, at a minimum,SELECTpermissions for:- All schemas you want to include in the Omni model
INFORMATION_SCHEMA.SCHEMATAINFORMATION_SCHEMA.TABLES
- Password
-
Host - This is a string similar to
https://<some-string>.eastus2.azure.clickhouse.cloud -
Port - In the above image, the port is
8443
Allowlist Omni's IP addresses
If access to ClickHouse is limited by IP address, you’ll need to add Omni’s IPs to the allowlist before you create the database connection.Omni’s IP addresses can be found on an individual connection’s page, accessed by navigating to Settings > Connections and clicking a connection.
What’s next?
Now that your database is set up, you can:- Use the Omni Agent’s quickstart skill to create your first topic from business questions
- Configure user permissions, schema refreshes, environments and timezone settings
- Learn how Omni generates the model associated with the connection