Requirements
To follow the steps in this guide, you’ll need:- Organization Admin permissions in Omni
- Microsoft Azure Portal Admin permissions, which are required to allowlist Omni’s IP addresses
Setup
Retrieve connection details
- Navigate to your Microsoft Azure Portal.
- In the portal, navigate to the database you want to connect to Omni.
-
On the database’s details page, locate the Connection strings field:
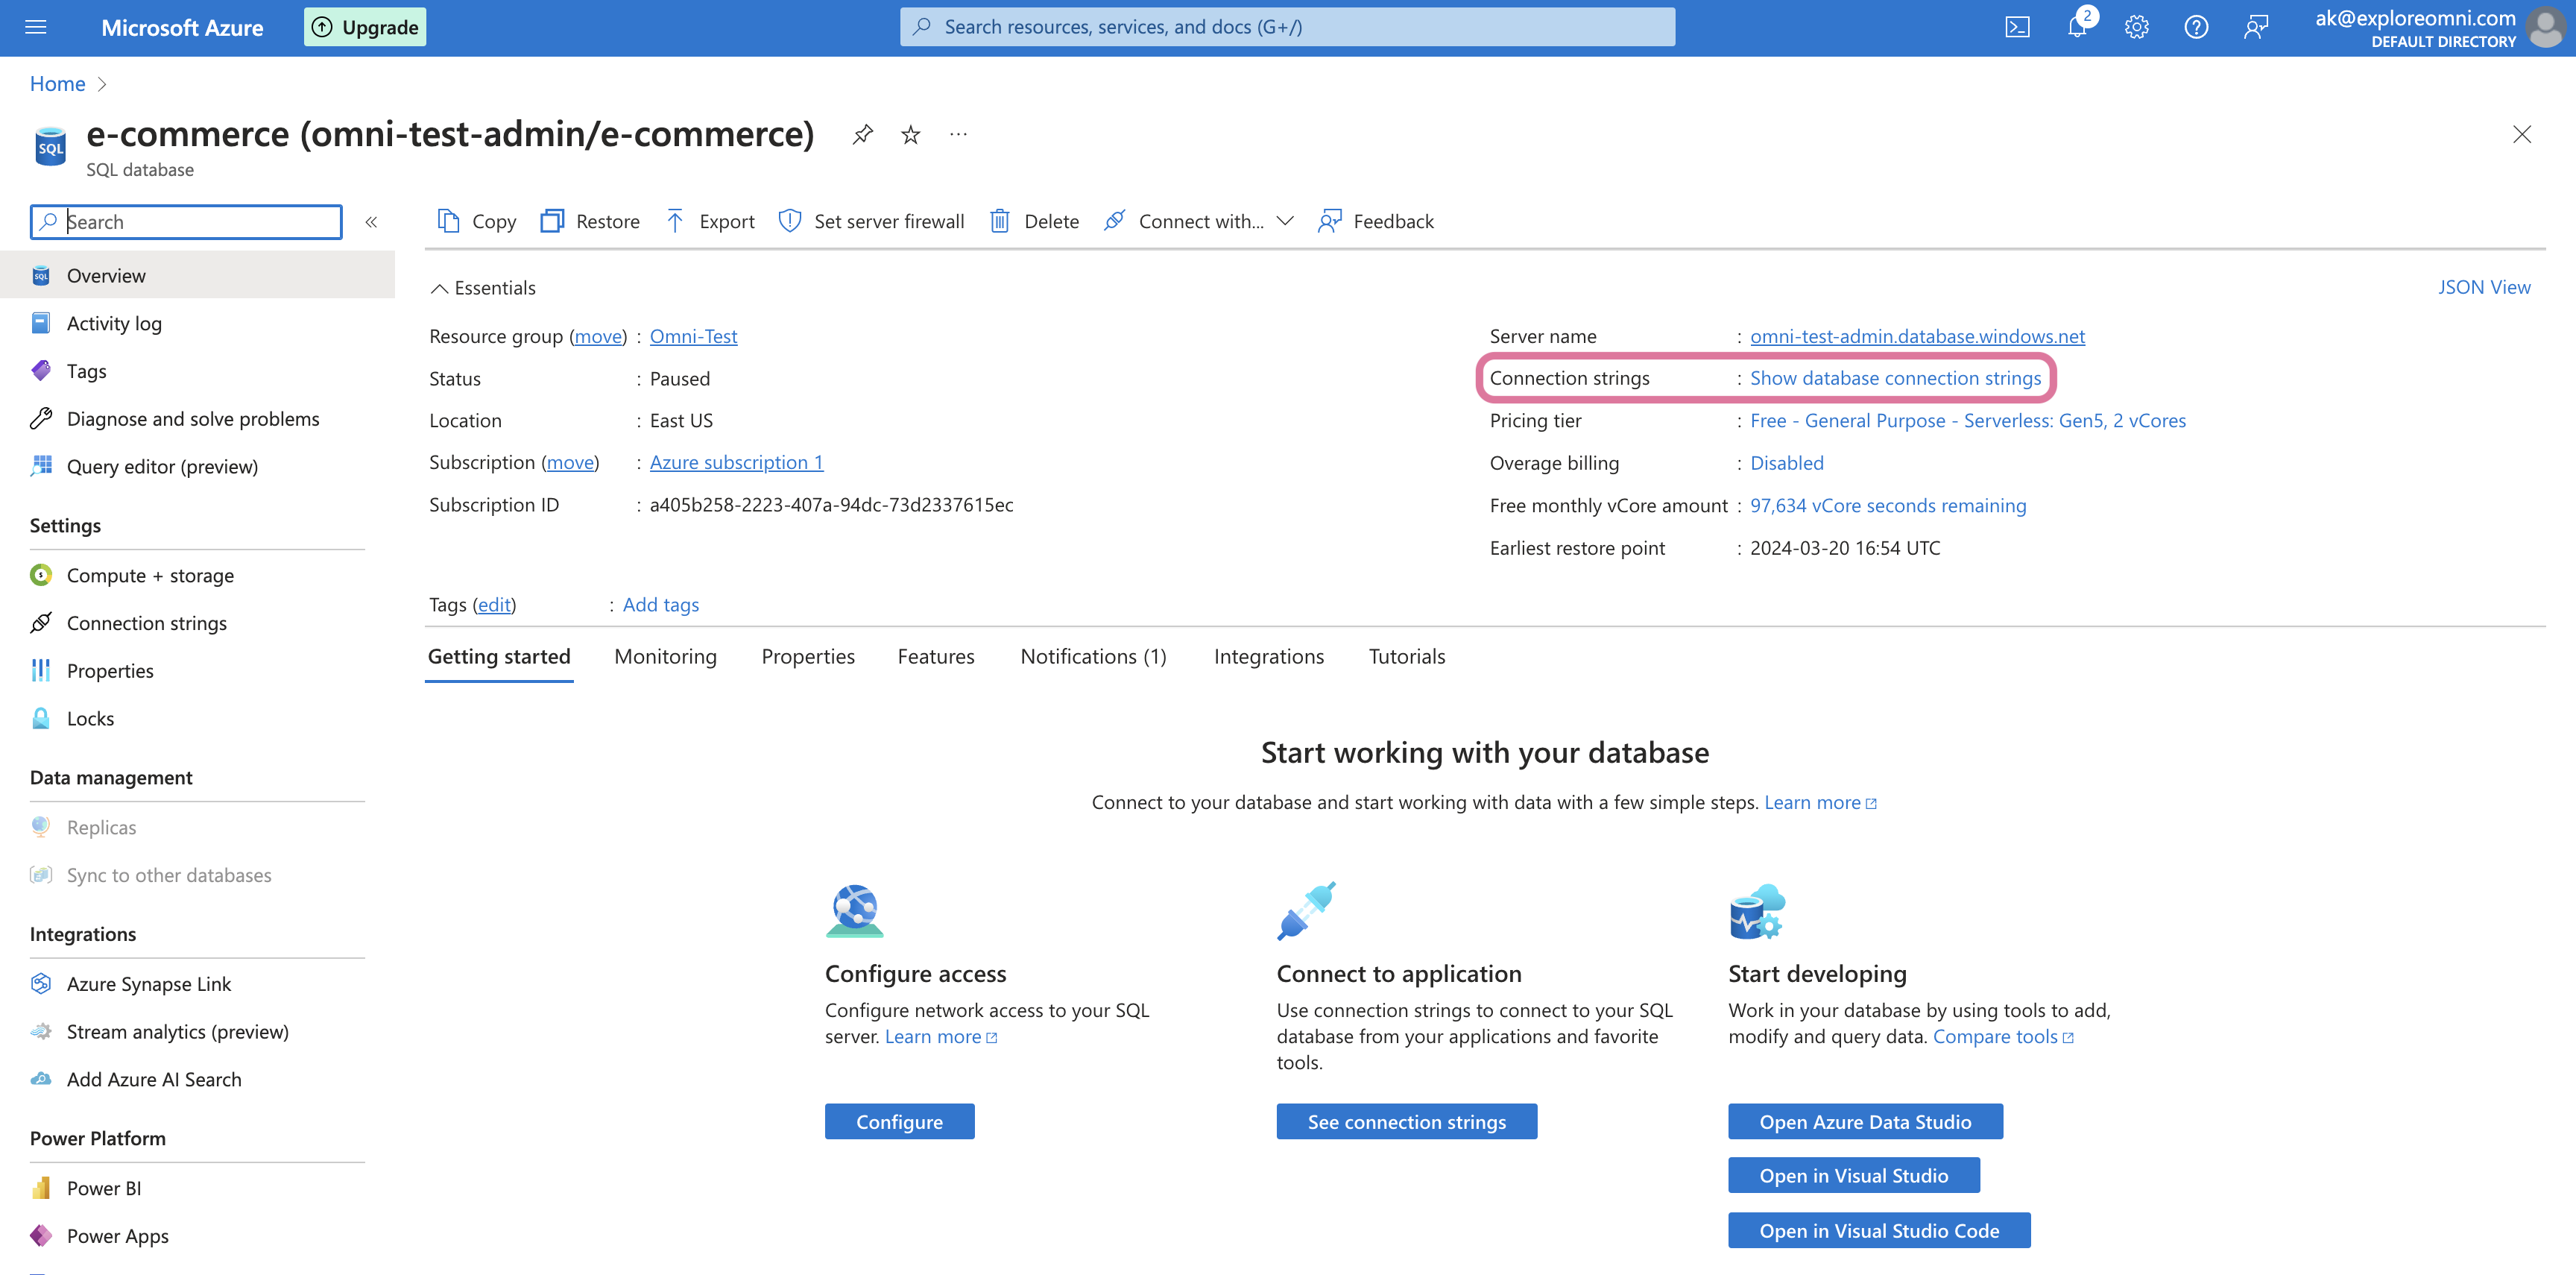
- Click the Show database connection strings link.
-
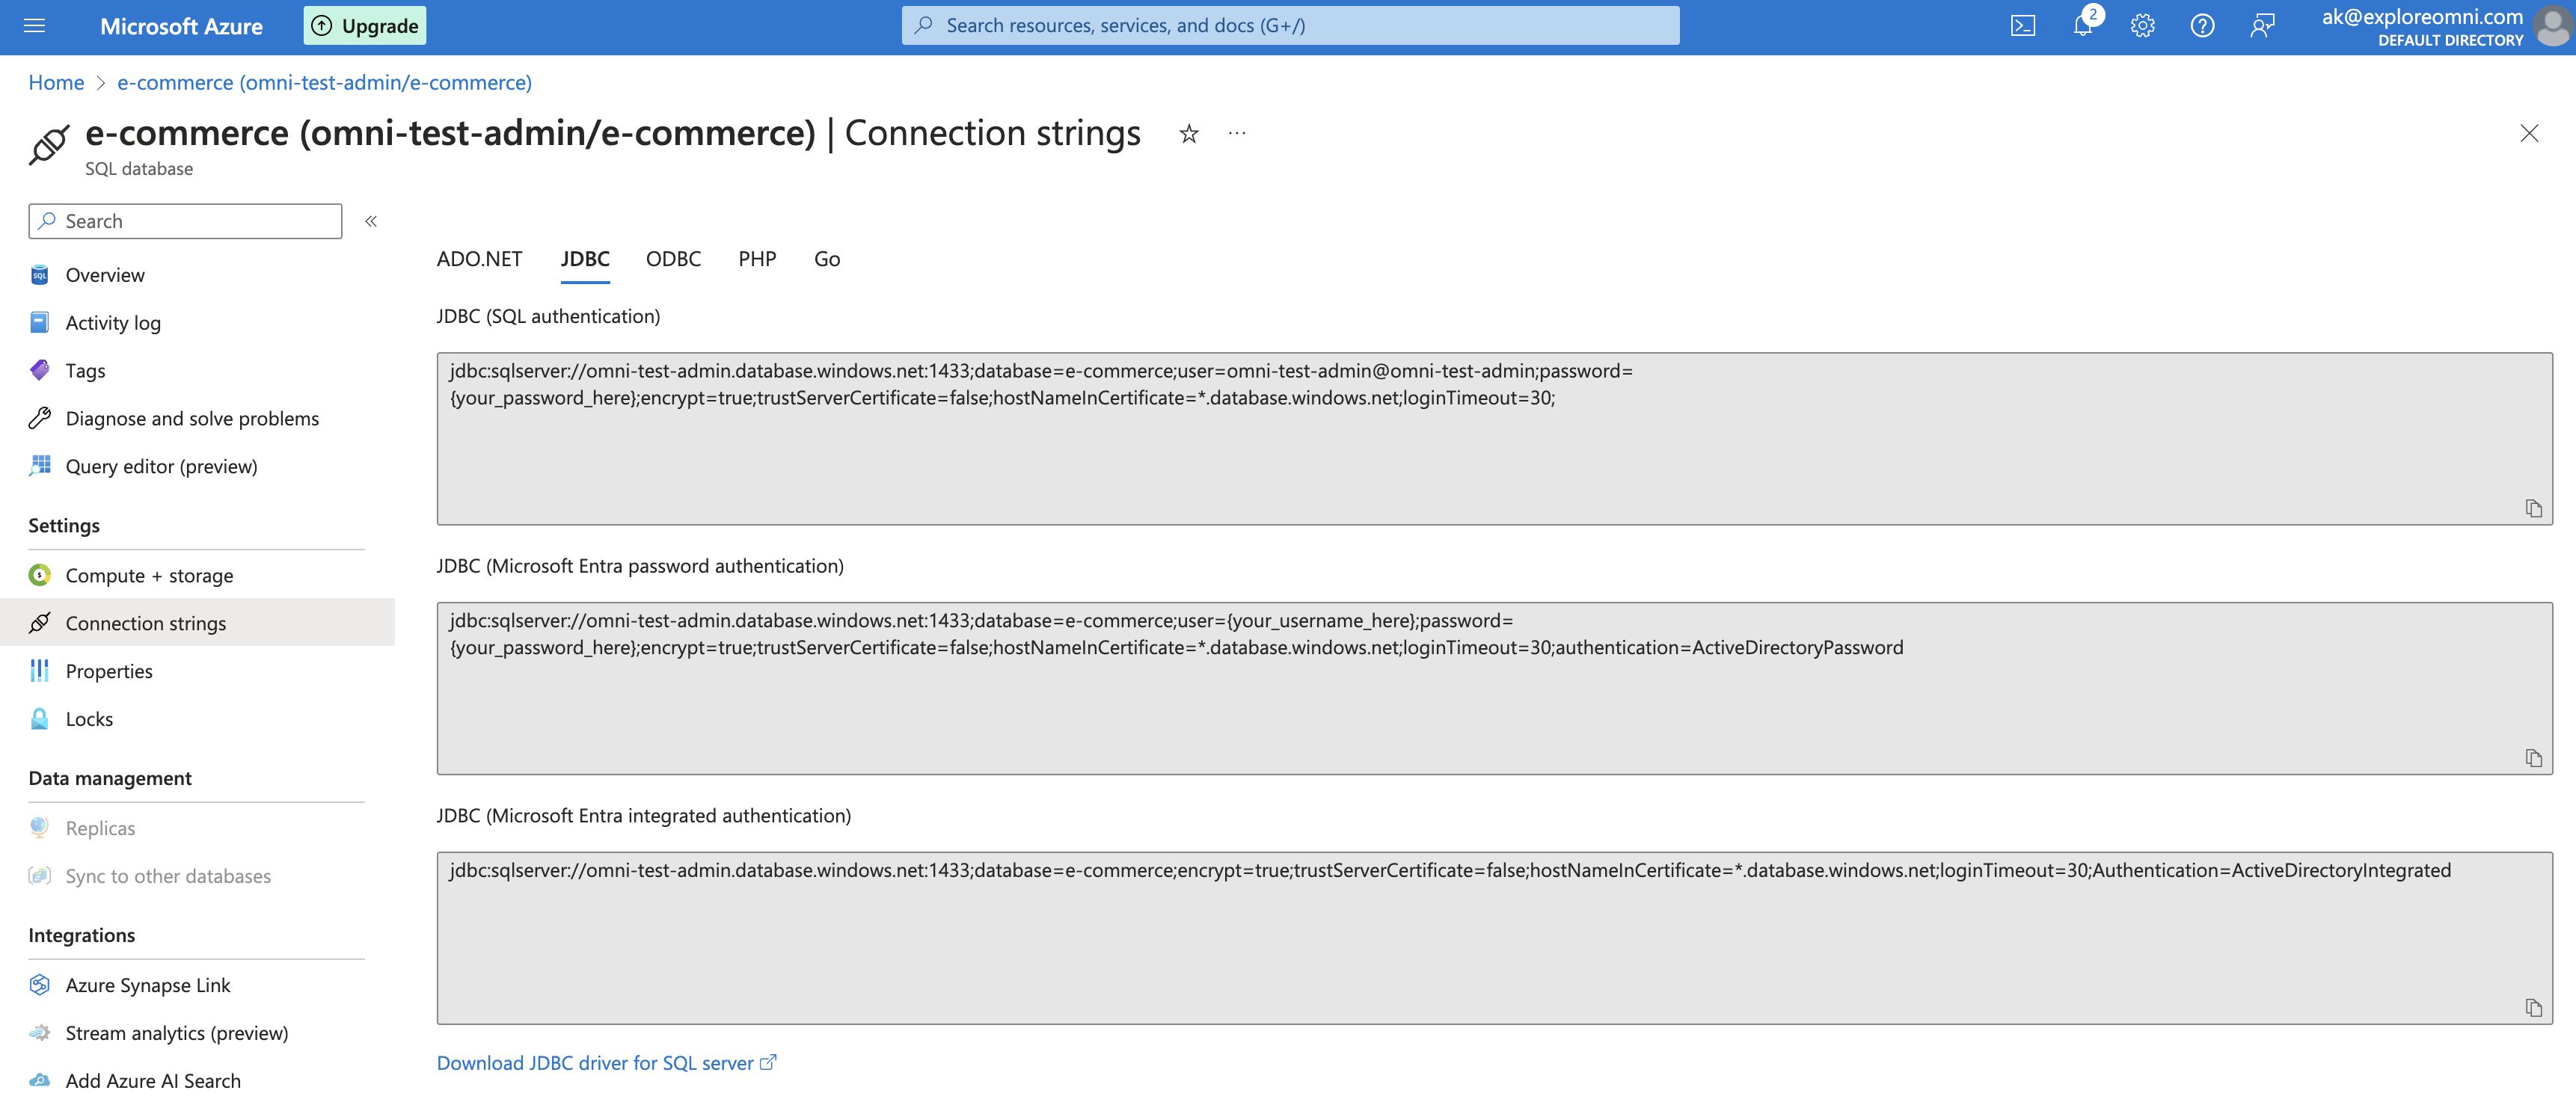
On the page that displays, click the JDBC tab:
-
You should see something like the following, which will contain all the information you need:
Set up a table upload schema
This step is optional. However, we recommend completing it as part of the initial set up or you won’t be able to use uploaded files like CSVs in joins.
- Create the schema in Microsoft SQL Server. This can be in its own database or the same database as other schemas to be used in modeling.
-
Run the following commands to grant the Omni user the required privileges:
Grant Omni user permissions to upload schema
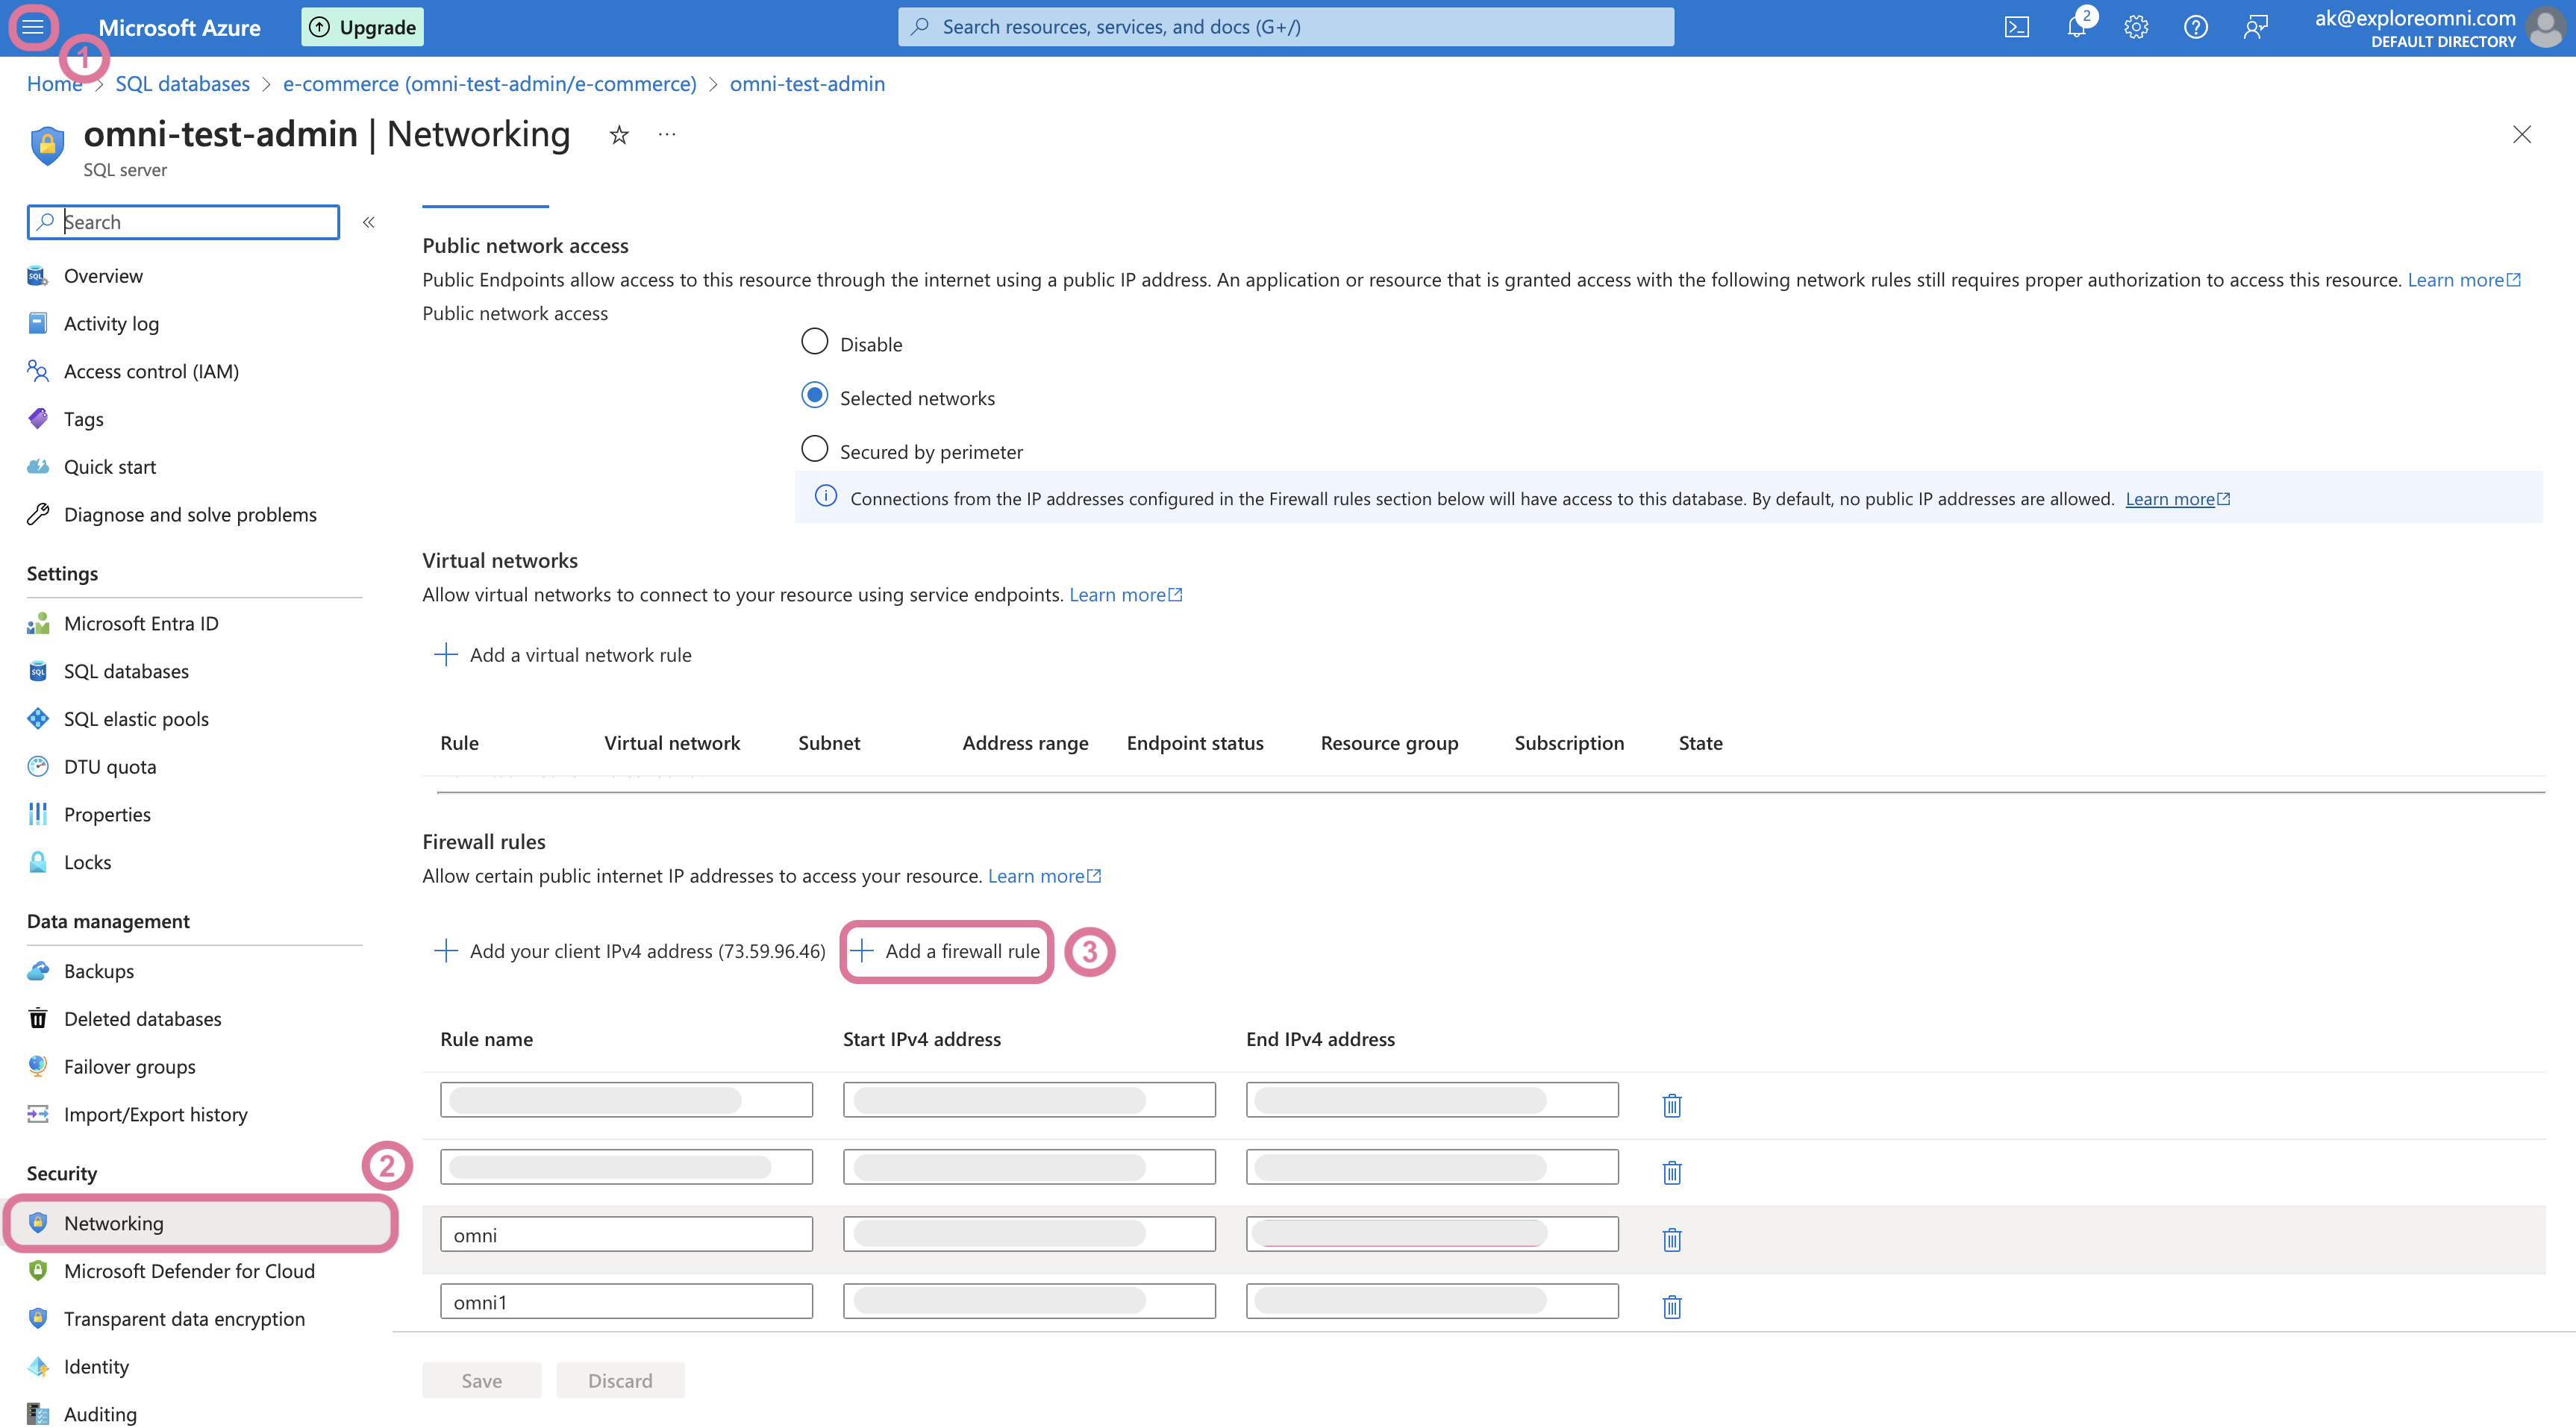
Allowlist Omni's IP addresses
If access to the SQL Server database is limited by IP address, you’ll need to add Omni’s IPs to the allowlist before you create the database connection.Omni’s IP addresses can be found on an individual connection’s page, accessed by navigating to Settings > Connections and clicking a connection.
- Navigate to your Microsoft Azure Portal.
- In the left navigation, click the Networking option under Security.
-
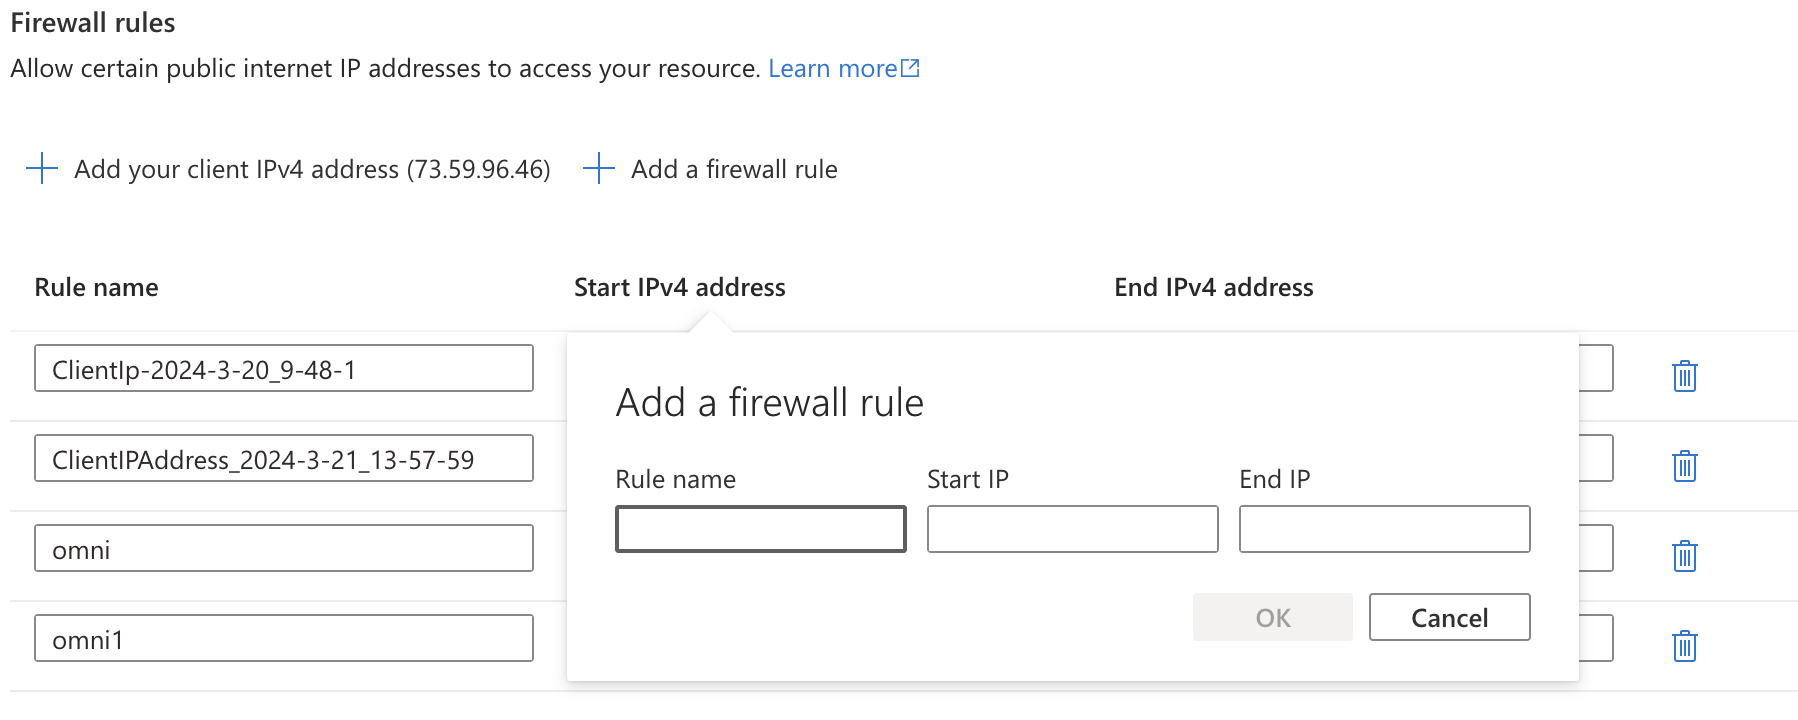
In the Firewall rules section, click Add a firewall rule:
-
Create a rule for each of Omni’s IP addresses:
What’s next?
Now that your database is set up, you can:- Use the Omni Agent’s quickstart skill to create your first topic from business questions
- Configure user permissions, schema refreshes, environments and timezone settings
- Learn how Omni generates the model associated with the connection