Organization Admin permissions are required to create and modify user attributes, including assigning them to users.
User attribute basics
Can I use user attributes to control data access?
Can I use user attributes to control data access?
Yes. User attributes can be used in a few ways to control data access:
-
Access filters, which allow you to restrict the rows of data a user can access within a topic. Access filters apply the values assigned on a user attribute to the
WHEREclause of every SQL query a user runs, filtering out to only the data designated to that user:Filter by brand_name -
Access grants, which define topic- and field-level permissions. Omni will map a user’s attribute value to a corresponding allowed value and determine if the user has the necessary permissions to access that topic or field:
Grant access for user group
-
Fields. User attributes can be referenced in fields using Mustache syntax, for example:
{{ omni_attributes.<attribute-name> }}. This construct can be used to:- Provide conditional access to a field, or
-
To hash a field based on a user attribute. This can be done by using a
CASEstatement in the SQL definition for a field. For example, the followingname_hiddenandname_hashedexamples demonstrate how to use user attributes to hide or hash a name field as an alternative to using access grants to remove access entirely:Hide or hash field based on user attribute
Can I use user attributes to dynamically change database connections?
Can I use user attributes to dynamically change database connections?
Yes. User attributes can be used to parameterize the connection queries run against while in an Omni branch. Refer to the Dynamically switching database environments guide for more information and setup steps.
Can I use user attributes to route users to tenant-specific models?
Can I use user attributes to route users to tenant-specific models?
Yes. Shared extension models use user attributes to route users to the correct model extension. You define a mapping in the parent model’s
dynamic_shared_extensions parameter that links user attribute values to specific extensions.Can I use user attributes to create dynamic content?
Can I use user attributes to create dynamic content?
Yes. There are a few ways to do this:
- Dashboard Markdown tiles. You can use user attributes in dashboard Markdown tiles with Mustache syntax. For example,
{{metadata.userAttributes.<user_attribute>.values}}would return the value of the specified user attribute. - Dashboard deliveries. User attributes can be used to personalize deliveries, including messages (where supported) and the data included in the delivery.
Can I assign user attributes to email-only users?
Can I assign user attributes to email-only users?
Yes. The steps for assigning a user attribute are the same regardless of user type. To view email-only users when working with a specific attribute, click the Email Only toggle in the attribute’s Users tab: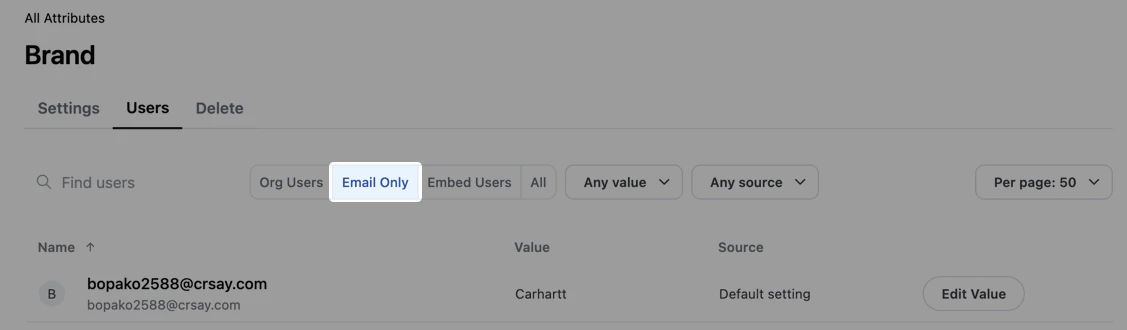
Does Omni have any system (default) user attributes?
Does Omni have any system (default) user attributes?
Yes. Refer to the Default system attributes section for more information.
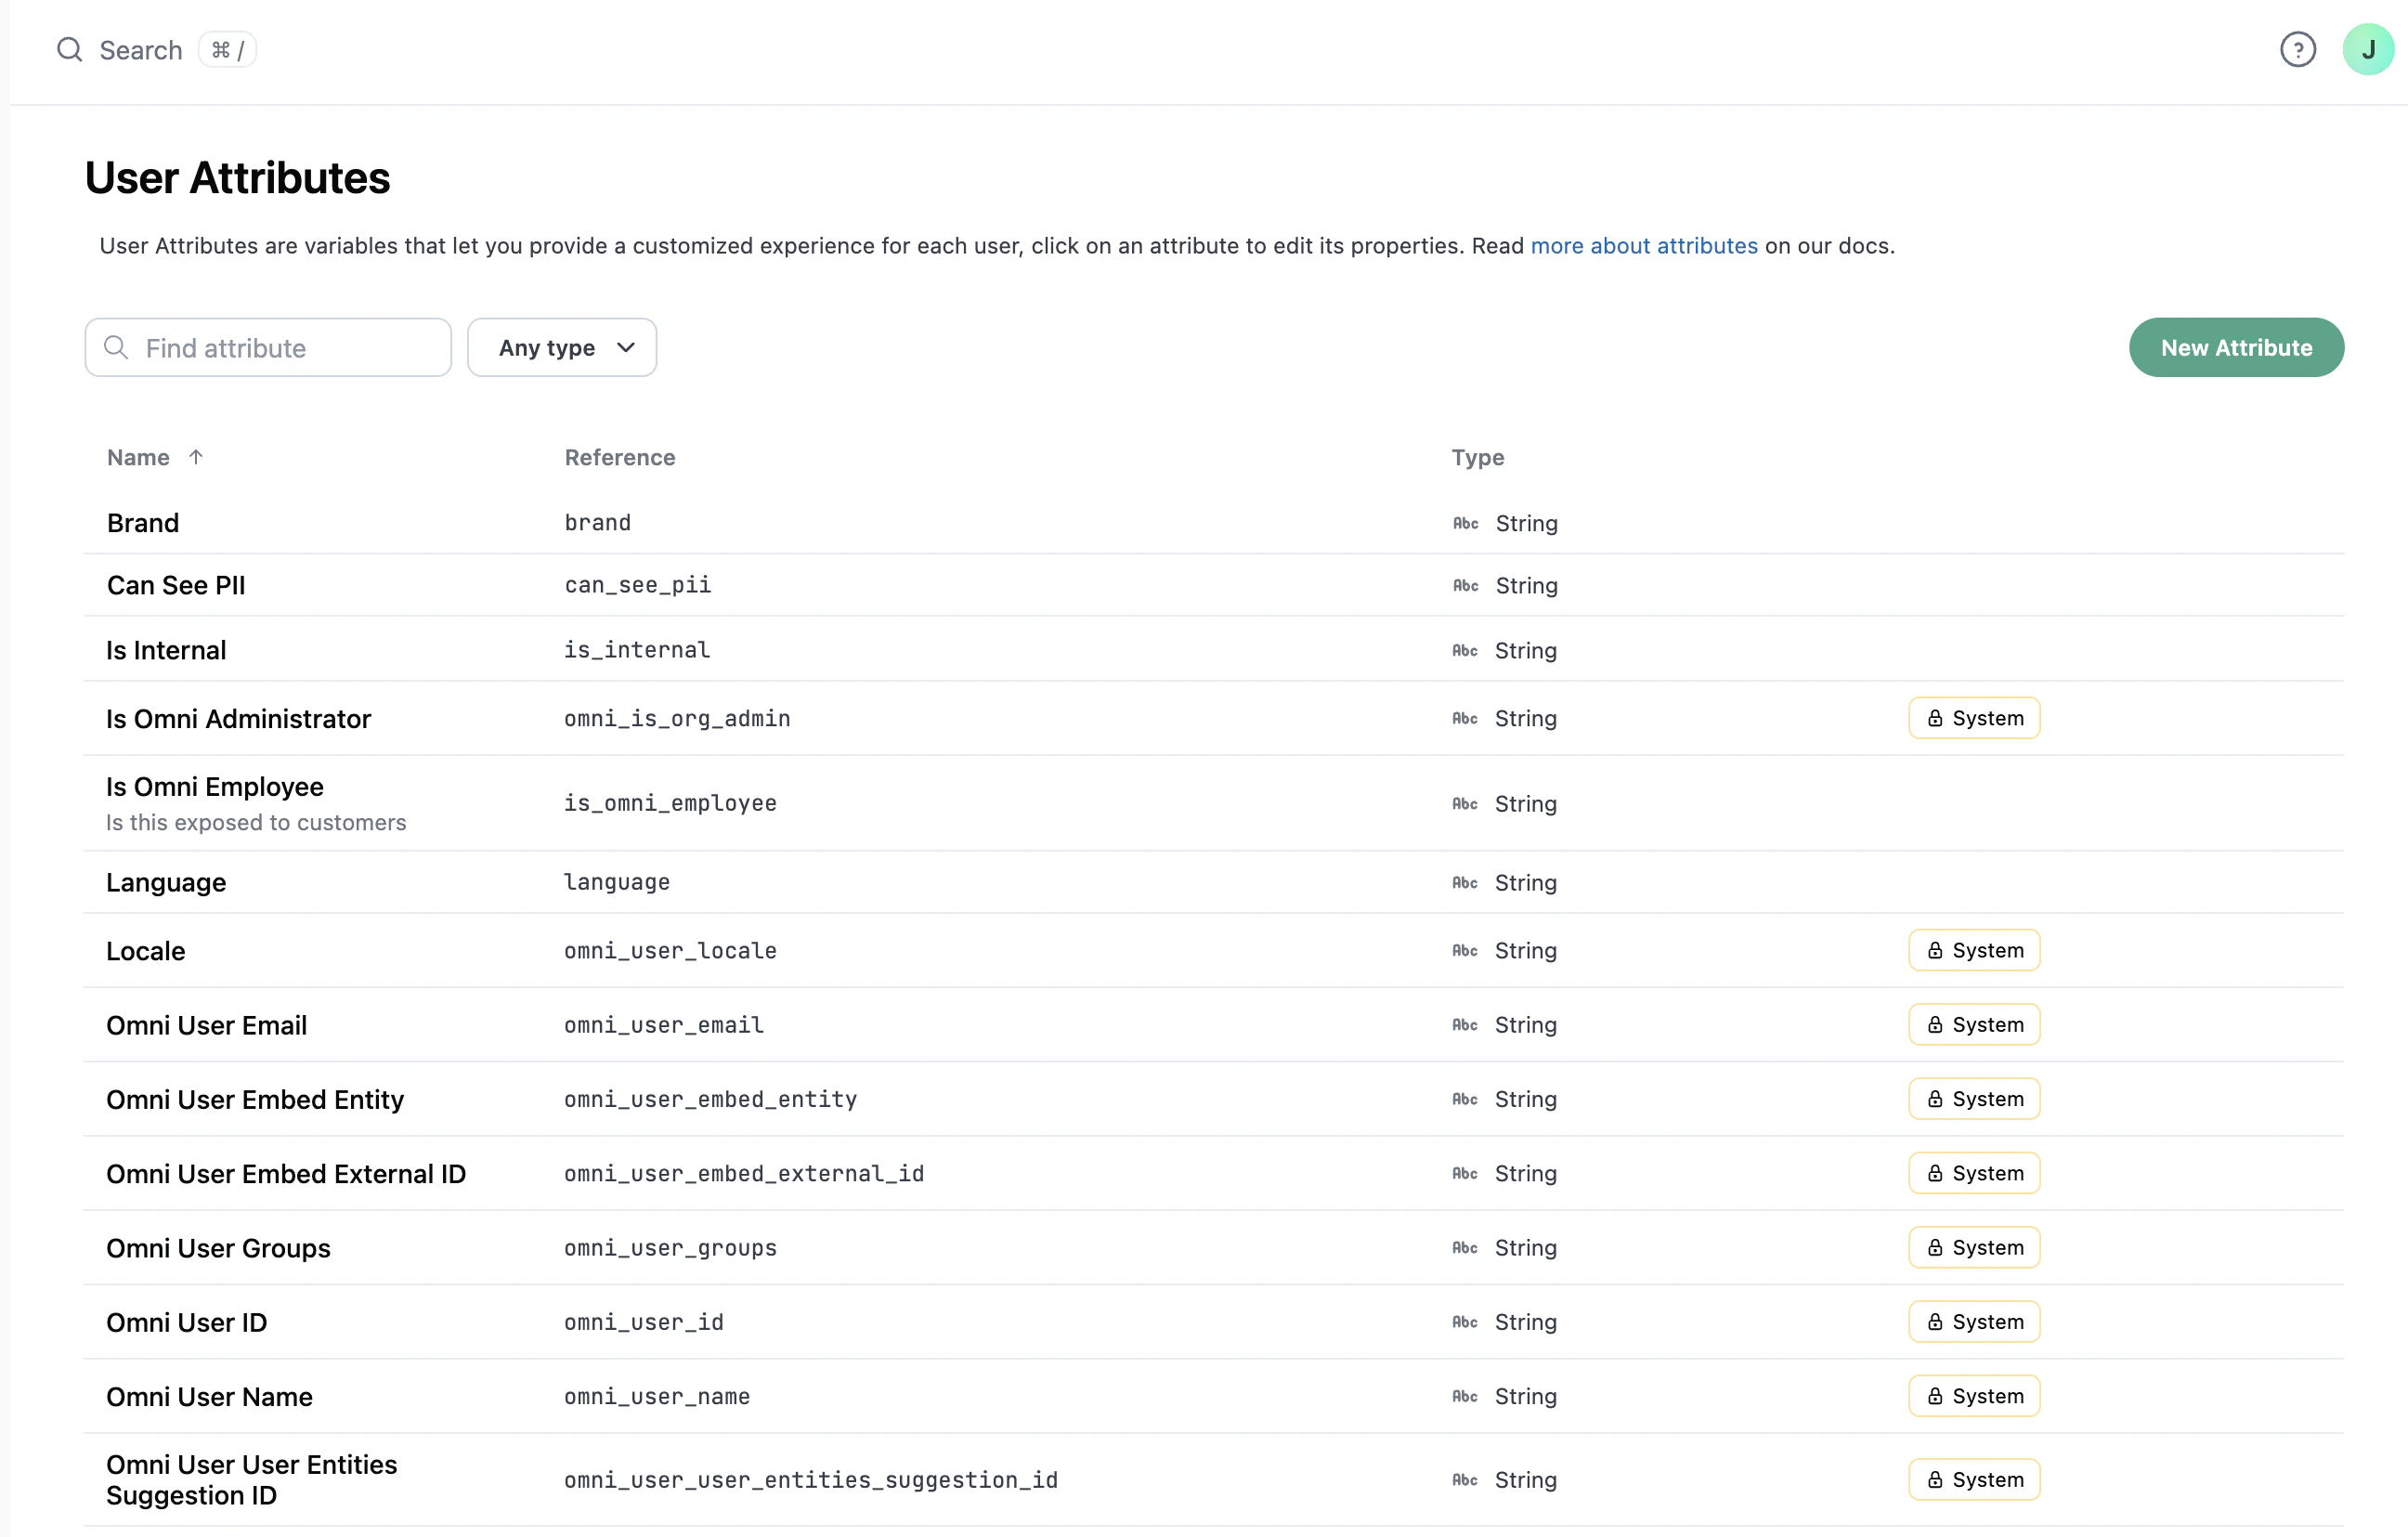
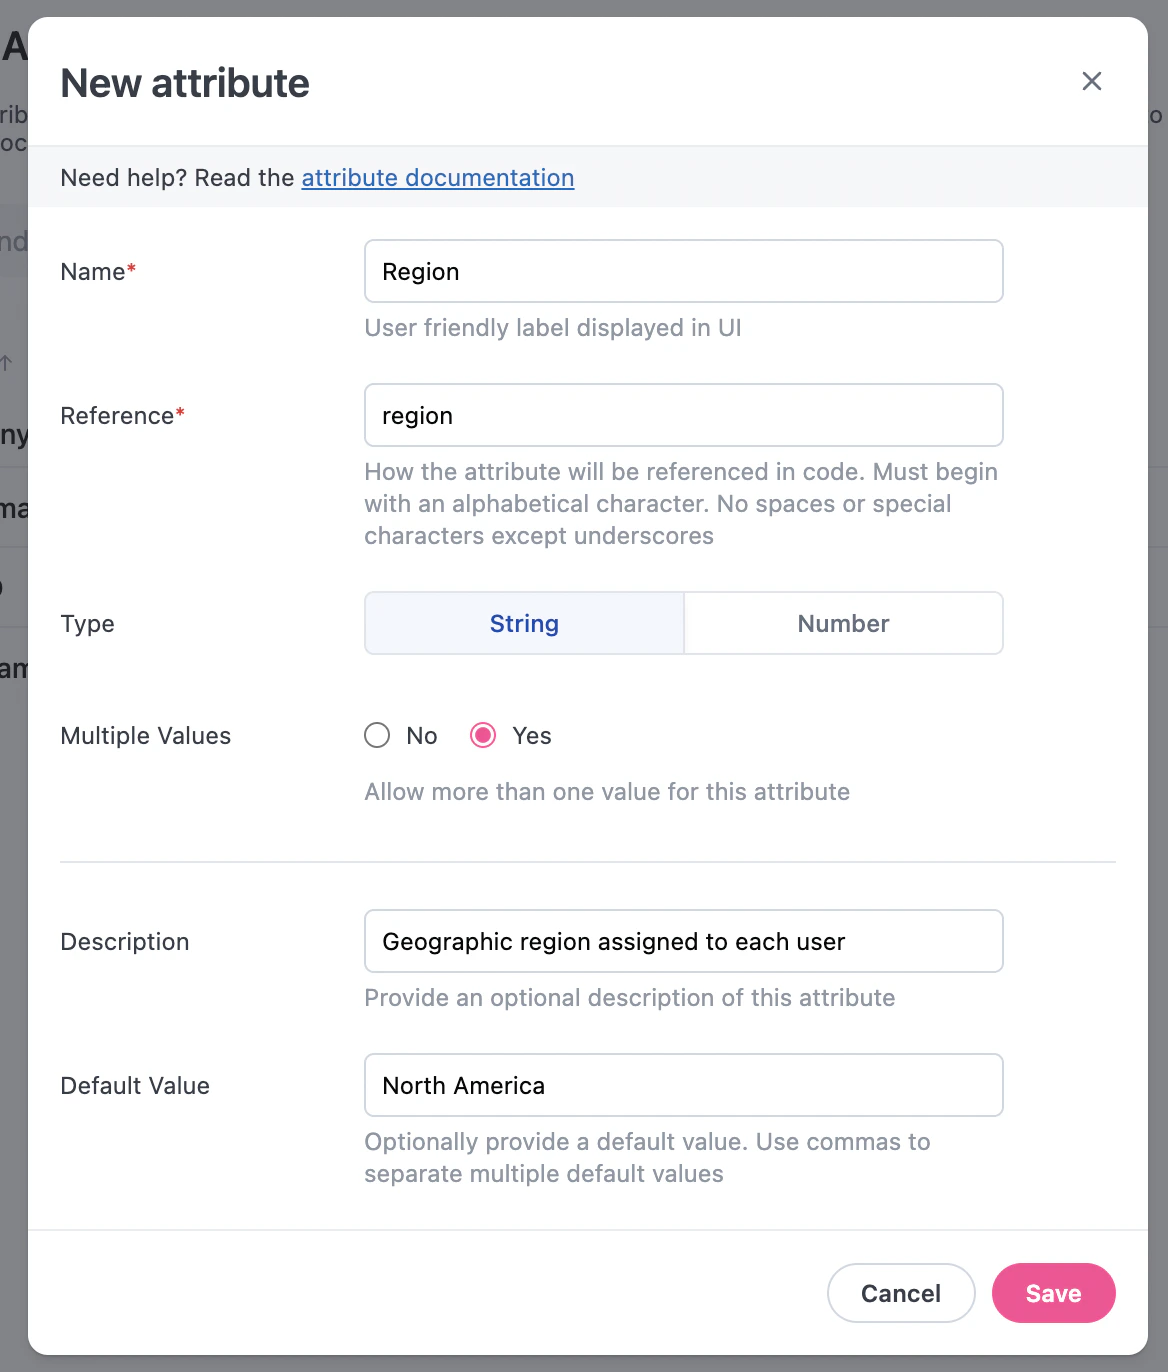
Creating user attributes
To define a new user attribute, navigate to Settings > Attributes and click the New Attribute button. Each user attribute has the following settings:- Name: The name of the user attribute, how it will be displayed in the UI
- Reference: How the attribute will be referenced in code, such as in the model
- Type: Used to check that valid values are assigned to users. String and Number data types are allowed.
- Multiple values: Specifies whether multiple values can be assigned to a user for this attribute
- Description: Explanation of the attribute or how it will be used
- Default value: Optional. Set a default value that all users will inherit if a value is not directly assigned to them.
Assigning attributes to users
The steps in this section apply to all user types, including email-only and embed.
1
Navigate to Settings > Attributes.
2
Click the attribute you want to set.
3
In the attribute’s page, click the Users tab.
4
In the list of users, locate the user you want to work with. Use the toggles above the table to filter the list to a specific user type: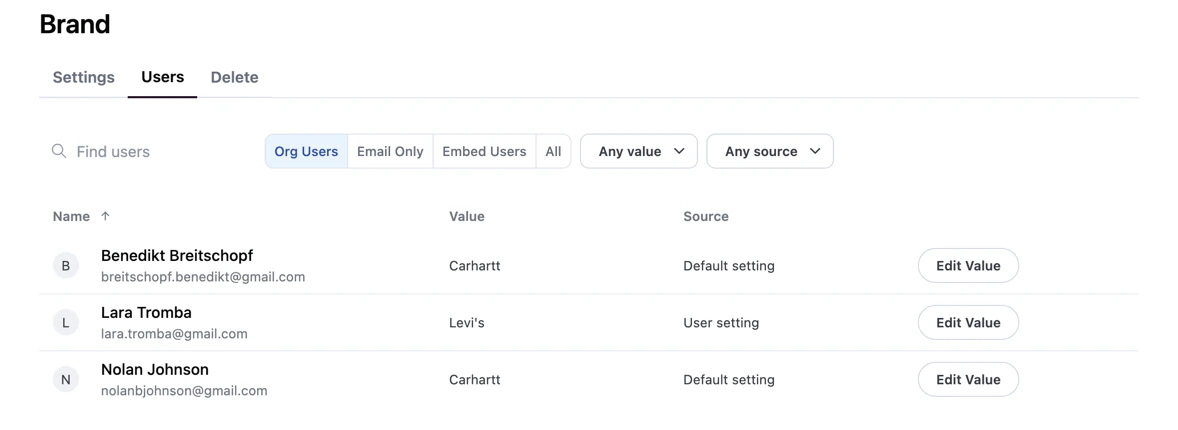
- Org Users - View only standard users that can log into Omni
- Email Only - View only email only users
- Embed Users - View only embed users
- All - View all users, regardless of type
5
In the dialog that displays, enter the value for the user.
6
Click Save.
Default system user attributes
System attributes are read-only.
A special virtual attribute that allows Organization Admins to set an organization-wide default AI credit limit for users. Unlike regular user attributes that assign individual values per user, this virtual attribute sets a default that applies to all users that don’t have set individual credit limits. By default, users have unlimited AI credits.Click this attribute in Settings > Attributes to open the configuration page for the attribute. See Managing AI credit usage for full details on configuring per-user credit limits.
If
true, the user can create, save, or move content in their personal My documents folder. When false, My documents is hidden in navigation and content operations default to the organization scope. Controlled with the Personal content access setting in each user’s settings page.If
true, the user is an Organization Admin.The user’s email address.
The user’s embedded entity name. For example,
Blobs R UsThe user groups that the user is a member of. The value will be a comma-separated list of user group names, for example
Blob Sales, Blob MarketingA unique identifier for the user. For example,
91abbe19-b0de-4537-bc62-cec1d95420c9The user’s name. For example,
Blob Ross or Blobby PartonThe user’s timezone, which is set using the Query timezone setting on the user’s profile. For example,
UTC or America/Los_Angeles