

Connection Admin or Modeler permissions are required to promote workbook changes to the shared model.
How the model layers interact
Omni’s model has three layers that stack on top of each other:
Changes you make in a workbook land in the workbook model first. They’re local to that workbook and invisible to other workbooks until you promote them up a layer.
Reviewing and promoting workbook changes
Promoting workbook changes directly to the shared model requires that you are in the published version of the workbook. Then, to view and promote changes, you can:- Click Model > View & promote changes
- Click the icon in the workbook’s sidebar
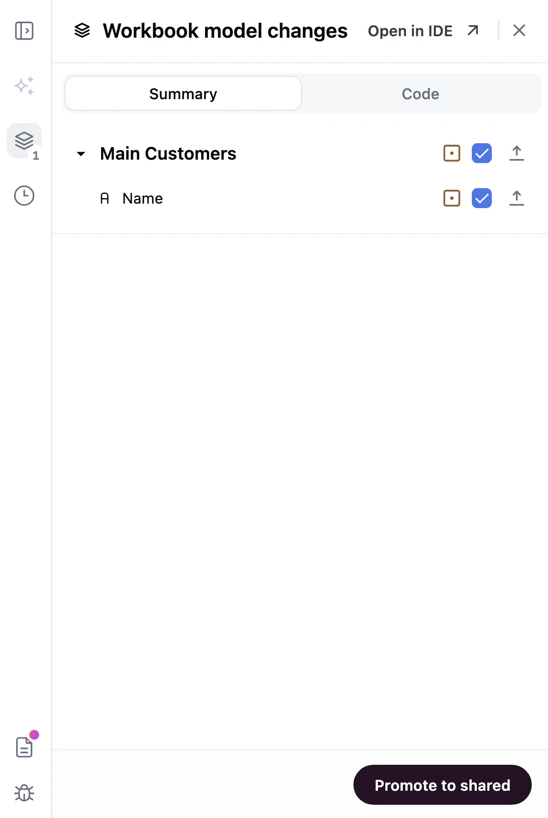
Reviewing changes
To quickly understand what changed without opening the IDE, click the Code tab to view the “diff” of the underlying model YAML: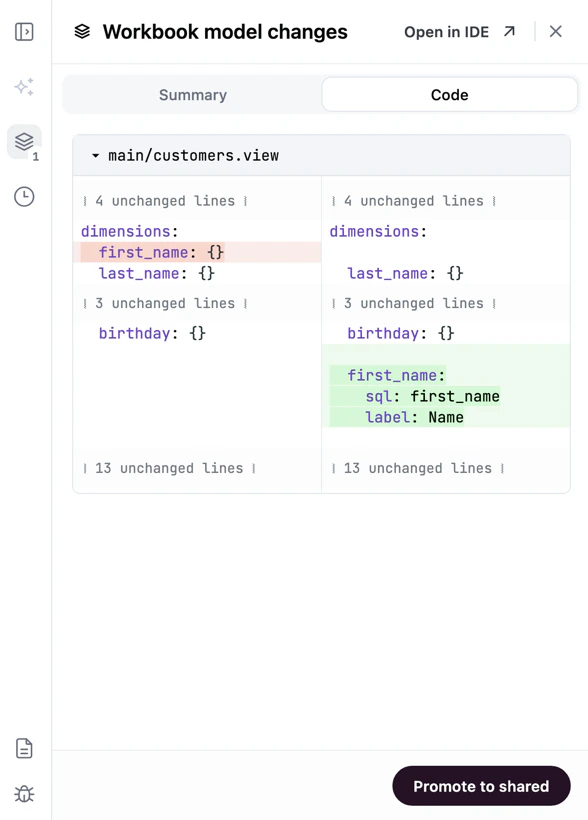
- The change type (added, modified, or removed) with color-coded styling
- A YAML snippet of the model item showing relevant properties
- For modified items, a side-by-side comparison of the shared model version and workbook version
Selecting and promoting changes
In the Summary tab of the workbook model changes drawer, review the changes. When ready, click Promote to shared to promote all of them to the shared model. When ready, click the Promote to shared button to promote the changes.If you only want to promote some of the changes, use the checkboxes to uncheck the ones to leave out. Partial promotion requires a branch, so the button becomes Add to branch and Omni creates a new branch for the selected changes when you confirm. Merge that branch to apply them to the shared model.
Removing unused objects from the workbook
If you’ve created fields, views, topics, or relationships in your workbook that are no longer referenced by any queries, you can use the Remove unused button to clean up the workbook layer. This will not affect the shared model. While in edit mode, the Remove unused button appears in the workbook model changes drawer alongside the Revert and Promote buttons. When you click Remove unused:1
A confirmation dialog appears showing what will be removed
2
After confirmation, Omni identifies all model objects (fields, views, topics, and relationships) that aren’t referenced by any query in the workbook
3
These unreferenced objects are removed from the workbook layer
The Remove unused button is disabled when incremental promotion changes are selected, similar to the Revert button behavior.
Promoting workbook changes in a branch
If you’re working in Branch Mode, you can stage workbook model changes to your branch instead of promoting them directly to the shared model. This lets you validate changes alongside content updates and merge everything to production at once.Connection Admin, Modeler, or Querier permissions are required to add changes to a branch. Connection Admin or Modeler permissions are required to merge.
- Open the workbook model changes drawer by clicking Model > View & promote changes or the icon in the workbook’s sidebar.
- Review the changes and use the checkboxes to select what to include.
- Click Add to branch to stage the selected changes.