omni_dbt prefix, you can build workbooks and topics once and dynamically swap the underlying data source between dbt environments - like production and a personal dev schema - without breaking your content.
Think of virtual schemas as a way to swap out the physical tables in your SQL queries for a variable that you can then use to switch in and out different dbt environments.
Common questions
Why use virtual schemas?
Why use virtual schemas?
- Environment swapping: Toggle your Omni branch to point to a development schema (e.g.,
dbt_blobby) to test new logic before merging to production. - Stable references: Dashboards built on virtual schemas use a stable reference (e.g.,
omni_dbt__orders). When you switch environments, Omni automatically adjusts to fetch data from your dev schema, but the dashboard itself will remain unchanged. - Safety: You can validate dbt changes in an Omni branch before they hit production, ensuring dashboards don’t break after a dbt deployment.
Is it best practice to use virtual schemas instead of standard schemas?
Is it best practice to use virtual schemas instead of standard schemas?
Will using virtual schemas make it harder to see where data comes from?
Will using virtual schemas make it harder to see where data comes from?
Which schemas get a virtual schema?
Which schemas get a virtual schema?
How do I verify which environment is being queried?
How do I verify which environment is being queried?
How do I iterate on dbt models without pushing to production?
How do I iterate on dbt models without pushing to production?
Should I keep virtual schemas or turn them off?
Should I keep virtual schemas or turn them off?
- Keep it if: You plan to preview how dbt code changes will impact your dashboards before pushing them to production.
- Turn it off if: You only have one dbt environment and never plan to use Omni for development preview work. Note that even if you turn off virtual schemas, dbt metadata like descriptions and primary keys will still flow into your standard schemas.
Why doesn't the SQL change in the SQL editor when I swap environments?
Why doesn't the SQL change in the SQL editor when I swap environments?
How are omni_dbt* schema names determined?
How are omni_dbt* schema names determined?
+schema: config you set in dbt_project.yml or in a model’s config block.Where Omni places models depends on if the model has a custom schema:- No custom schema - Placed in
omni_dbt - Custom schema - Placed in
omni_dbt_<custom_schema>
dbt_project.yml:- Models under
marketing/→omni_dbt_marketing - Models under
finance/→omni_dbt_finance - Models under
staging/(no custom schema) →omni_dbt
Requirements
To set up or migrate to virtual schemas, you’ll need:- Connection Admin permissions on the Omni connection
- A configured dbt integration
Setting up virtual schemas
Enable the integration
- In Omni, click Connections.
- Locate the connection you want to work with.
- Click the dbt tab.
- Toggle on Enable Virtual Schemas.
omni_dbt_.You will need to build your model from views in the omni_dbt_ version of your schema for dbt virtual schemas to work.It’s recommended you only include these schemas going forward, by adding the following to your model file:Configure dbt environments
- In the connection’s dbt tab, scroll to the Environments section.
- Verify that the Production environment’s Default schema and Target name settings match your production dbt job settings (e.g., target:
prod). - Next, you’ll configure a new development environment. Click Add environment.
- Fill in the following:
- Name - Enter a name for the environment, such as
JDoe Dev - Default schema - Enter your personal dbt schema (e.g.,
dbt_jdoe). In dbt Cloud, you can find this under Profile > Credentials > [your project] > Development credentials > Schema. - Target name - Must exactly match the target name used when that developer runs dbt. In dbt Cloud, you can find this under Profile > Credentials > [your project] > Development credentials > Target name. Common values are
defaultordev. - Environment variables - If your dbt project uses variables for schema names (e.g.,
{{ var('schema_override') }}), add them here so Omni can resolve the paths correctly. - Enable deferral - Check this box to automatically fall back to production builds for models not built in this dev environment. Useful when running partial builds.
- Name - Enter a name for the environment, such as
- Click Save to create the environment.
Confirm Omni model and dbt source mappings
Migrating existing content
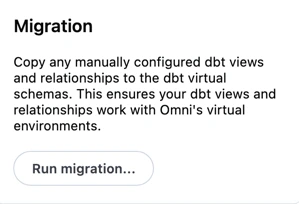
If you already have a model built on physical schemas, you’ll need to migrate your logic to the virtual layer to unlock environment switching.Migrate your logic
- Audit dbt health: Confirm that all models Omni currently accesses are correctly mapped to their dbt sources in the IDE.
- Enable virtual schemas in Omni: Navigate to the dbt tab of the connection in Omni and toggle Enable virtual schemas to on.
-
Run the migration: Next, you’ll use Omni’s migration tool to copy the existing semantic logic from your physical schemas to the new virtual ones.
To start the migration, navigate to the connection’s dbt tab and click the Run migration button:
- View files — every view is recreated with the omni_dbt_ prefix
- Relationships/joins — any joins you previously built are duplicated onto the corresponding virtual schema views
- Shared model logic — things like custom field definitions, measures (e.g. sum of revenue), labels, etc. are carried over to the virtual schema version.
-
Verify the setup: Navigate to the model IDE and look for a Virtual Schemas section. Database views accessible by Omni but not mapped to a specific dbt model will fall under the generic
omni_dbtvirtual schema.
Migrate your Omni content
- Open an Omni branch: This ensures that users won’t be disrupted while you perform the content migration. See Developing with Branch Mode for more information.
-
Repoint topics: In the model IDE, update topic
base_viewreferences to use theomni_dbt_views. - Bulk update content: Use the Content Validator to find and replace physical schema references with virtual ones across all dashboards and tiles.
-
Test environment toggling: Within your branch, point Omni to a dev schema to verify that changes in your dbt development branch are reflecting correctly. Then:
- Open a workbook that uses a virtual schema
- Open the Query Inspector by clicking the in the left navigation
- Check that the underlying table name switches to the dev schema you selected in your branch header
Clean up and go live
-
Finalize the model: Once validated, hide the physical schemas to keep your model clean. Add the following to your model file:
- Merge: Merge your Omni branch.
Testing new dbt models in Omni branches
Build in dev
dbt build in your local or cloud dev environment.Push dbt code to git
git push origin new-feature).Create an Omni branch
Switch environments and refresh
Point to your dbt branch
Using virtual schemas with partial dbt builds
Enable deferral (recommended)
The recommended approach is to enable the Enable deferral checkbox when configuring your dev environment in Omni. When enabled, Omni automatically falls back to production builds for models not built in your dev environment, so you can run partial builds without needing to create clones or build the full project. See Configure dbt environments for instructions on enabling deferral.Using dbt clone for zero-copy clones
Alternatively, you can usedbt clone to create zero-copy clones of production objects in your development schema:
Enable deferral in dbt Cloud
Run dbt clone
dbt clone command in your development environment.On warehouses that support it (like Snowflake), this creates zero-copy clones of all production objects in your development schema, creating the “stubs” or references Omni needs to see the entire project.Iterate with dbt build
dbt build -s <your_model> for just the specific models you are changing.Omni will now see the entire schema - the cloned production tables and your specific dev changes - allowing you to validate your work without a full project run.Troubleshooting
dbt environments aren't working in Omni
dbt environments aren't working in Omni
- Missing environment entry: Every developer needs their own entry added under Connections > dbt > Environments. If an entry doesn’t exist for a given developer, Omni has nothing to resolve to when they switch environments.
-
Incorrect default schema: Each developer typically builds into their own personal schema in dbt (e.g.,
dbt_blobby). If the Omni connection’s Default schema doesn’t match where that developer’s dbt builds, Omni will look in the wrong place. -
Incorrect target name: The Target name dbt setting in Omni must exactly match the target that developer uses when running dbt (e.g.,
dev,default, or a custom value). See the Configure dbt environments section for guidance on where to find this in dbt Cloud. -
dbt hasn’t been run for that developer yet: If a developer has never run
dbt buildordbt runin their personal schema, there will be nothing for Omni to find. Once the environment is configured, navigate to Connections > dbt > Environments in Omni, open the health check for that environment, and click Re-run dbt. -
Missing warehouse permissions: The Omni service account must have access to each developer’s personal database and schema. If it doesn’t, you’ll see a warning like
"Database 'DEV_BLOBBY' does not exist or not authorized"in the health check. To verify, open the SQL editor in an Omni workbook and runSHOW DATABASES. If the developer’s database (e.g.,DEV_BLOBBY) doesn’t appear in the results, the service account hasn’t been granted access to it. Confirm the service account has been granted the correct permissions on that developer’s database and schema, then re-run the health check. - Missing environment variables: If your dbt project uses custom environment variables to control schema names, those need to be added per environment in Omni.
Virtual schemas are empty
Virtual schemas are empty
- Missing materialization: Omni can only see models that have been physically built in your warehouse. Ensure you executed
dbt runordbt buildin that specific environment. - Schema refresh needed: If the data exists in your warehouse but isn’t showing in Omni, trigger a schema refresh. See Schema refreshes for instructions.
- Permissions: The database user Omni uses must have
USAGEandSELECTpermissions on your personal development schema. - Inclusion filters: If your model file has
included_viewsorincluded_schemasdefined, you must explicitly add"omni_dbt*"to that list.
Environment toggle not working on dashboard
Environment toggle not working on dashboard
omni_dbt_ (virtualized) layer. If your topic or SQL shows a hardcoded schema name that doesn’t start with the virtual prefix, the environment switch will be ignored.Missing tables after running dbt clone
Missing tables after running dbt clone
- Check the Omni user’s permissions. Ensure the database user Omni uses (or your individual OAuth user) has
SELECTgrants on the production schemas being cloned. - Check production health: Verify that the models exist and have had a successful run in your production environment. If a model is missing from the production manifest, it cannot be deferred or cloned.
- Check your environment settings. If you have multiple environments (e.g., Staging and Prod) and are using dbt cloud, check that your dbt settings are deferring to the environment that actually contains your data before running the
dbt clonecommand.
Next steps
- Schema refreshes — Sync model changes after switching environments.
- Content Validator — Find and bulk-replace schema references across content.