
Creating a new workbook
To create a new workbook from the Home page:1
Click the + New button in the top-left corner of the page.
2
Select the model to use for the workbook. If your organization has more than 10 models, use the search bar to locate the model you want to use.
3
After you select a model, a blank workbook will display.
Exploring a workbook
You can also create a new workbook from within an existing workbook. Clicking the Explore button near the top-right corner of the page creates a new copy of the workbook that you can work in without impacting the original version.Saving a new workbook
Workbooks can optionally be named and saved. When a workbook is saved, it will appear alongside other dashboards and workbooks in the content system. To save a workbook:1
In the workbook, click File > Save.
2
Give the document a Name and an optional Description: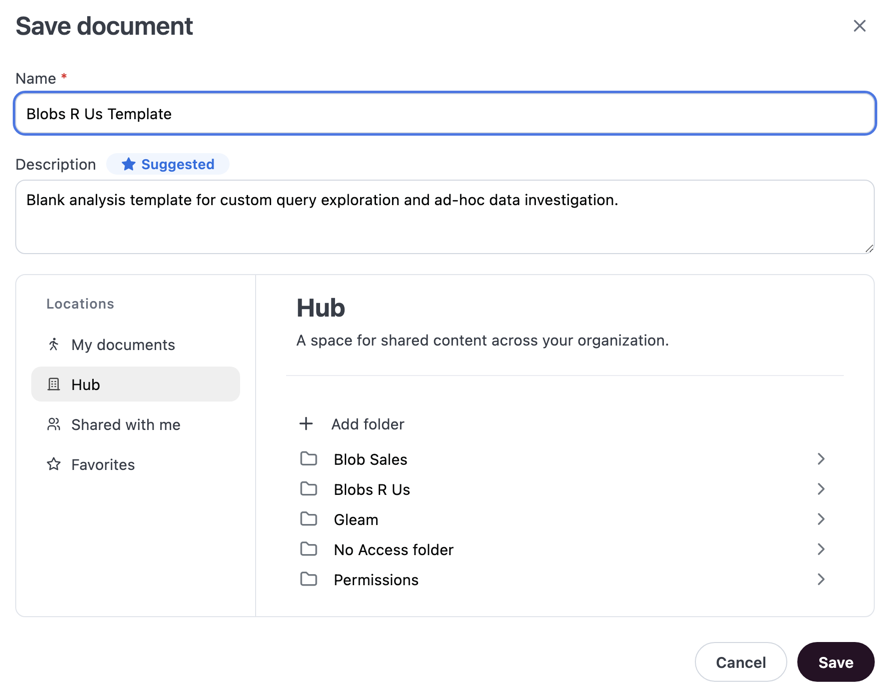
3
Use the Locations browser to find and select the folder you want to save the document to. The document can be moved after saving if needed.
Document location determines content access! For example, if you save a document in My documents, it will only be accessible to other users if you explicitly share it with them. See Sharing content for more information.
4
Click Save to save the document.
Unsaved analyses and URL behavior
When you click + New to start a fresh analysis, Omni creates an unnamed workbook in the background. Until you explicitly save it, this is considered an unsaved analysis — and its URL is not a stable, permanent link.What happens when you save
Saving an unsaved analysis converts the unnamed workbook into a named document. When this happens, all URLs that pointed to unsaved states of that session will redirect to the newly saved document — even if the content appears unrelated. For example: if a user has been bookmarking an unsaved analysis URL, and then saves a different analysis that was built in the same session, the original bookmarked URL will redirect to the newly saved document. This is expected behavior.Preserve your analysis
If you want a query to remain accessible, save it explicitly using File > Save and store it in an appropriate folder. Saved documents have stable, permanent URLs and appear in the content system where they can be shared with others.Workbook states
A workbook can be in either View or Edit (draft) mode. When viewing, you’re looking at the latest saved version of the workbook. When editing, you’re changing the workbook and changes will auto-save as you work. Changes made in draft mode will also impact the dashboard that attached to the workbook.Workbook versions
To view a history of all changes to the workbook, click File > Version History to open the Version History panel. You can also use this panel to restore a previous version of the workbook.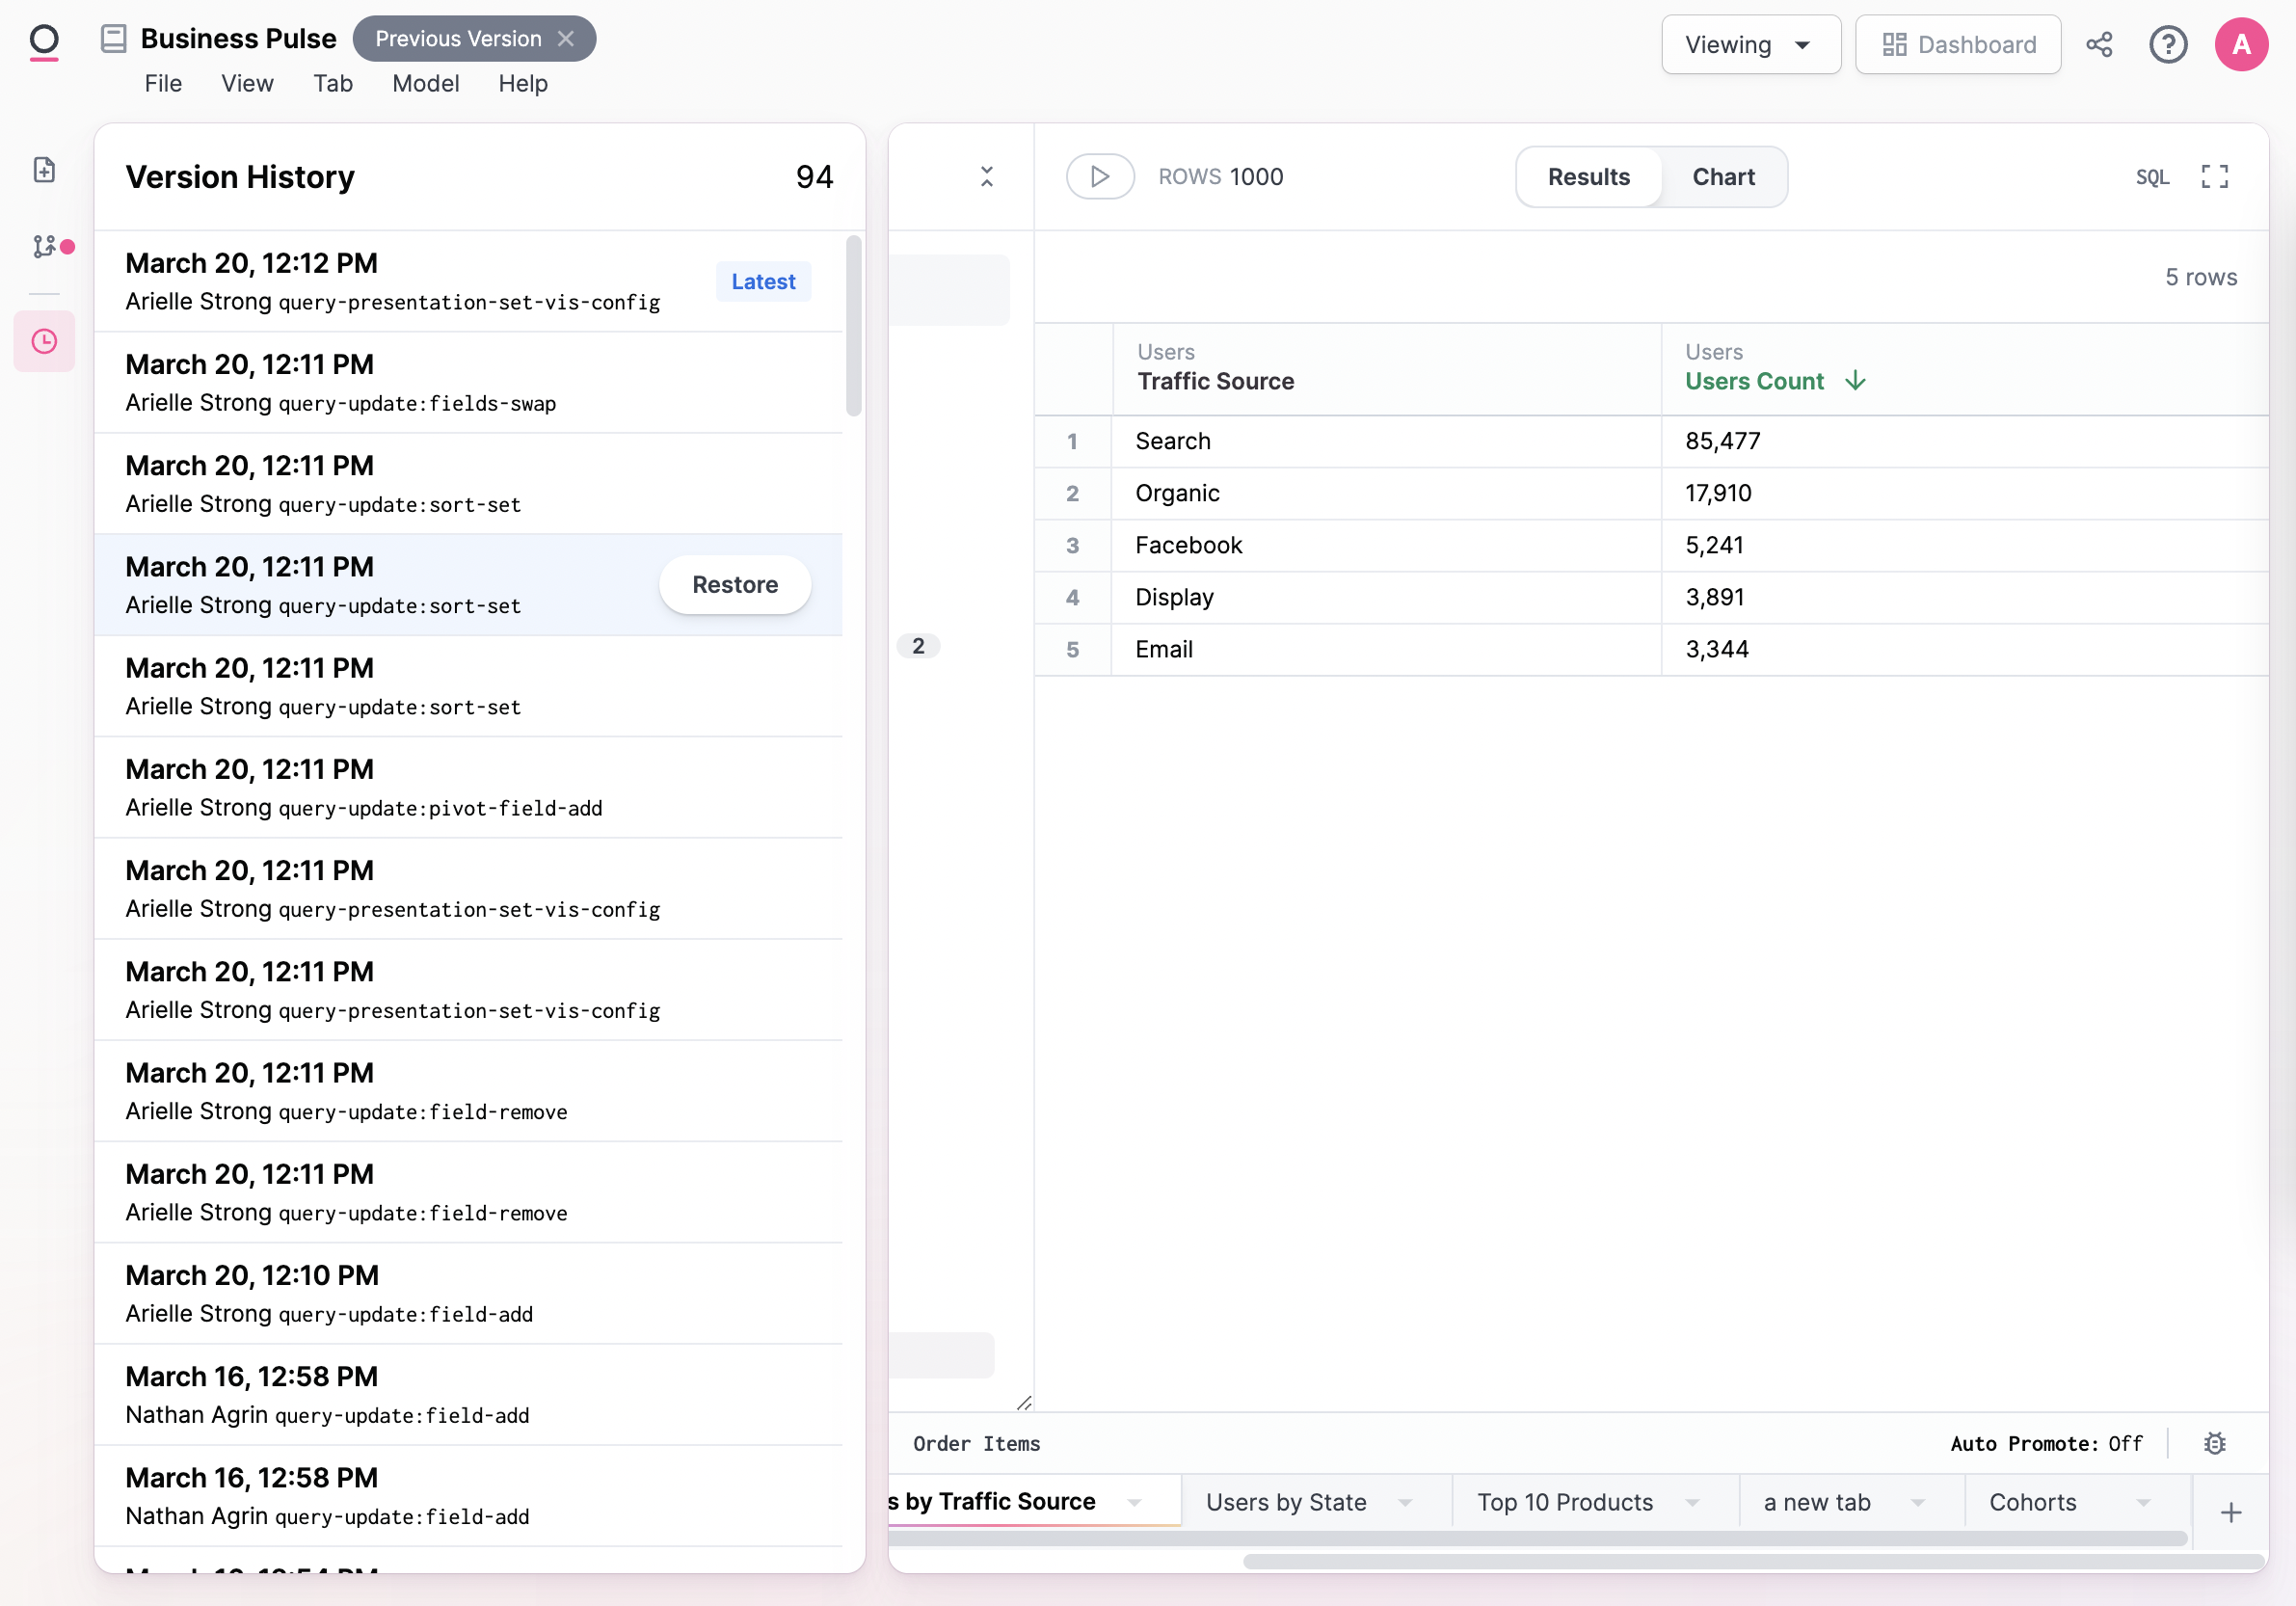
The Version History panel only contains changes to the workbook itself, not the workbook model or the dashboard. Open the model IDE (Model > Model layers > Workbook) to view workbook model changes.
Moving queries between workbooks
Workbook tabs can be duplicated inside workbooks, or copied to an existing workbook, or create an entirely new workbook.Duplicate a tab in the same workbook
From the workbook, enter edit mode, right click on the tab and select ‘Duplicate’.Copy a tab to an existing workbook
Copying workbook tabs requires the Duplicate content permission to be set to On.This permission only applies if your organization has the Duplicate feature enabled by support — if it isn’t enabled, you can copy tabs without restriction.
- Enter draft mode.
- Right-click on the tab you want to copy.
- Select Copy to.
- Click the button to copy the query ID.
- Enter draft mode.
-
Click Edit > Import tab. In the Import Tab dialog, you can paste either:
- The query ID (e.g.,
abc123def456) - The full widget URL (e.g.,
https://yourinstance.omni.co/workbooks/123?w=abc123def456)
- The query ID (e.g.,
- A tab can only be copied to a workbook with the same connection and shared model
- If there are changes to the workbook model in the tab you are copying over, those will be copied into the existing workbook as well. In the event of a conflict (e.g. the same field exists on both workbooks with different definitions), the workbook copied to should win.
- If the source workbook contains query views with names that match query views in the destination workbook, the import will be refused with an error message identifying the conflicting view(s). To proceed, rename the conflicting query view in the source workbook before importing the tab. This prevents data corruption where an imported tab would incorrectly read an unrelated view from the destination workbook.
Create a new workbook with a new tab
From the dashboard, right click on the tile and click Explore. From the workbook, right click on the tab and click Explore.Linked tabs
From the workbook, enter edit mode, right click on the tab and selectCreate linked tab. Save the linked tab, and you can now build multiple visualizations from the same query in a workbook. This also means changing one query, you do not need repeat that change for each linked query.
- Dashboard filters can only be mapped to the source tab.
- When you delete a source tab, may either delete the linked tabs or unlink them and turn them into independent queries.