Looking for query views? See Editing query views.
Requirements
To edit views, you’ll need:- Querier, Modeler, or Connection Admin permissions
- Connection Admin or Modeler permissions to promote the changes to the shared model
Editing metadata
You can update a view’s label, description, tags, visibility, and AI context from the workbook or the model IDE. Note that some view metadata — such asaliases — may only be editable from the IDE.
In the workbook
In the workbook
- In a workbook query, hover over a view in the field browser.
- Click the icon next to the view name.
- Select Edit from the context menu.
- View label — The display name for the view
- Description — A description of the view’s purpose or contents
- Tags — Tags to organize and categorize the view
- Hidden — Toggle to hide or show the view in the field browser
- AI context — Additional context to help Omni AI understand and work with the view
In the IDE
In the IDE
- Navigate to the model IDE.
- In the Schemas section, locate the view you want to work with.
- Click the file to open it and then edit the corresponding parameters:
- Click Save changes in the IDE to apply your changes.
Editing fields
You can edit field properties — label, description, AI context, visibility, and more — from either the workbook or the model IDE.In the workbook
In the workbook
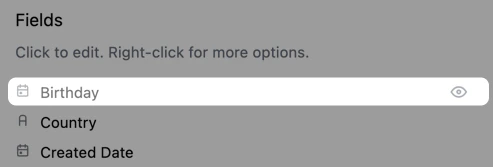
Open the Edit view drawer. The drawer lists every field in the view, including hidden ones:
- Visible fields — Click a field row to open the Edit field panel, or click the icon for additional options.
-
Hidden fields — Appear greyed out. Click the icon next to a hidden field to unhide it, then click it to edit its properties:
In the IDE
In the IDE
Open the view file and locate the field under Click Save changes when you’re done. See the Dimension and Measure references for all available parameters.
dimensions or measures. From there, you can update any of the field’s parameters.For example, hide a field from the workbook field browser by setting hidden: true: