Using a classic dashboard? Upgrade it to use the features in this guide.
Common questions
How many pages can a dashboard have?
How many pages can a dashboard have?
Dashboards can have up to 15 pages.
Requirements
Configuring page navigation in dashboards requires Editor, Manager, or Owner permissions on the document.Manually adding page navigation
Omni will automatically add navigation in certain scenarios. To manually add page navigation to a page, click Add > Layout > Page navigation, then place it in a container where you want the page tabs to appear. Once added, page switchers offer rich editing capabilities to customize how viewers navigate between pages.Adding navigation tabs
Tabs for new pages are added to navigation items automatically, but you can also add tabs manually to include custom URLs or link multiple tabs to one page.1
Select the page navigation item on your dashboard. The properties panel should open on the right side of the page.
2
In the Items section of the panel, click the icon: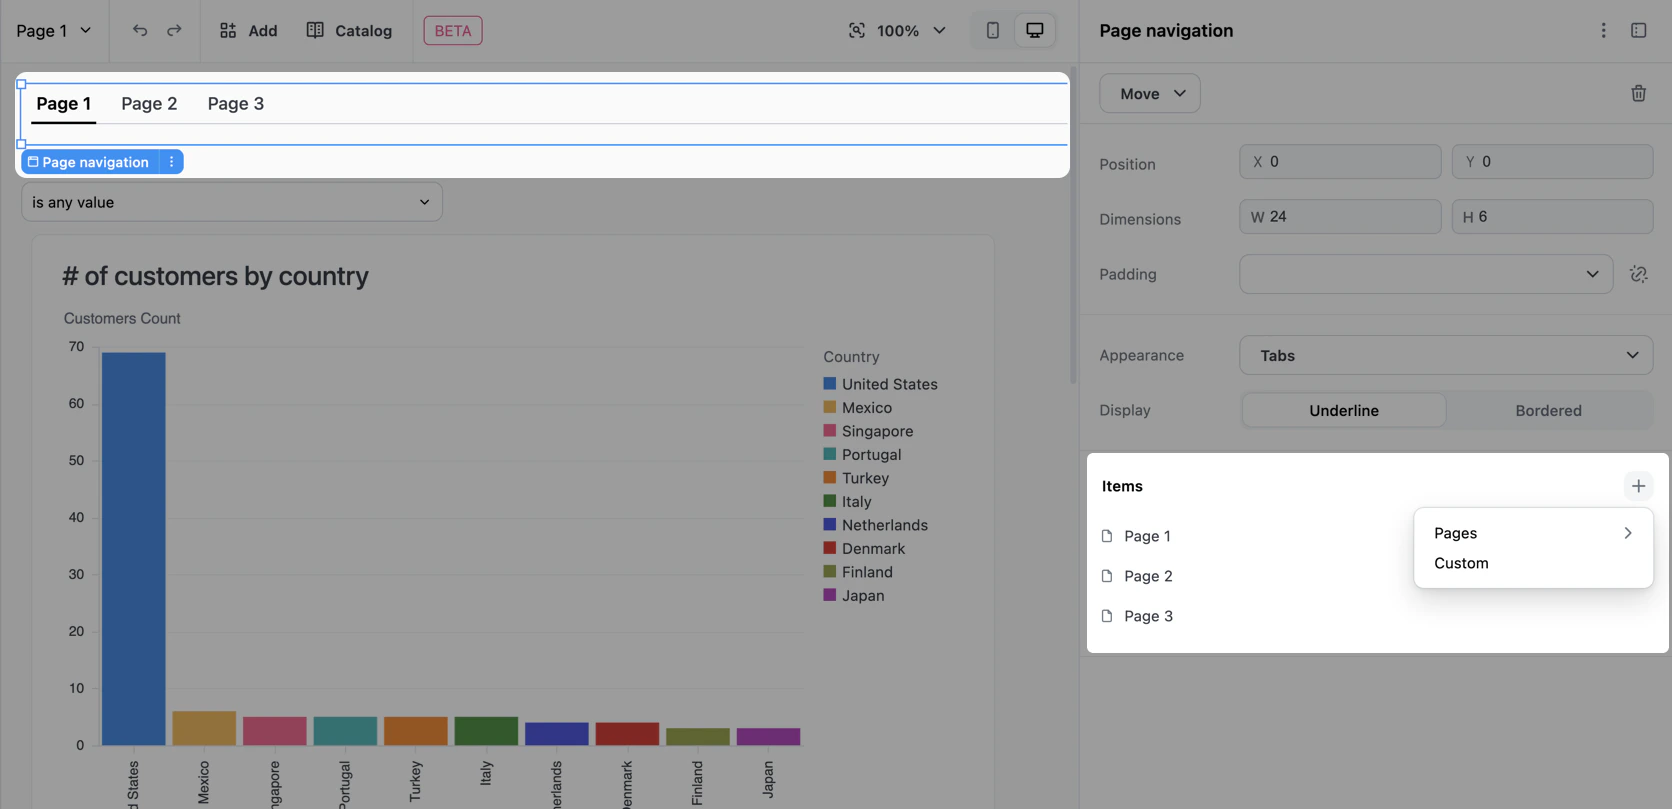
3
Use the menu to select one of the following:
- Pages - Choose an existing page or add a new page. Pages already included in the navigation will be disabled. Adding a new page will automatically add it to the navigation.
- Custom - Add a tab that navigates to an internal path or external URL. See Custom URL tabs for more information.
Editing navigation tabs
To edit an existing tab:1
Select the page navigation item on your dashboard. The properties panel should open on the right side of the page.
2
In the Items section of the panel, hover over the tab you want to edit and click the that displays: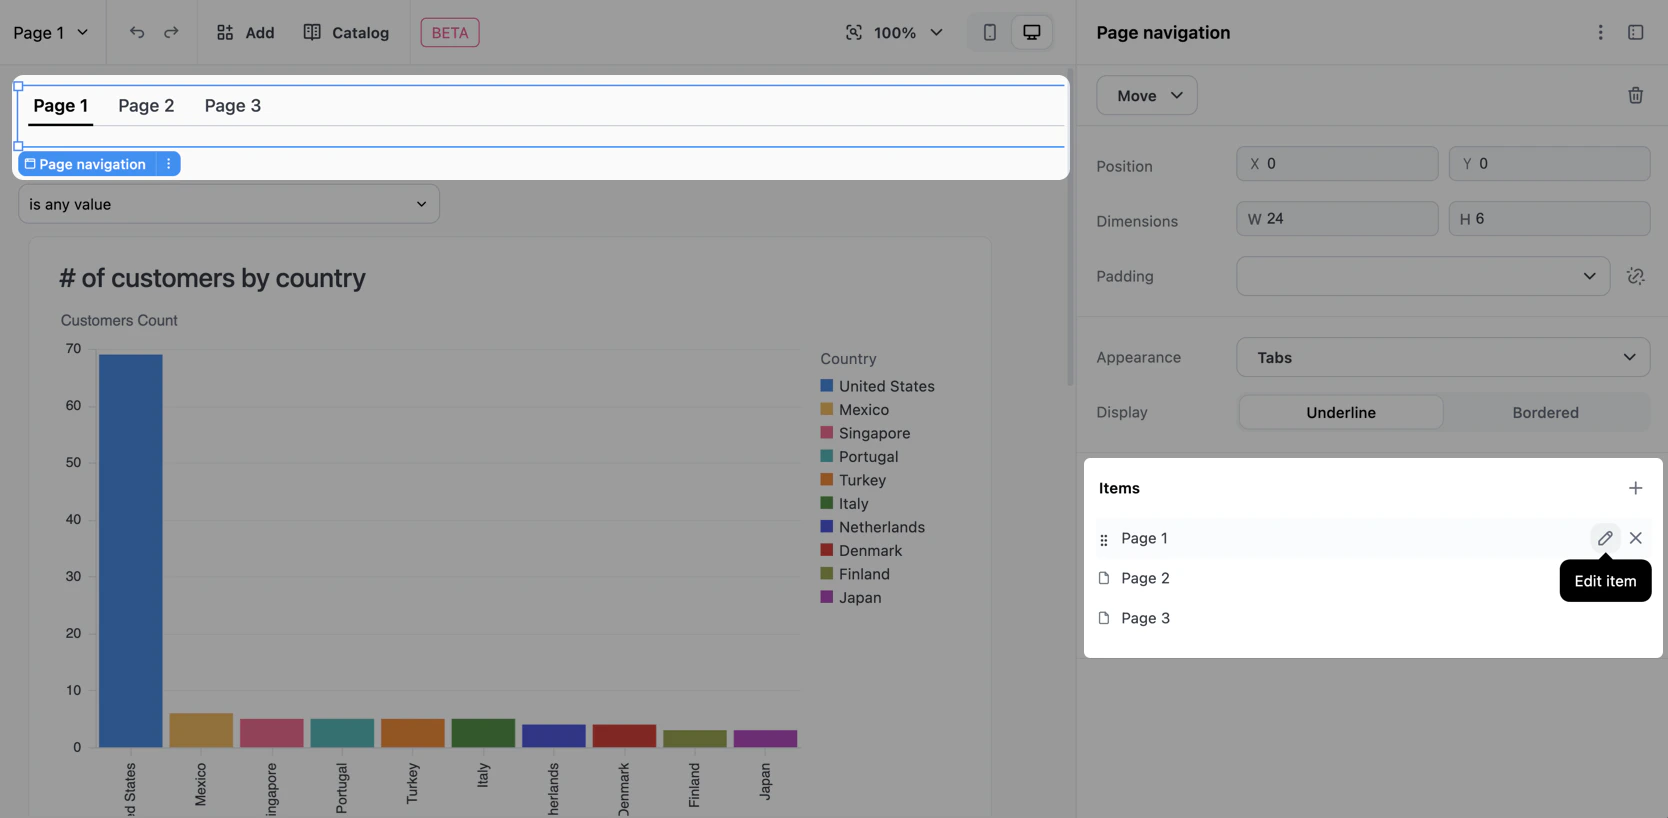
3
A popover with configuration options will display. Select an option from the Link to dropdown:
- Page - Allows you to select a dashboard page to link to.
- Custom - Allows you to specify a custom URL. See Custom URL tabs for more information.
4
In the Label field, define the display label for the tab. Toggle the icon to connect or disconnect the label from the page’s title. See Labeling navigation tabs for more information.
5
When finished, click out of the popover.
Labeling navigation tabs
Each tab in a page navigation item has a label that viewers see in the switcher. Labels can be connected to the linked page’s title — so they track renames automatically — or disconnected to display custom text. Disconnected labels also support dynamic references that pull in the current page name.Selecting a label mode
When you create or edit a navigation tab, you can use the icon next to the Label field to select how the label should behave:Using dynamic page names in labels
This section only applies to disconnected labels.
{{page.<PAGE_KEY>.name}} to create custom labels that automatically track page renames. This allows you to add custom text to page labels while keeping them synchronized with the actual page names.
Syntax
<PAGE_KEY> with the unique key of the page you want to reference. For example, to create a label that displays “Overview — ” followed by the page name:
Example custom label
Supported properties
Only the.name property is supported. If you use other properties like {{page.KEY.description}}, the reference will be displayed as literal text rather than being expanded.
Linking multiple tabs to one page
Page switchers support multiple tabs pointing to the same page, each with its own label. This is useful when you want to provide different entry points or contexts for the same content. For example, you might have:- “Overview” and “Summary” tabs both linking to your main dashboard page
- Multiple entry points labeled for different user roles or workflows
1
Add a tab to the navigation and select the page you want to link to.
2
Add another tab, linking to the same page as the tab in step 1.
3
Use disconnected labels to give each tab a distinct name.
Custom URL tabs
Custom URL tabs let you add navigation to internal dashboard paths or external resources directly from your page switcher.Creating a custom URL tab
To add a custom URL tab:1
Add a tab to the page navigation, selecting Custom as the tab type.
2
Hover over the new tab in the Items section and click the icon.
3
In the popover that displays, fill in the following:
- Link to - This should be set to Custom
- Label - Enter the display text for the tab. Custom URL tabs are automatically created in disconnected mode.
- URL - Enter the destination URL. See URL support for support information for different URL types.
4
Click Advanced to display the following options:
-
Target - Choose how the URL opens:
- Same tab - Default. Navigate in the current browser tab.
- New tab - Open in a new browser tab.
- Custom - Specify a custom window name for advanced window management.
-
Forward params - Optional. Toggle on to append the current URL’s query string to the destination URL. This is useful for carrying over filter values or other parameters.
The Forward params option only appends query parameters when the destination URL is same-origin (same domain). This prevents leaking filter or token state to external sites.
5
When finished, click out of the popover.
URL support
Reordering tabs
Tabs can be reordered using drag-and-drop to match your preferred navigation flow:1
Select the page navigation item on your dashboard. The properties panel should open on the right side of the page.
2
In the Items section of the panel, click and hold the tab you want to move: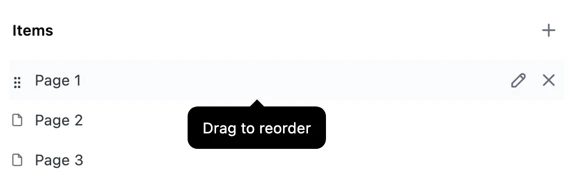
3
Drag the tab to your preferred position and release.
Removing tabs
Tabs can be removed from the page switcher without deleting the underlying page:1
Click the page navigation item.
2
In the Items section of the panel, hover over the tab you want to edit and click the that displays.
Navigating in edit mode
When editing a dashboard, clicking on page switcher items displays a context menu to help prevent accidental page changes. This behavior varies by appearance type:- Tabs, buttons, and list: Right-click or click to open a context menu with Go to page (for dashboard pages) or Open link (for custom URLs). Select the option to navigate.
- Dropdown: Navigates directly to the page.
Troubleshooting
Why is {{page.KEY.name}} showing as literal text instead of the page name?
Why is {{page.KEY.name}} showing as literal text instead of the page name?
Page name references are displayed as literal text when:
- The property isn’t
.name- Only.nameis supported. Properties like{{page.KEY.description}}won’t be expanded. - The page key doesn’t exist - For example,
{{page.nonexistent-page.name}}will display as-is. The dashboard won’t crash, but the reference won’t expand. - The label is in connected mode - References only work on custom (disconnected) labels. Connected labels automatically use the page name and can’t include references.
Why isn't Forward params adding query parameters to my external URL?
Why isn't Forward params adding query parameters to my external URL?
The Forward params option only appends query parameters when the destination URL is same-origin (same domain). This prevents leaking filter values or token state to external sites. If you need to forward parameters to an external destination, you’ll need to construct the URL manually.
Next steps
- Learn to build dashboard layouts with containers and items like charts, text, filters, and controls.
- Use pages to create multi-page dashboards, where each page has its own layout, items, and filters.
- Configure filters to display filters as button toggles, multi-select dropdowns, single-day pickers, and timeframe controls.