Requirements
To follow the steps in this guide, you’ll need Modeler or Connection Admin permissions on the model you want to work with.Migrating tables
1
In Omni, click Develop in the left navigation.
2
Click the model you want to work with.
3
In the model IDE, click Model > Branch to create a new branch.
4
In the model IDE, click Model > Migrate tables. The Table migration modal will display the tables you can migrate.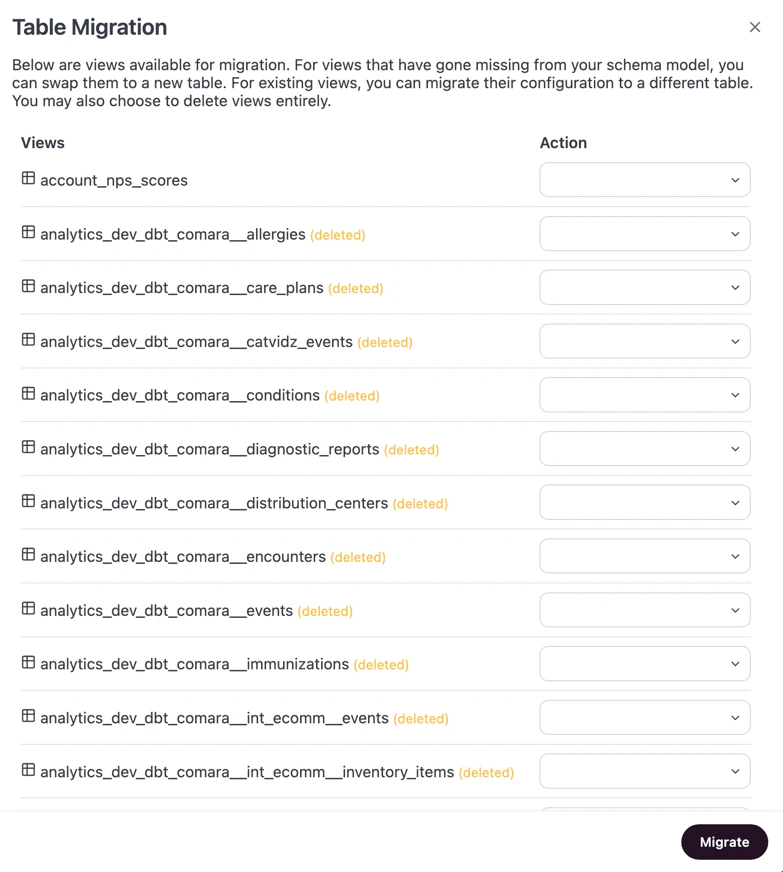
5
Locate the table you want to work with and click the Action dropdown to display the options.
-
Swap to a new table - Use when you have a replacement table ready to go. Updates references to this table throughout the model. When selected, a second dropdown will display. Use this field to select the table Omni should use as the replacement:

renamed_fromparameter to the table’s underlying view file, which helps prevent downstream references from breaking. In a view file, this will look like the following:View file with renamed_from parameter -
Delete this view - Use when a table is no longer needed. Soft-deletes the table by adding
ignored: trueto the table’s underlying view file. If needed, you can recover the table by reverting the change in the Staged panel of the model IDE before merging your branch.
6
If needed, select actions for more tables in the modal.
7
When finished, click Migrate. This will apply the changes you made in the Table migration modal to your Omni branch.
8
Merge the Omni branch to promote the changes to the shared model. If the git integration is enabled for the model, you may need to open a pull request first.