Requirements
To follow the steps in this guide, you’ll need:- A table with start and end date (or datetime) fields — for example,
check_in_dateandcheck_out_date - Access to the model in your Omni instance
How it works
A query view is a SQL view defined in the model that can accept parameter values at query time. Instead of hardcoding a date in SQL, the selected date is injected directly into theWHERE clause. When the user changes the parameter, the query view regenerates automatically.
The core pattern
The
::DATE cast strips time information from your timestamps. This prevents mismatches when your datetime fields include time components like 2024-02-15 14:30:00Set up the query view
Define the query view
- In the workbook, create the query from a new SQL tab. Once the query is created, save as query view. Note: This particular pattern focuses on SQL based query views
-
Define a filter parameter for the snapshot date. The syntax for injecting parameter values follows this pattern:
For example, if the view is named
snapshotsand the parameter issnapshot_date: -
Using the above-mentioned syntax, add the newly created parameter to the query view’s SQL to inject the parameter’s value. When building the
WHEREclause, use<(not<=) for the end date comparison. For example, a reservation that checks out on Feb 17th shouldn’t appear in a Feb 17th snapshot.You can also suggest from a list of timestamps usingsnapshots.query.viewsuggestion_listor optionally set a value as the default filter, for example:Which would then look like this in the workbook: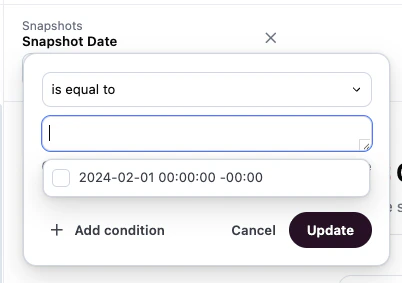
Add the view to your topic
In the topic file, add the query view as a join (as shown) or include it as a standalone view so users can access it in workbooks: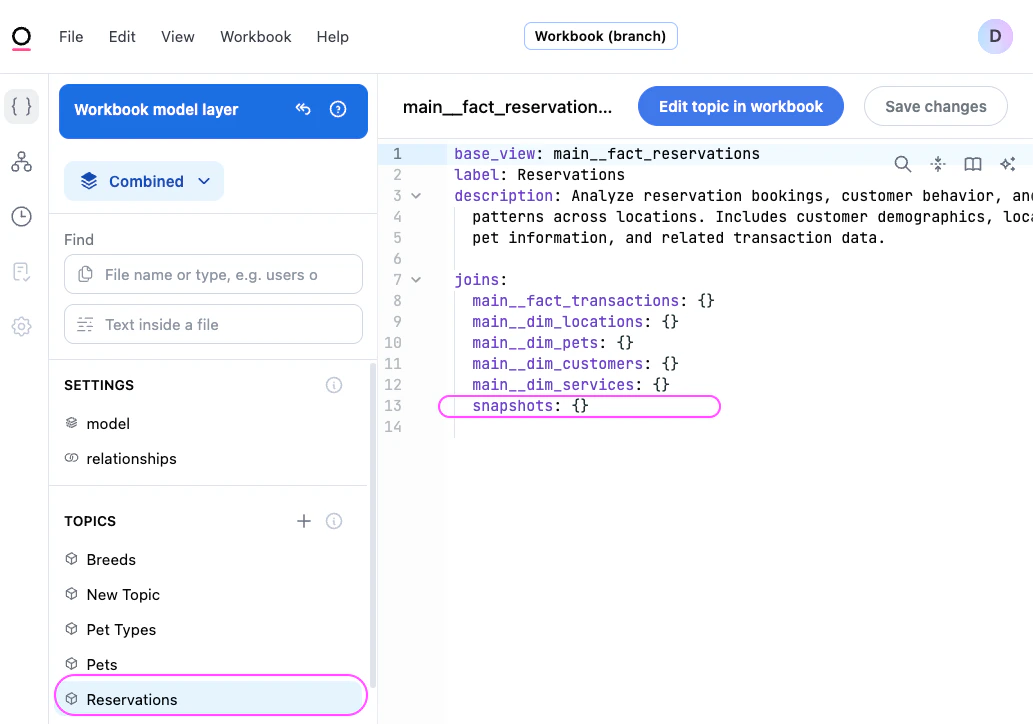
Test the snapshot
- Open a workbook and navigate to your topic.
-
Add the
snapshot_dateparameter filter to the query. -
Enter a date into the filter and run the query. You should see only the records that were active on that date:
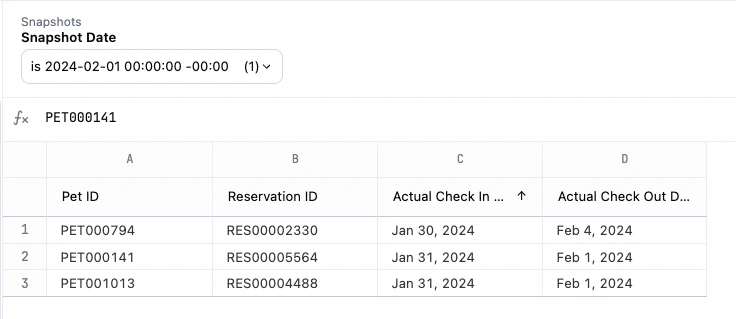
count_distinct on your ID field — without it, records that span multiple days can be counted more than once.Bonus: Populate the date picker with a list of dates
By default, thesnapshot_date parameter accepts free-text input. If you want users to select from a list of valid dates instead, you can use suggest_field to populate the dropdown from a calendar view.
Create a calendar view
A calendar view is a query view that generates a list of dates. Most databases support a recursive CTE approach:
The SQL syntax for recursive CTEs varies by database. Click the tab for your database to view the correct SQL.
Point parameter at the calendar
Update the snapshot parameter to pull suggestions from the calendar view:Now when users click the 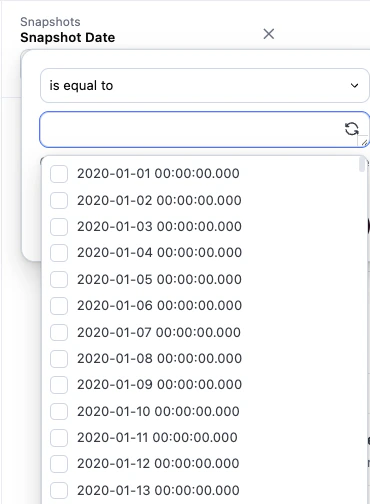
snapshot_date parameter, they’ll see a dropdown populated with dates from your calendar view instead of a blank text field or suggestions from the specific suggestion_list.