RANK calculation and dashboard filter mapping.
Requirements
- A dashboard that:
- You have the ability to edit
- Has at least one visualization tile
- Familiarity with calculations
Steps
1
Add a calculated field to the query
In a draft workbook, add the calculation to the query that powers your chart. In this example, we added a 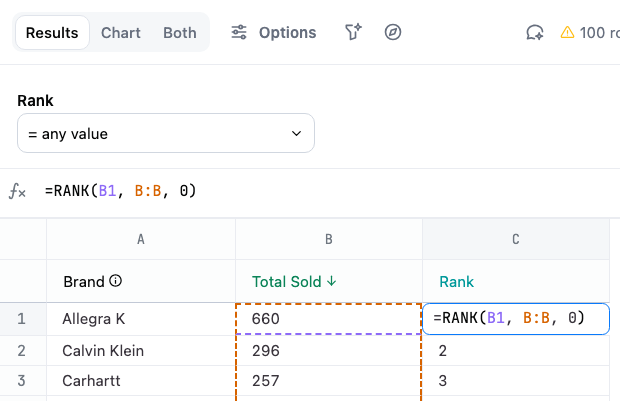
RANK calculation that uses the value of the Total Sold column to rank results:2
Create a numeric dashboard filter
- Navigate to the dashboard by clicking the Dashboard button in the top right corner of the page.
- Click Add > Filter.
-
For the filter source field, select any numeric field included in the query. In this example, we selected the
Total Soldfield. Note: This field only establishes the filter type - you’ll map it to the calculation field in the next step. - Give the filter a descriptive label.
3
Map the filter to the calculation
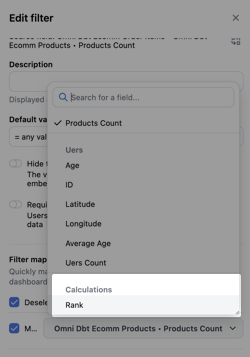
- While still in the Edit filter panel, scroll to the Filter mapping section.
- Deselect tiles that don’t contain the calculation. The filter should only apply to those that have the calculation.
-
Search for the name of the calculation, or scroll down to the Calculations group. Select the calculation:
-
Verify that the tile is mapped to the calculation:
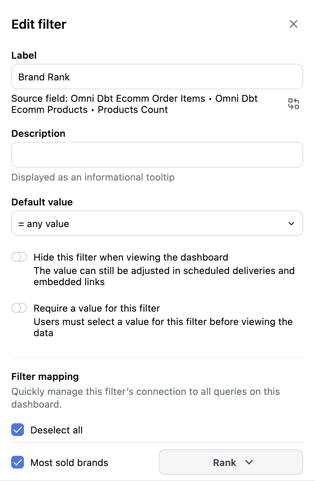
- Click Done to save the filter.
4
Publish your changes
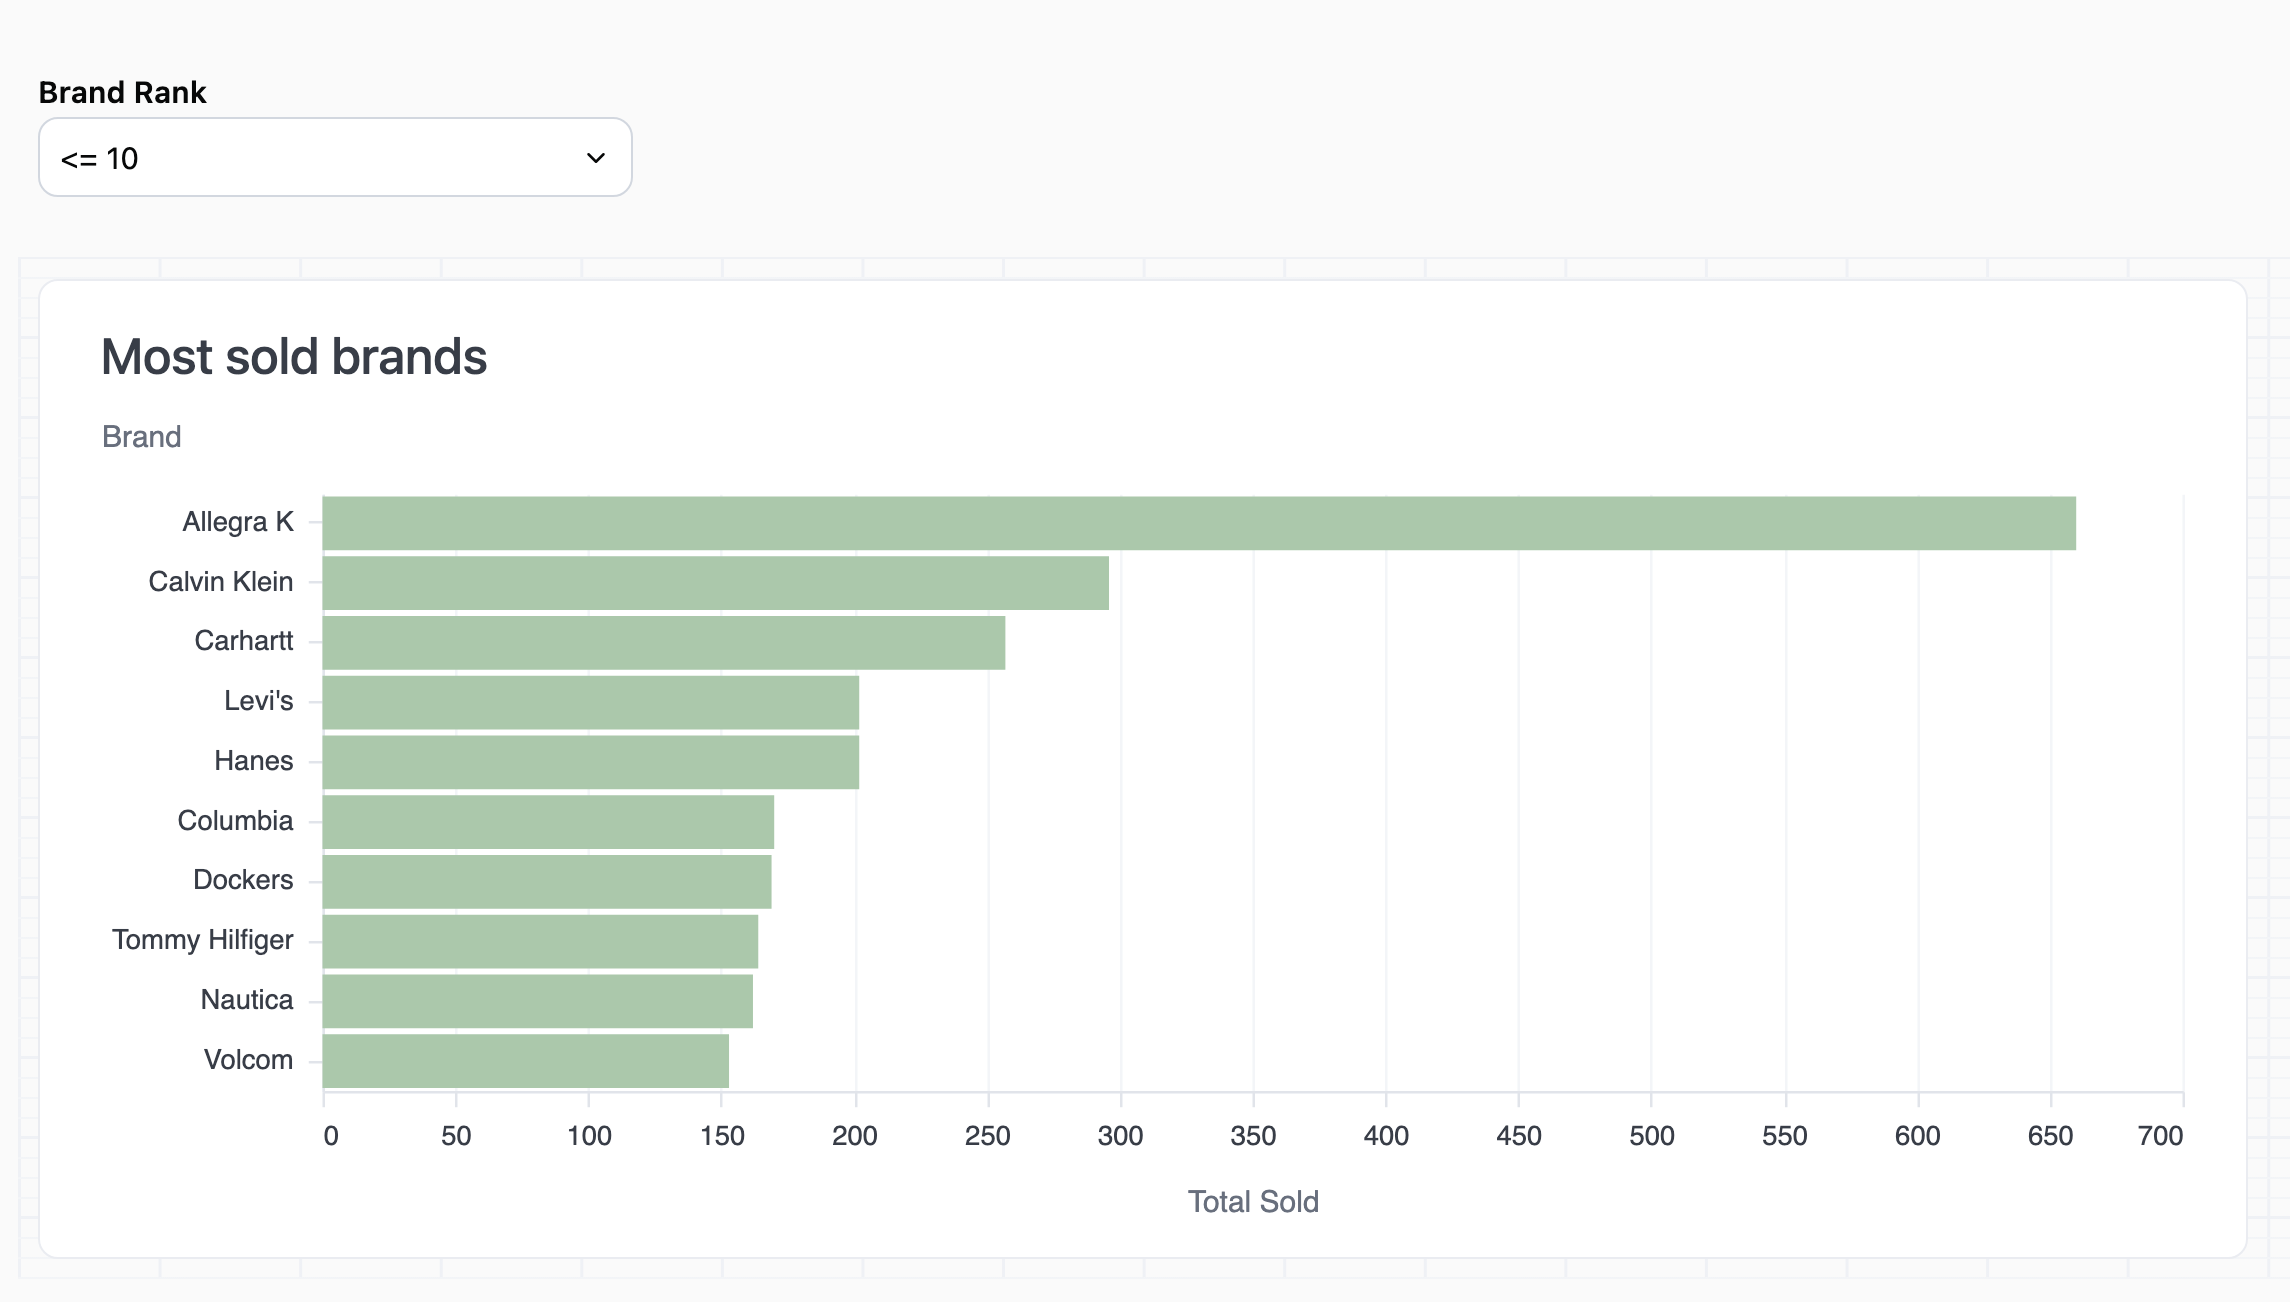
The last step is to publish the changes to the document. This will make the filter available for the viewers of your dashboard.Click the Publish button near the top right corner of the page.
If you don’t see the Publish button, your instance settings may not allow publishing without using a branch. Refer to the Developing and publishing content guides for more information.