Requirements
To follow the steps in this guide, you’ll need:- To have Okta SAML authentication set up. If you don’t, refer to the Okta SAML authentication setup guide before proceeding.
- Omni Organization Admin permissions
- Permissions in Okta that allow you to:
- Access the Admin console
- Modify Okta applications
Limitations
- Omni system user attributes are read-only and cannot be assigned via SCIM
-
Omni does not currently support the following Okta provisioning features:
- Sync password
- Enhanced group push
Steps
Omni users created via SCIM will have Organization Member permissions. Organization Admins must be created in Settings > Users or have their permissions manually upgraded.
Create an Omni API key
- Follow these steps to create a new API key named Okta SCIM.
- Copy the key somewhere handy - you’ll need it to complete the setup.
Configure the Omni Okta application
This guide assumes that you have an existing Omni application in Okta. If you don’t, make sure you’ve finished setting up Okta SAML authentication before continuing.
- Log in to the Okta Admin console.
- Navigate to the Omni application.
- Click the Provisioning tab.
- In the Integration tab, click the Configure API Integration button.
- Check the Enable API Integration box.
- In the API Token field, paste your Omni API key:
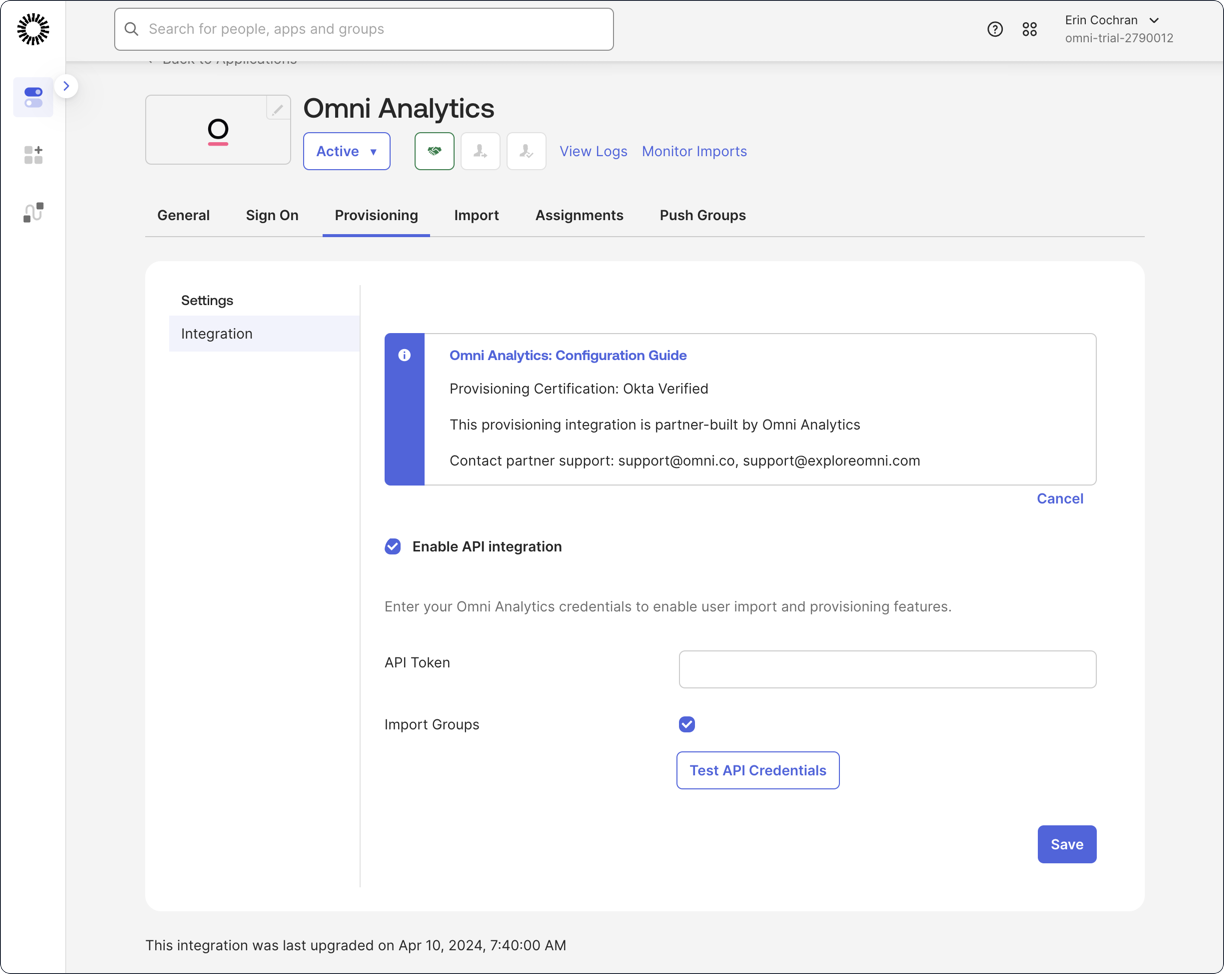
- Click Test credentials to verify the setup.
Set up provisioning and user attribute updates
If the API credential test is successful, additional options will display in the application’s Provisioning tab.
- In the Provisioning tab, click the To app option. Then:
- Click the Edit link to the right of the Provisioning to app heading.
- Check the Enable boxes for Create users, Deactivate users, and Update user attributes.
- Click Save.
- Navigate to the Sign on tab. Then:
- Locate the Credentials details section.
- Set the Application username format to Email. To change this setting, click the Edit link near the top of the tab:
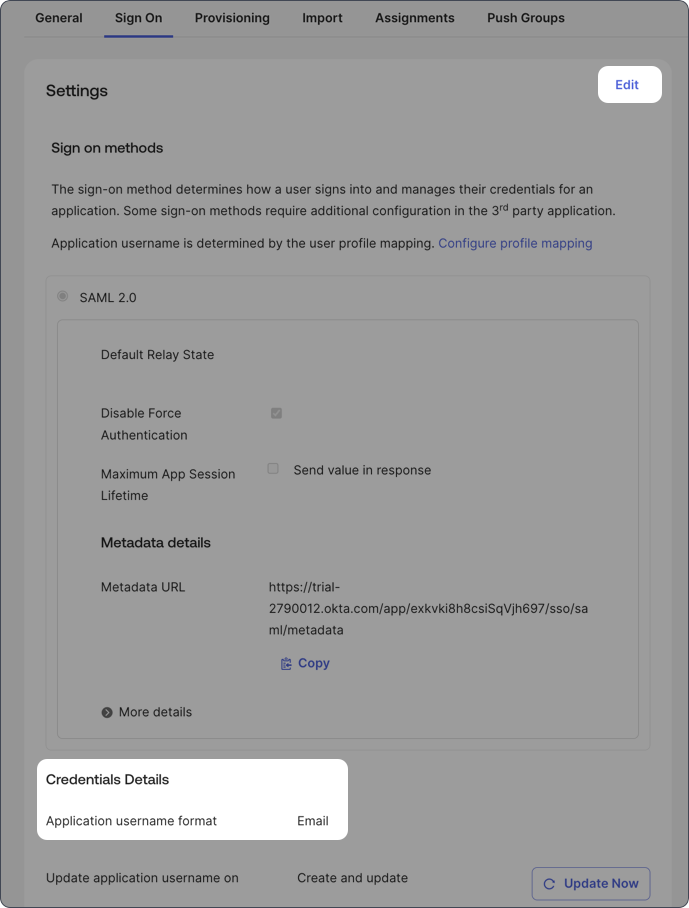
- Click Save when finished.
Configure Omni provisioning settings
In Omni:
- Navigate to Settings > Authentication.
- Enable Automatically provision new users on first login from this SAML provider.
- Click Save SAML changes.
Enable user group provisioning in Okta
Pushing an Okta group to Omni will not automatically provision accounts for users who are group members. You’ll need to use the Assignments tab to assign the group to the users. Refer to the Okta SAML setup guide for more information.
- In the Omni application, navigate to the Push Groups tab.
- Click the Push Groups button, then select Find groups by name:
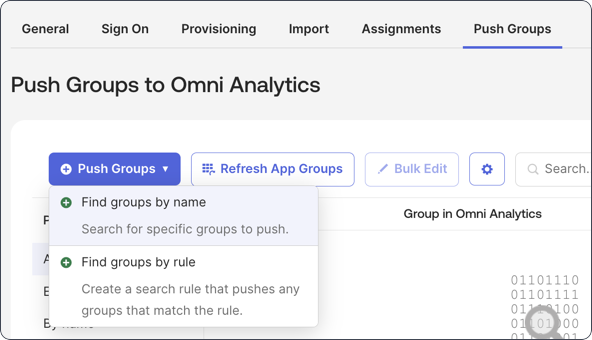
- Use the search field to find and select an Okta group to push to Omni.
- Click Save.