blob_entity from Okta to Omni.
Requirements
To follow the steps in this guide, you’ll need:- To set up SCIM provisioning with Okta. Refer to the Omni Okta SCIM guide for more information.
- Organization Admin permissions in Omni
- Permissions in Okta that allow you to:
- Access the Admin console
- Create user profile attributes
- Define user profile attribute values
- Modify applications
Limitations
Omni system user attributes are read-only and cannot be assigned via SCIM.Setup
Create an Omni user attribute
In Omni, navigate to Settings > Attributes and create a new attribute.Our example attribute,
blob_entity, has the following settings:-
Name -
Blob Entity -
Reference -
blob_entity -
Type -
string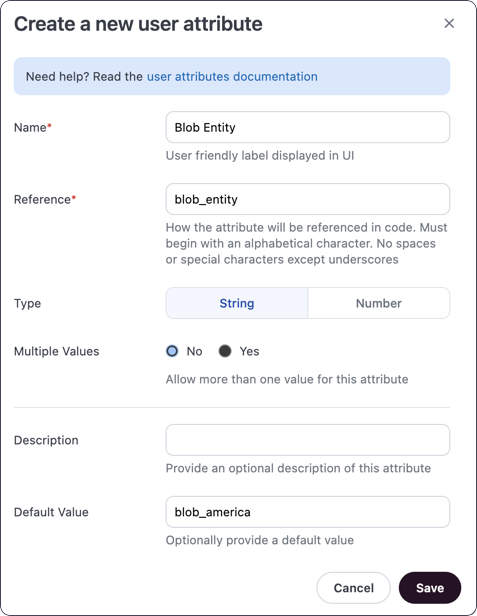
Create & define an Okta user profile attribute
Click the dropdowns to display instructions for each step.
2.1. Create the attribute
2.1. Create the attribute
- Log in to your Okta Admin console.
- Navigate to Directory > Profile Editor.
- Click the User (default) option.
- Click the Add Attribute button.
-
Fill in the attribute fields as follows:
- Data type - Select the Type the attribute has in Omni. For example, if the attribute has a Type of
stringin Omni, you’d selectstring. - Display name - Enter a name for the attribute.
- Variable name - Enter the Reference for the attribute in Omni. In our example, this would be
blob_entity. - Enum - If the Omni attribute can have multiple values, check this box and use the fields that display to add the possible values.
- Data type - Select the Type the attribute has in Omni. For example, if the attribute has a Type of
- Omni doesn’t require a specific configuration for the remaining fields; feel free to define them as needed.
-
When finished, click Save.

2.2. Define attribute values
2.2. Define attribute values
After you create the attribute, open the profile of each user assigned to the Omni application and define a value for the attribute. Refer to the Okta documentation if you need a refresher on how to do this.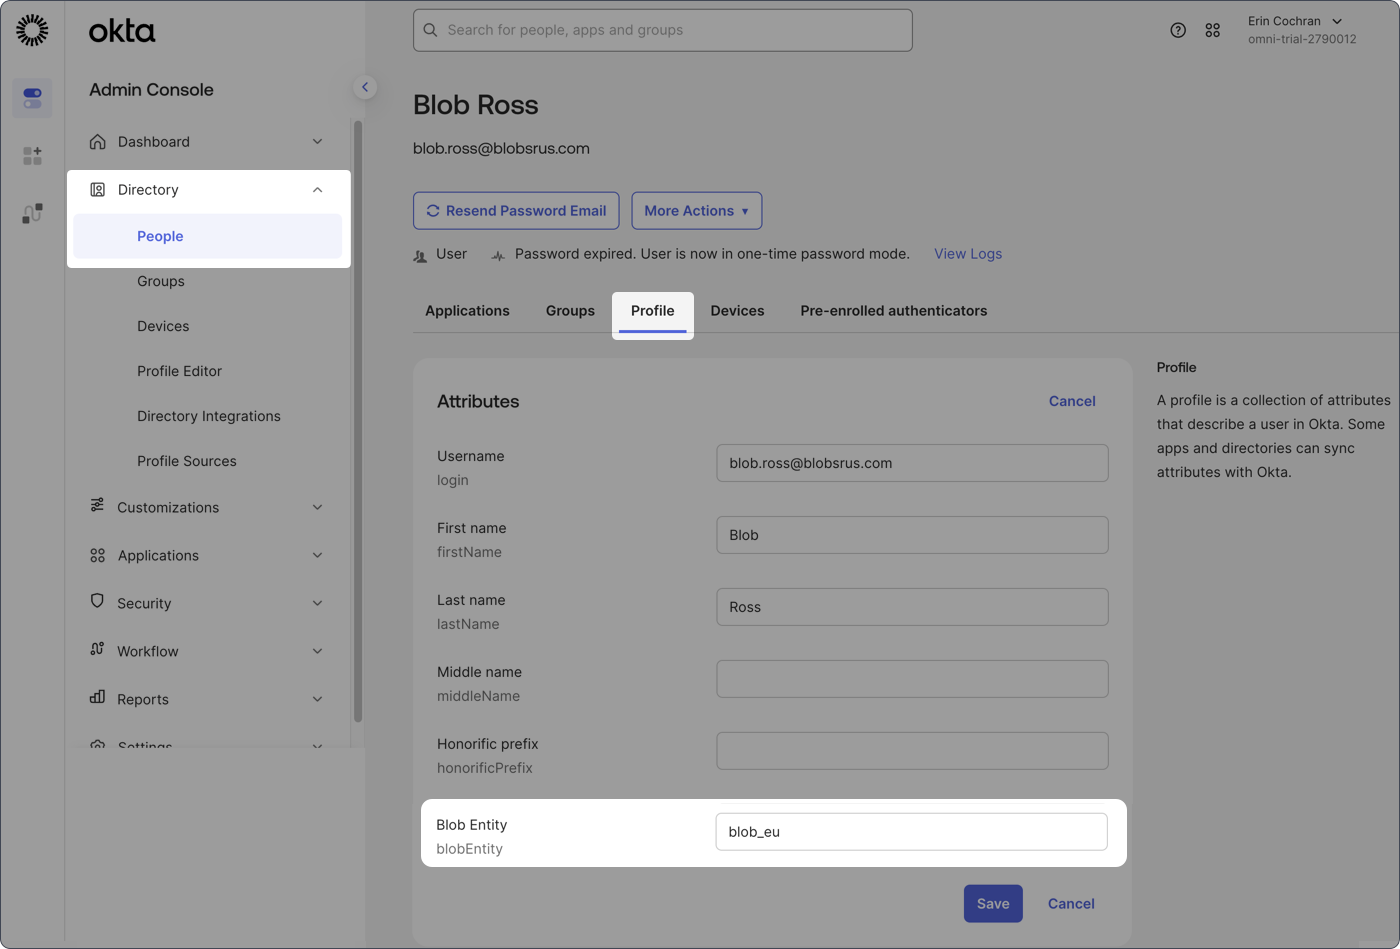
Create an Omni application attribute
- In Okta, navigate to Directory > Profile Editor.
- Click the Omni application.
- Click Add Attribute.
-
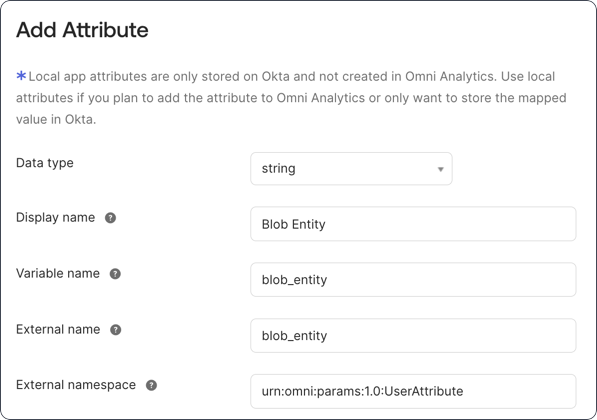
Fill in the attribute fields as follows:
- Data type - Select the Type the attribute has in Omni. For example, if the attribute has a Type of
stringin Omni, you’d selectstring. - Display name - Enter a name for the attribute.
- Variable name - Enter the Reference for the attribute in Omni. In our example, this would be
blob_entity. - External name - This will auto-populate based on the Variable name
- External namespace - Copy and paste the following into this field:
This value must be this exact string - don’t change the
UserAttribute. - Enum - If the Omni attribute can have multiple values, check this box and use the fields that display to add the possible values.
- Data type - Select the Type the attribute has in Omni. For example, if the attribute has a Type of
-
Click Save.
Map the user & application attributes
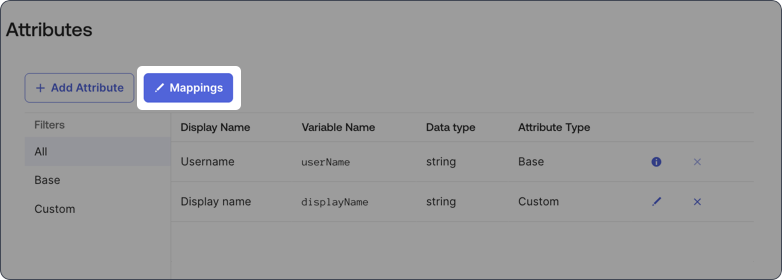
The last step is to map the Okta profile attribute to the Omni application attribute.
-
In the profile editor for the Omni application, click the Mappings button:
-
In the dialog that displays, toggle the view to Okta User to Omni Analytics:
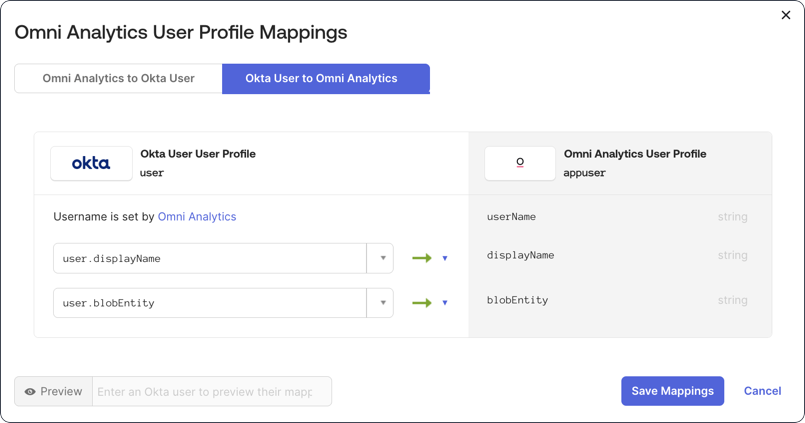
-
Use the dropdowns to map the attributes to each other. In our example, the
user.blobEntityattribute on the Omni user profile side is mapped to theblobEntityattribute on the Omni Analytics User Profile side. -
Use the arrows in the middle of the dialog to set the attribute to Apply mapping on user create and update:

- When finished, click Save Mappings.
What’s next?
At this point, there are two things left:-
Syncing the attributes to Omni. You can do this by:
- Waiting for Okta to perform the next automatic sync, or
- Forcing a manual sync. Open the Okta Omni application, click the Provisioning tab, and scroll down to the Attributes section. Click the Force Sync button to trigger a sync.
- Defining attribute values. When you do this, use the user profile attribute you created in Okta in step 2. The mapping between this attribute and the one in the Okta Omni application will allow the value to flow through to your Omni instance. If you need a refresher on how to do this, refer to the Okta documentation.