Embedding static dashboards
In this example, you’ll embed a static dashboard into a new Visualforce page. Unlike dynamic (parameterized) dashboards, the content of static dashboards doesn’t change.Create a new VisualForce page
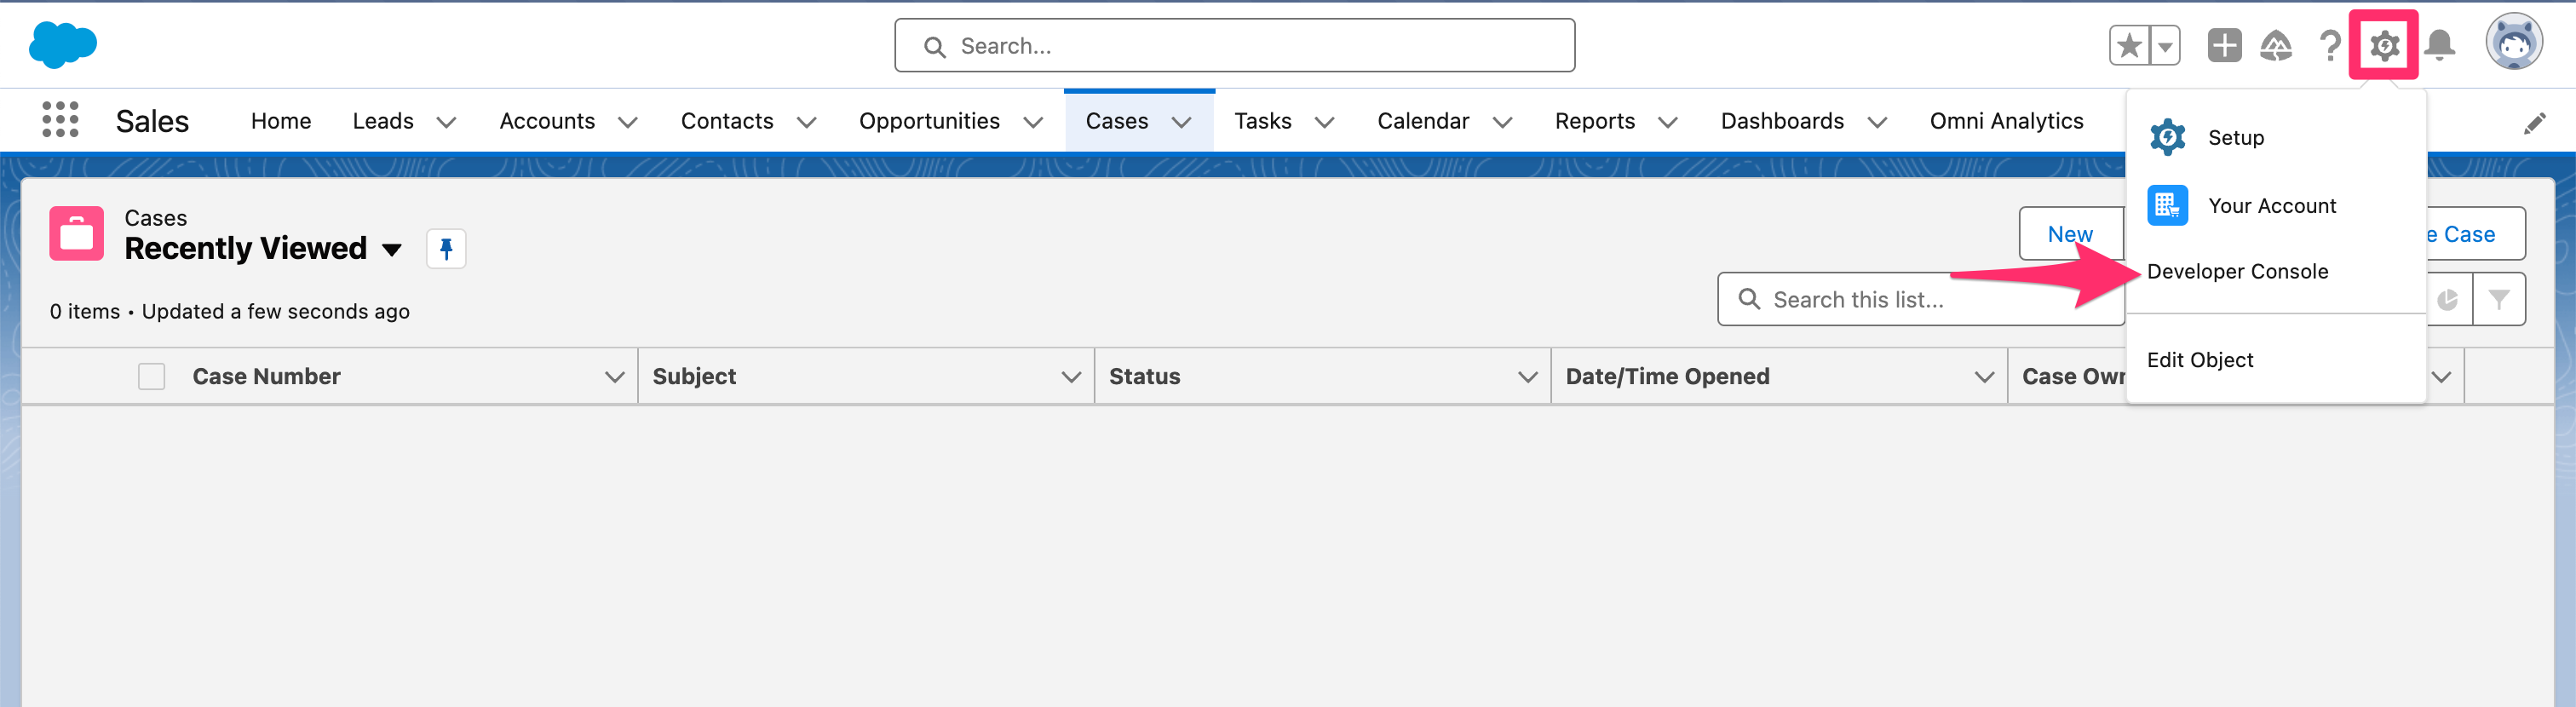
- In your Salesforce instance, navigate to the Developer Console:
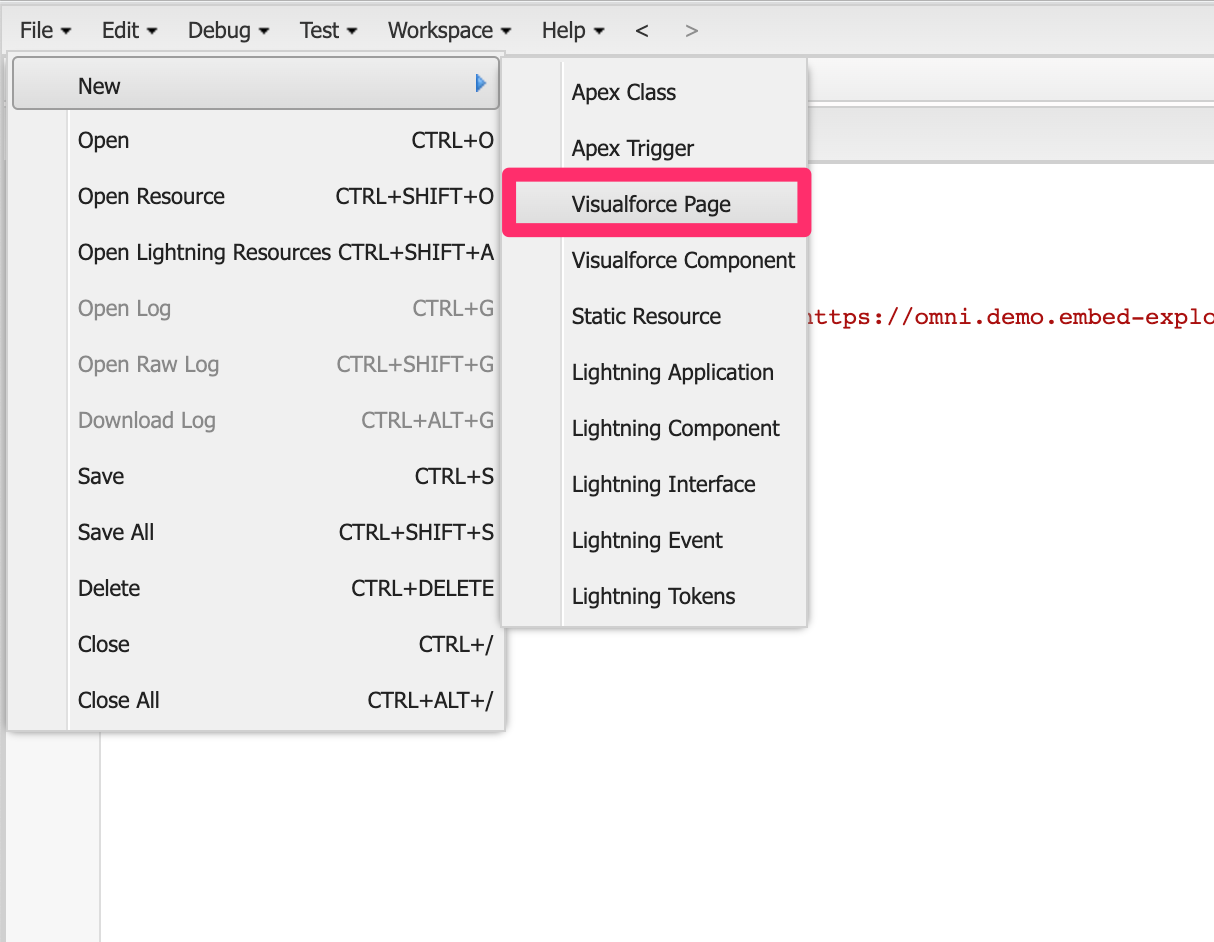
- Create a new Visualforce page:
Retrieve the dashboard's embed URL
-
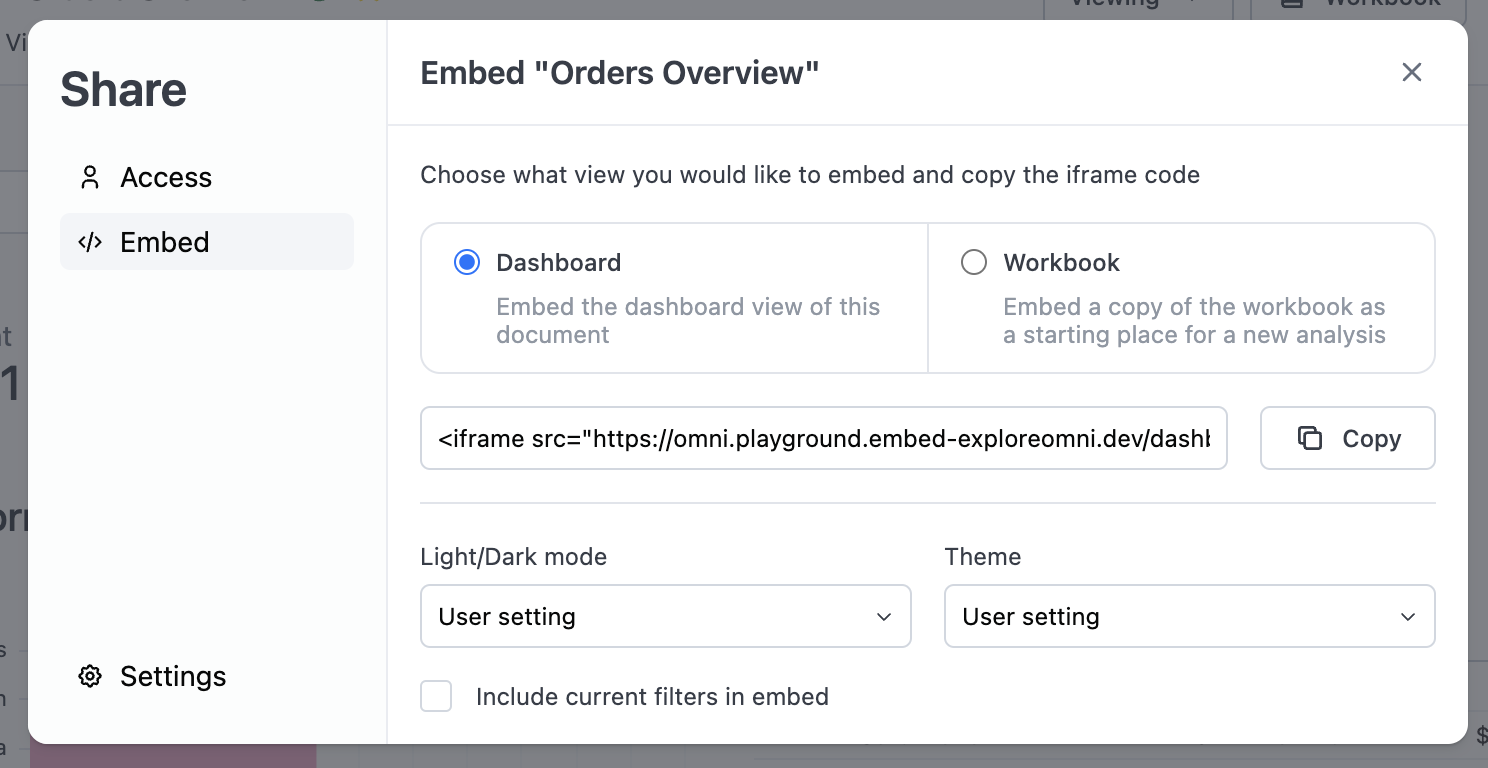
In a published Omni dashboard, click Share to open the share modal:
-
Copy the
iframeembed code.
Embedding dynamic dashboards
To make your dashboards dynamic, you can parameterize the filters in the iframe URL with Apex variables. In this example, you’ll embed a dashboard that dynamically filters data based on the Salesforce account that is currently being viewed and add it to an existing Salesforce object.Prepare your dashboard for embedding
- In your Omni dashboard, add a filter on the field you want to parameterize (for example, Account ID). This filter should not be one of your default filters.
- Click Share to open the share modal.
- Check the Include current filters option.
-
Copy the
<iframe>embed code. -
In a text editor, locate the filter value in the URL and replace it with the Apex variable you want Salesforce to pass through.
For example, replace the hard-coded Account ID with
{!Account.Id}:
Create a new VisualForce page
- In your Salesforce instance, navigate to the Developer Console:
- Create a new Visualforce page:
- Paste the
iframecode you created in the previous step and save the page.
Optional: Create a Visualforce tab
If you want the dashboard to appear as its own tab in Salesforce:
- In Salesforce, navigate to Setup > Tabs:
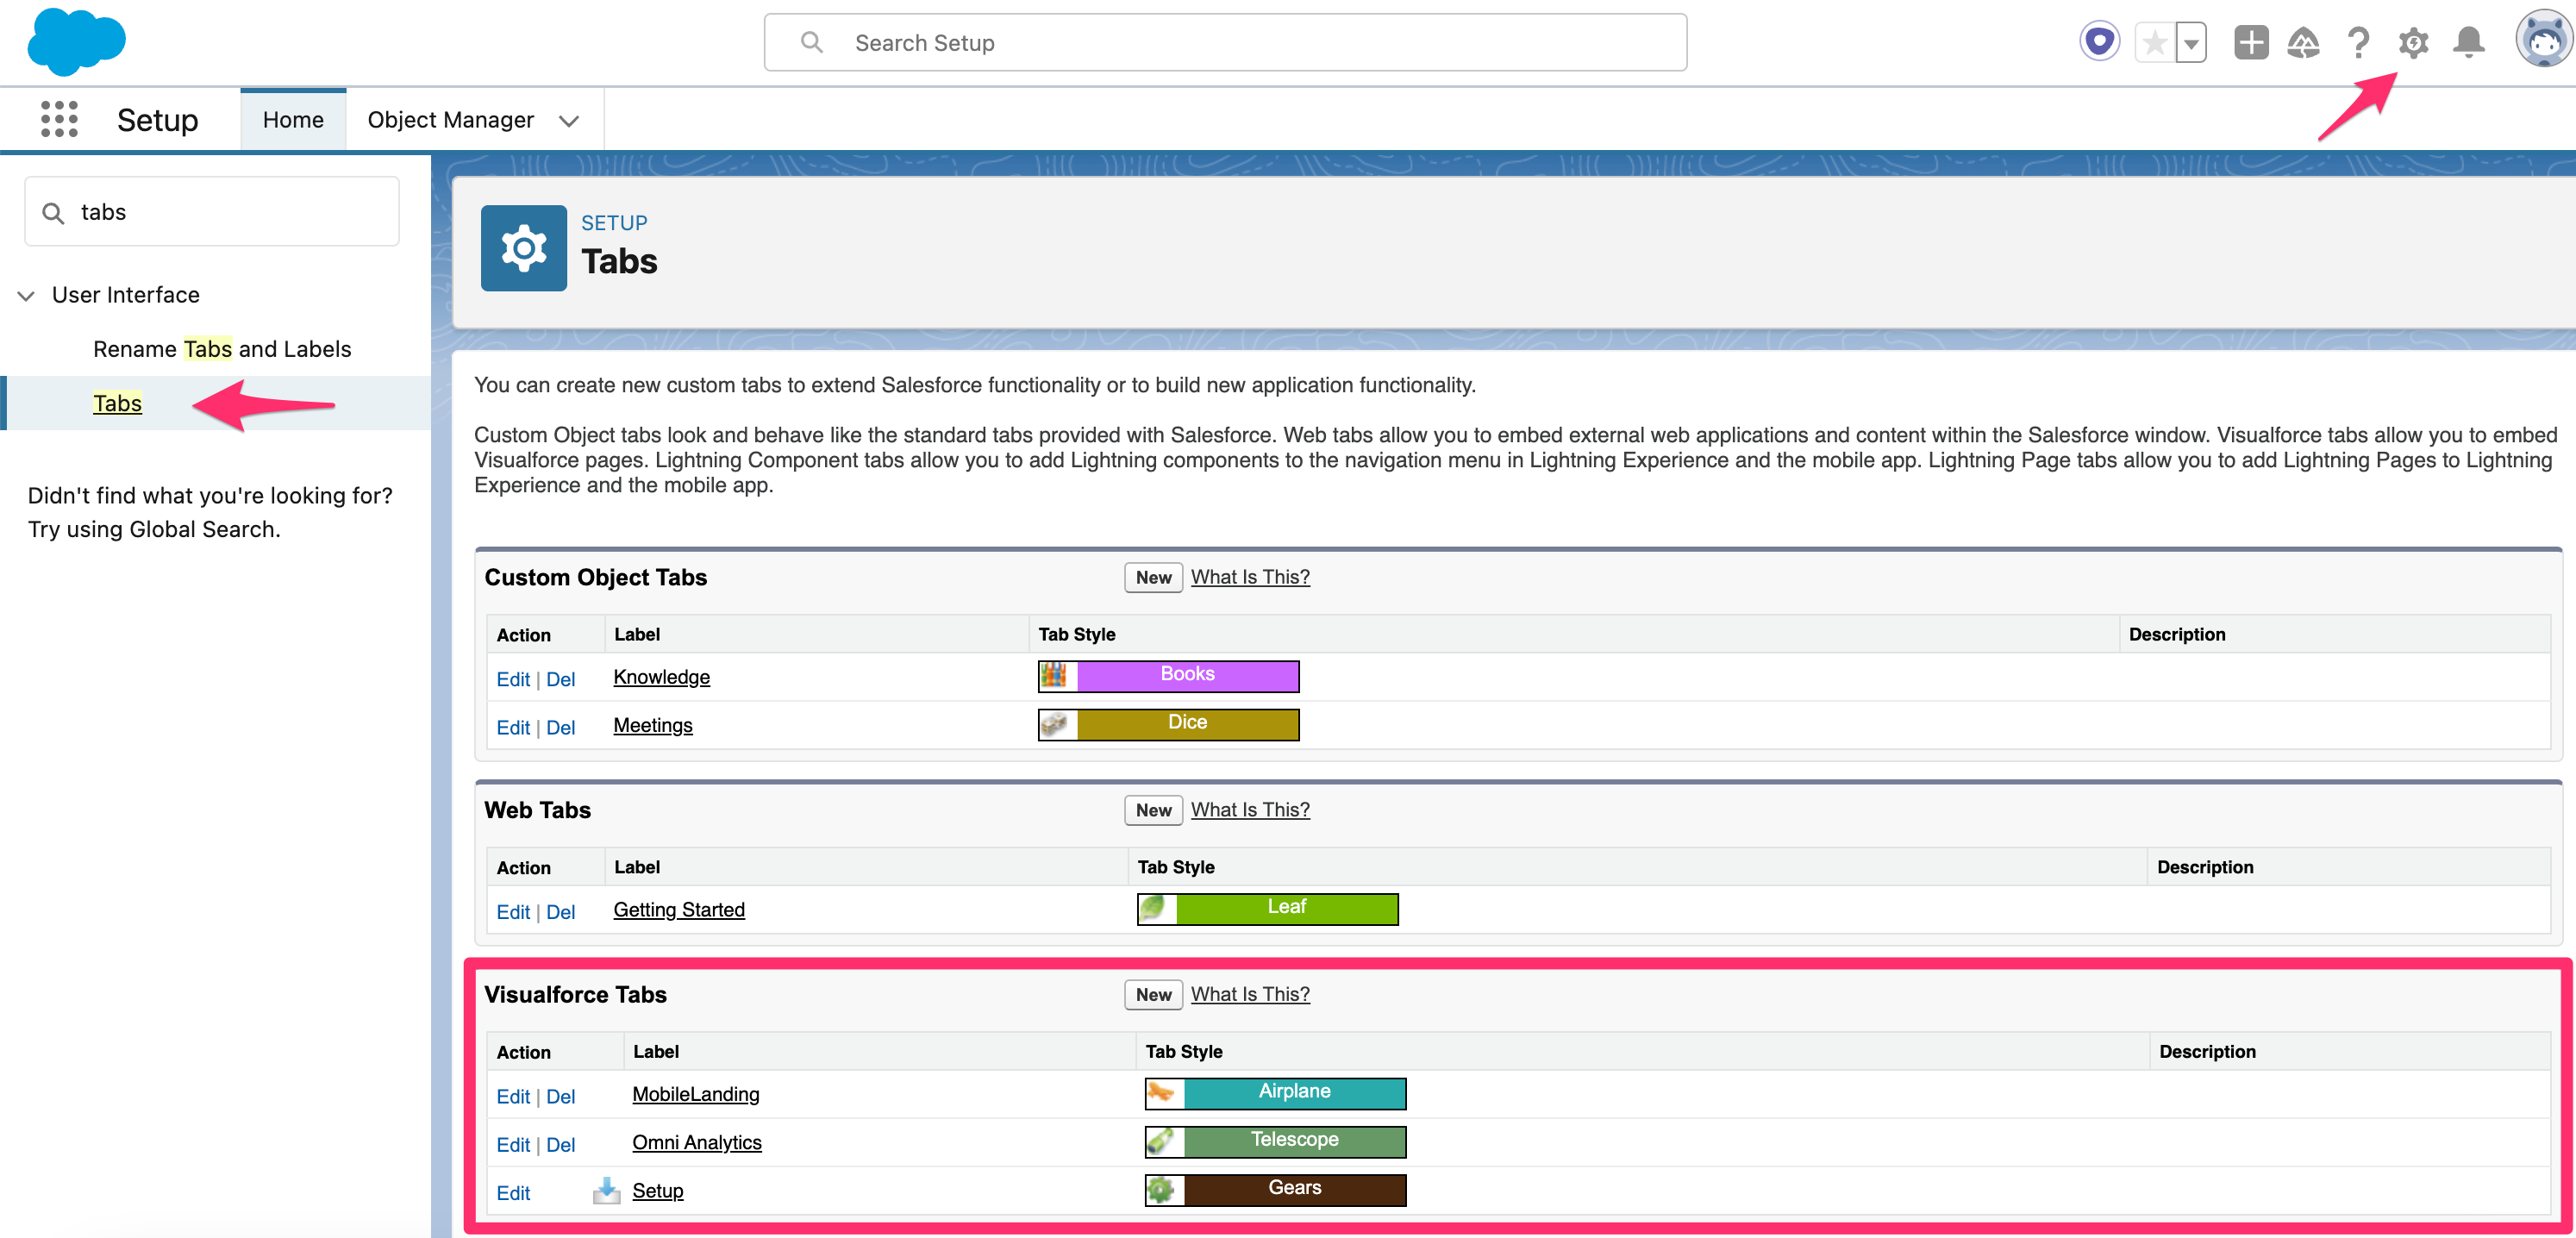
- Create a new Visualforce Tab, selecting the Visualforce page you created in the previous step.
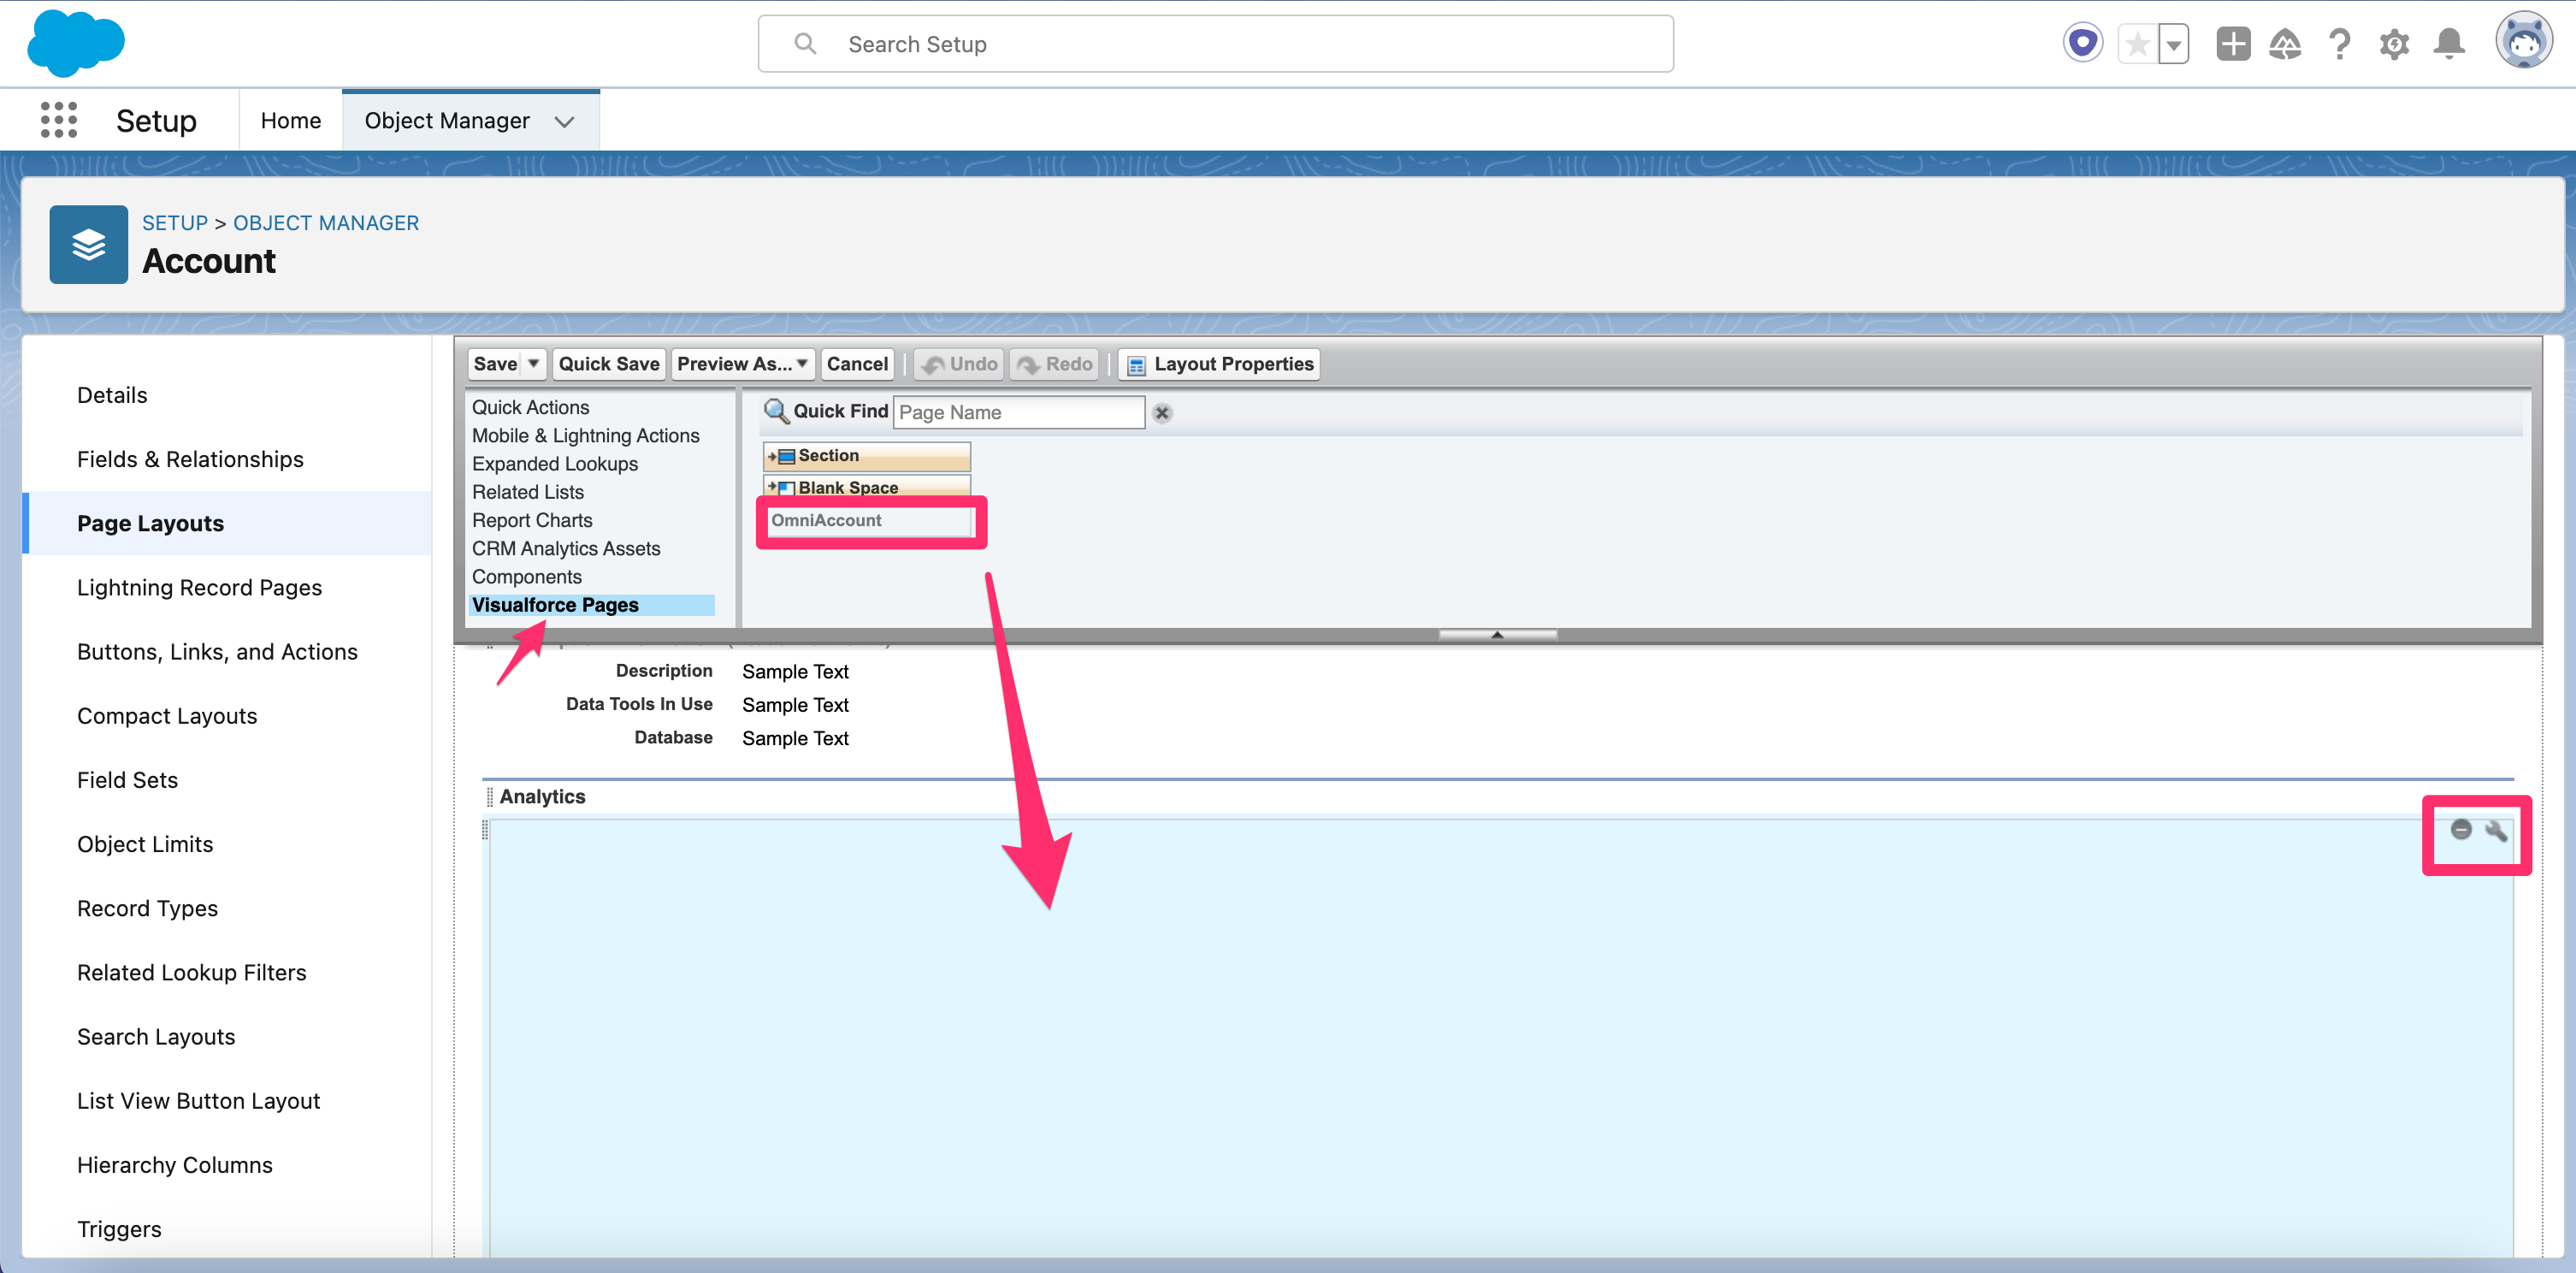
Add the embedded dashboard to an existing Salesforce object
- In Salesforce, navigate to Setup > Object Manager:
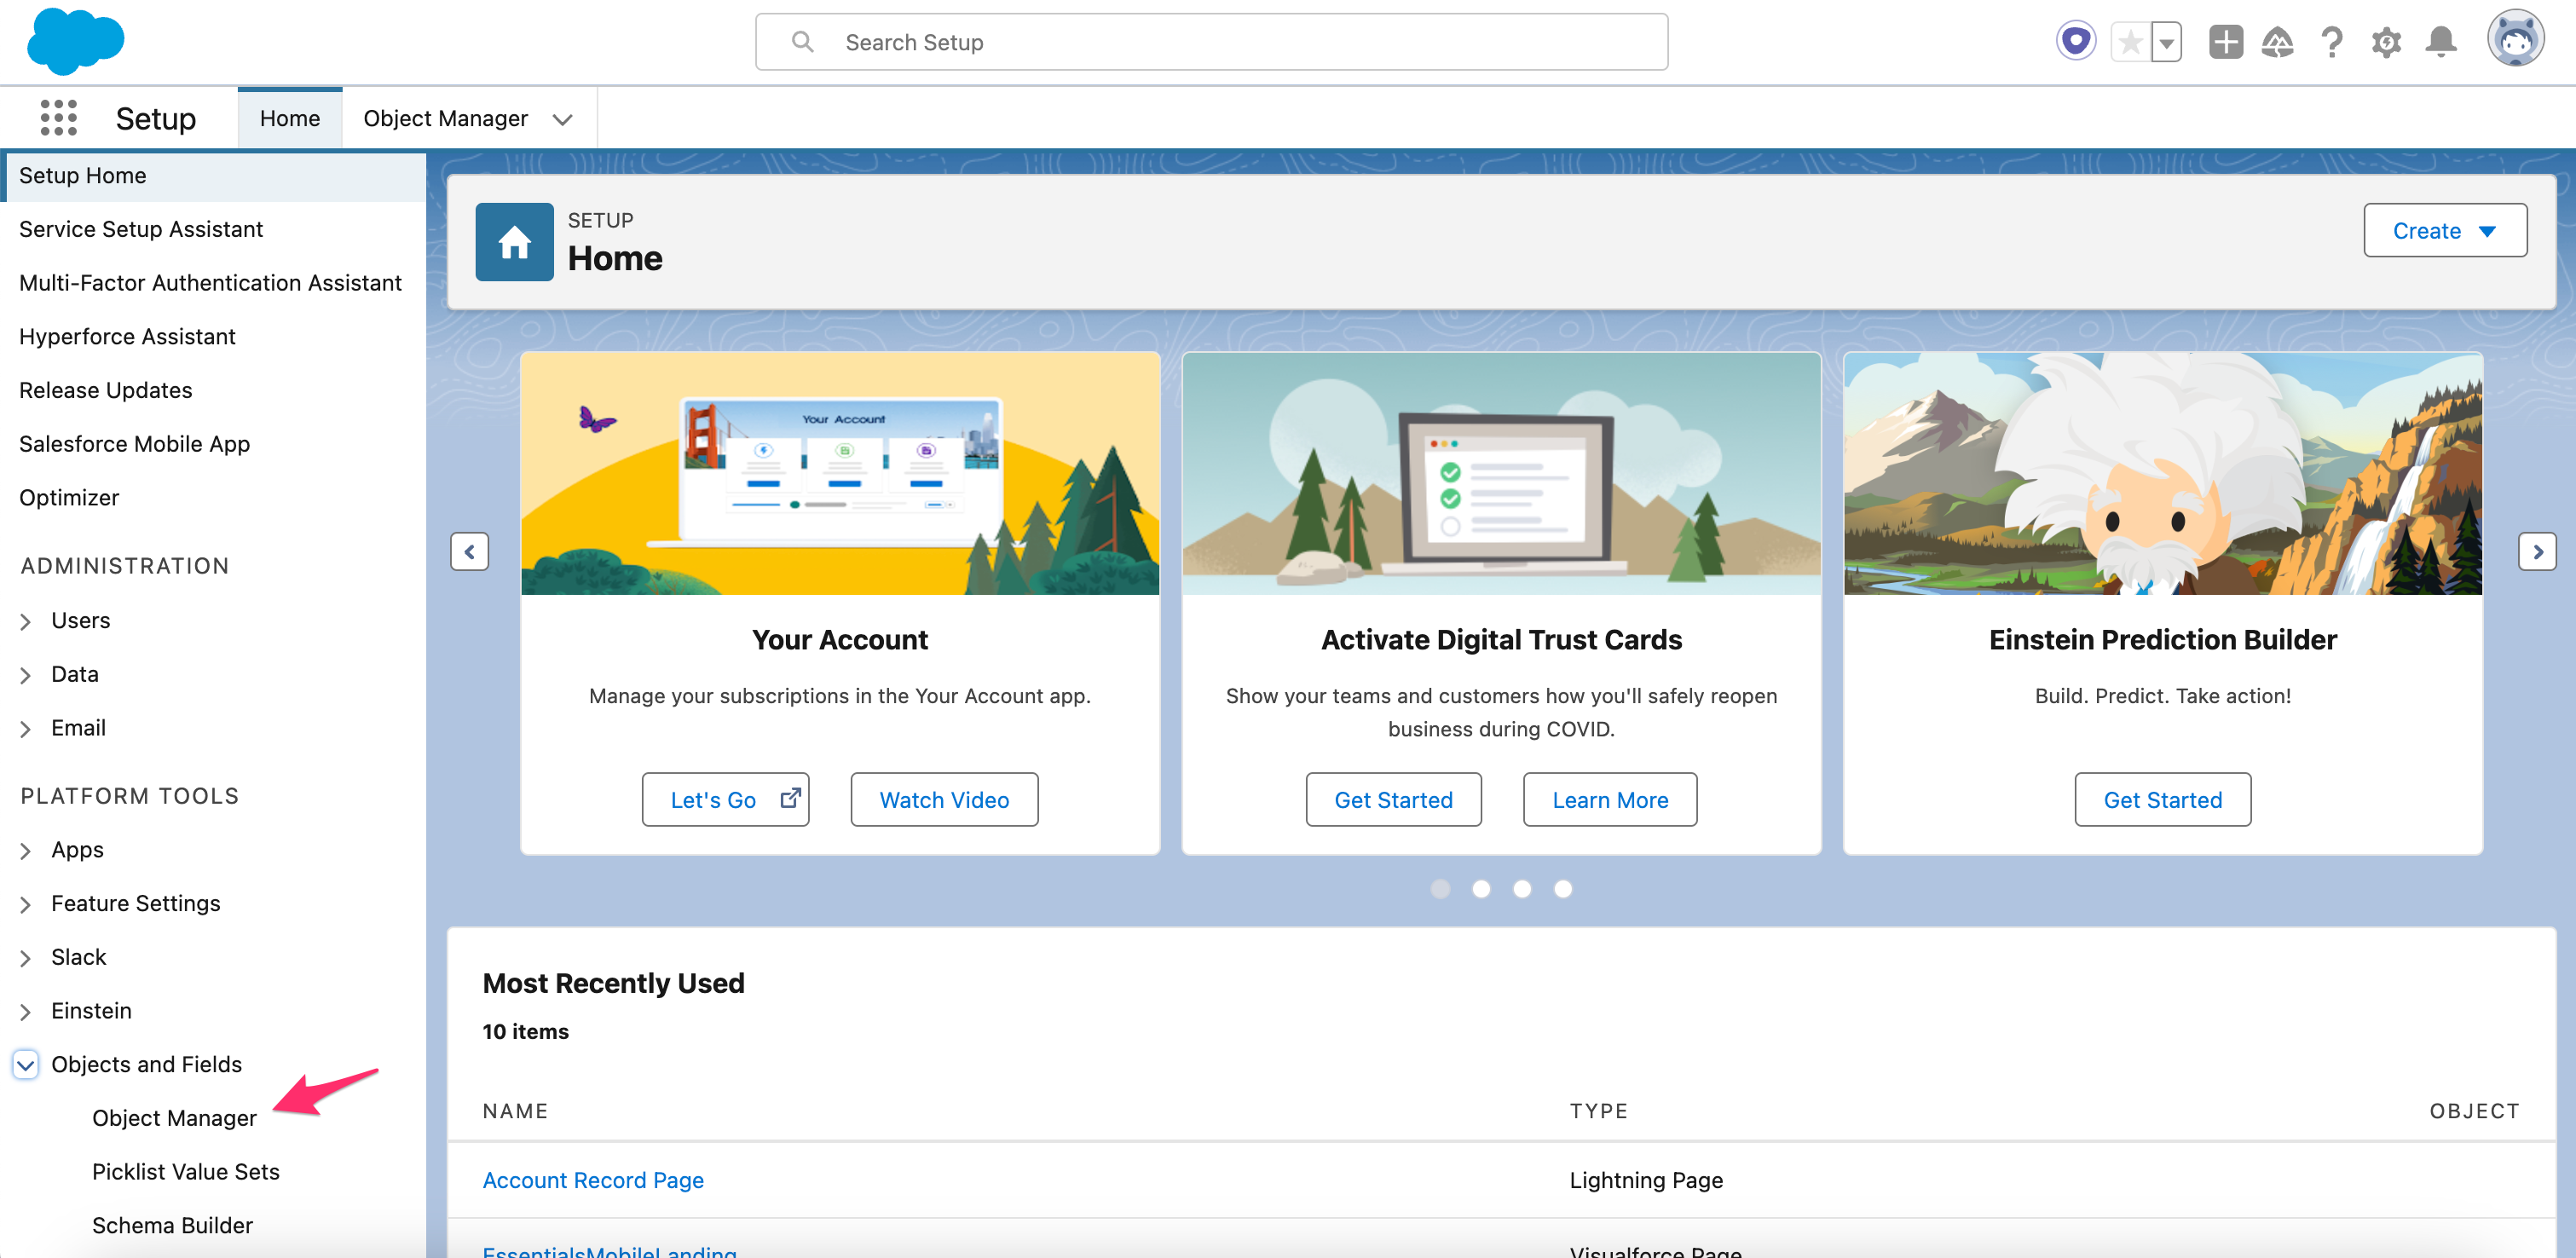
- Select the object where you want the dashboard to appear (for example, Account).
- Open the Page Layouts section and choose the layout you want to edit.
- Add a new section to the layout to hold the embedded dashboard:
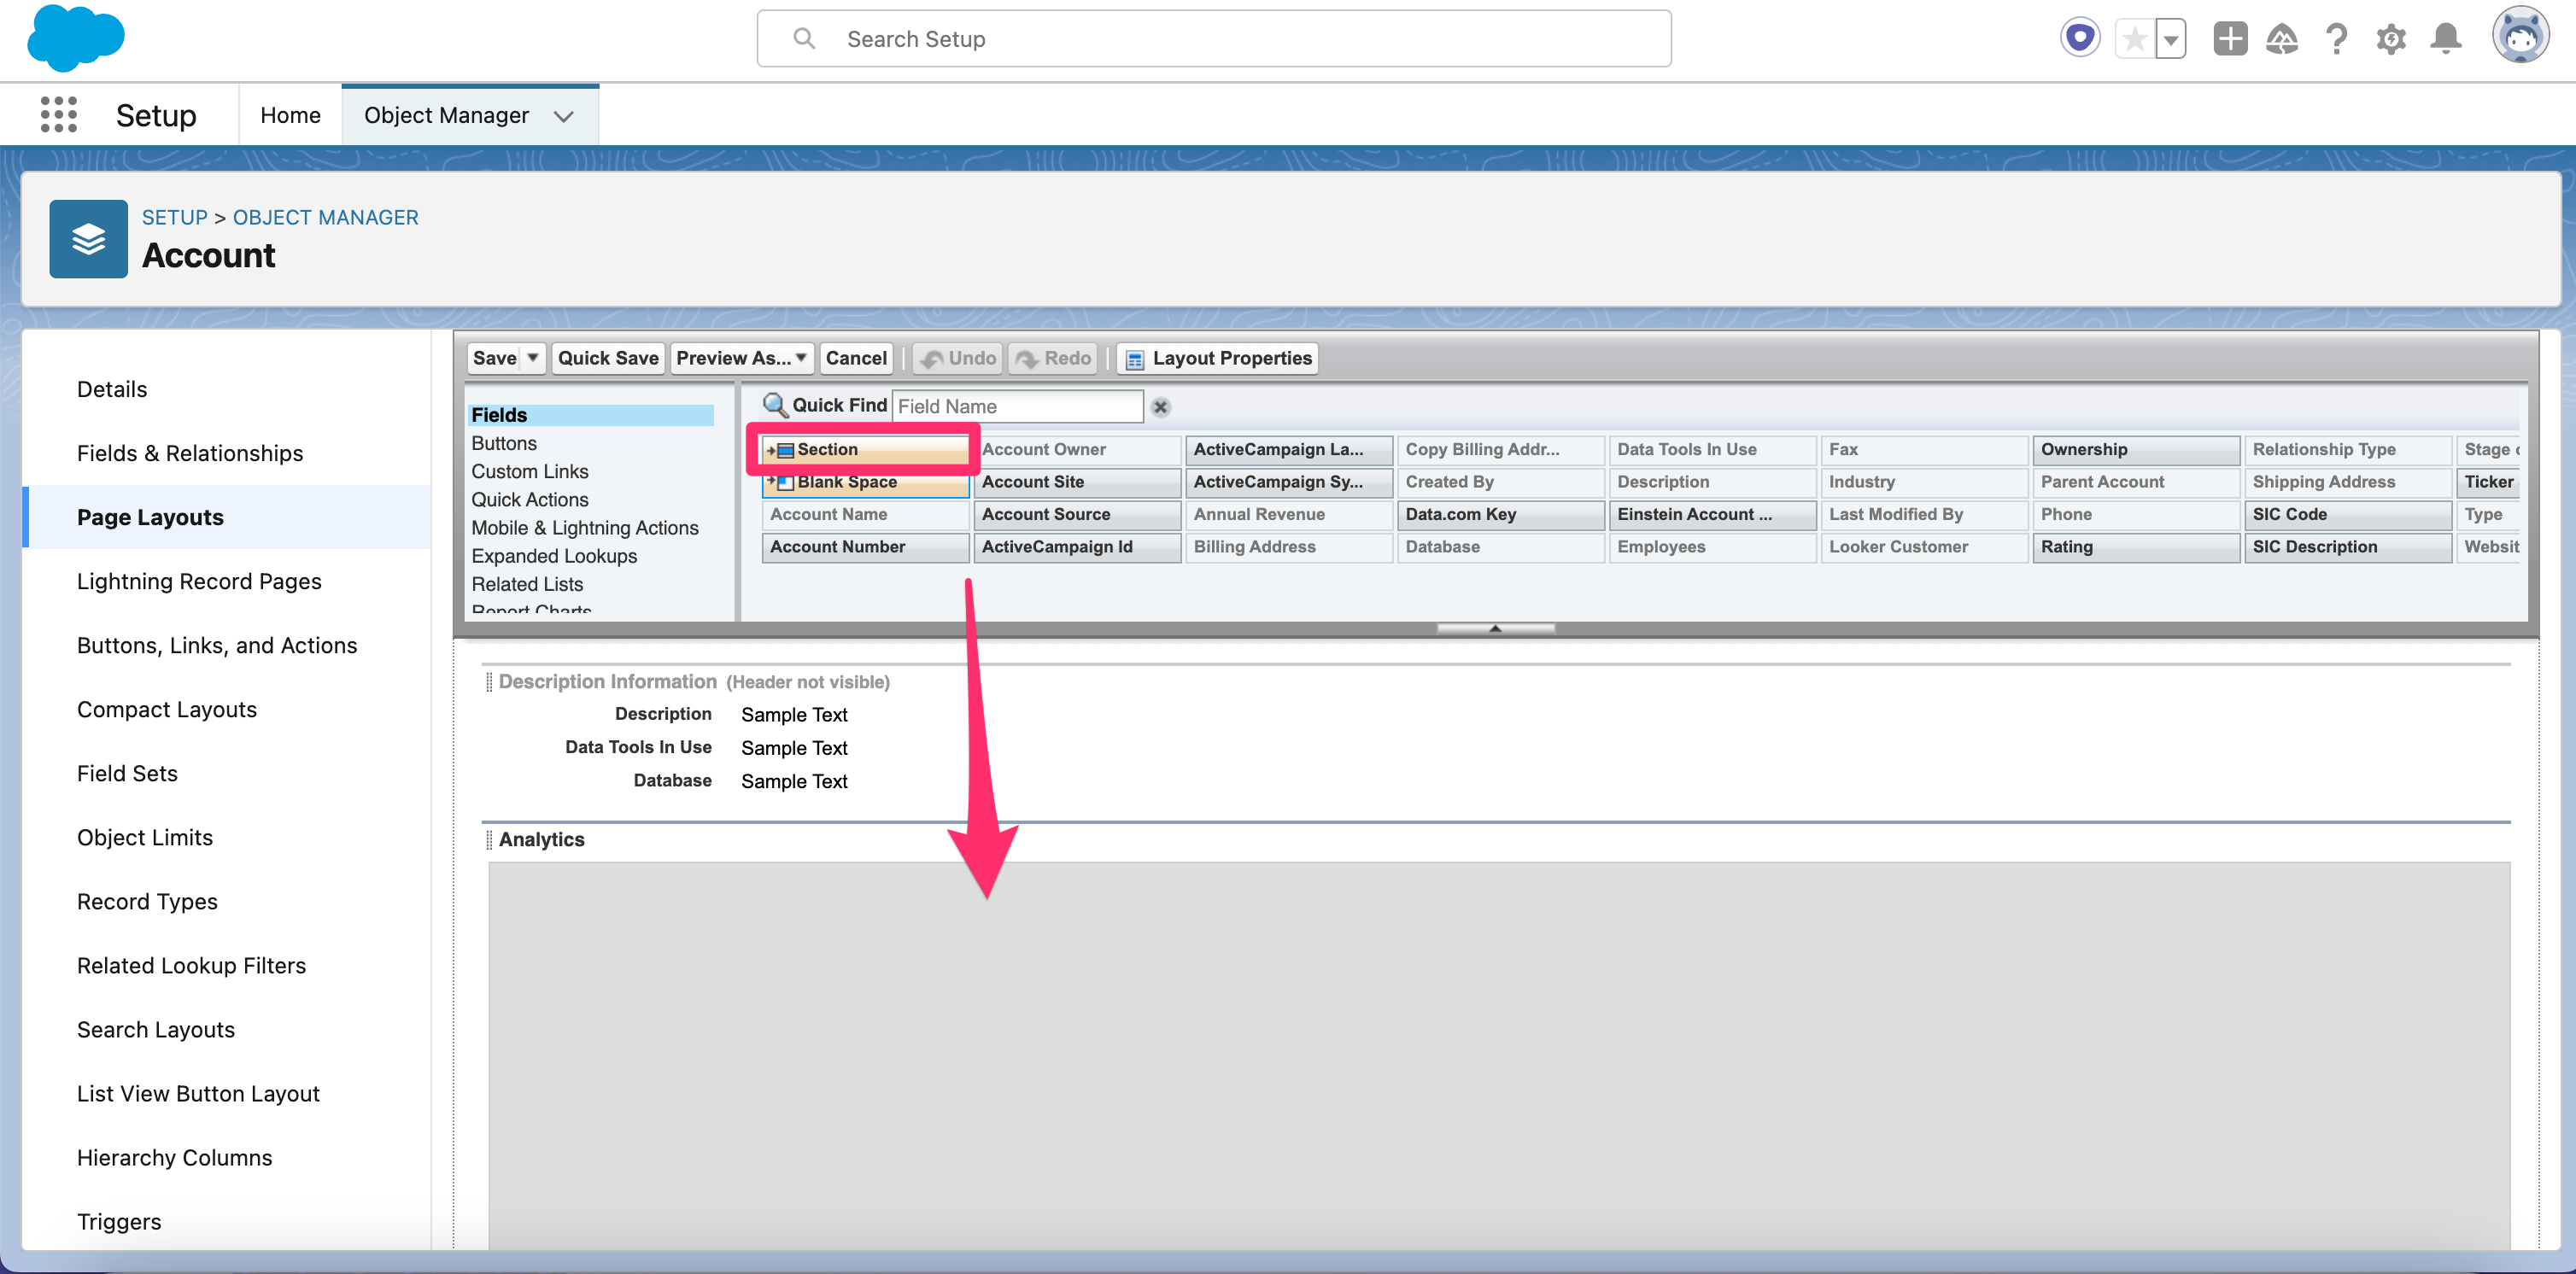
- Drag the Visualforce Page component into the new section: