> ## Documentation Index
> Fetch the complete documentation index at: https://docs.omni.co/llms.txt
> Use this file to discover all available pages before exploring further.
# Connecting a Gitlab dbt repository to Omni
> Connect your Gitlab dbt repository to Omni.
export const keyInstructions_0 = "Copy the public key from the Omni dbt settings tab and paste it into this field"
export const writeAccess_0 = "Check this box if you want to push changes made in Omni to the repository"
export const type_1 = "HTTPS"
export const type_0 = "SSH"
Omni supports three methods for connecting to your Gitlab-hosted dbt repository:
* **SSH authentication** — Uses a deploy key to connect Omni to your repository. This is the traditional method and requires configuring a deploy key in your Git provider.
* **HTTPS token authentication** — Uses an access token to authenticate. This method is simpler to set up because it doesn't require deploy keys.
## Select an authentication method
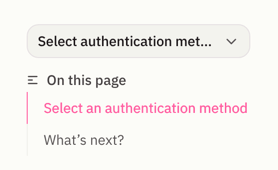
**To view instructions**, select the authentication method you want to use from the **dropdown menu** on the right side of the page, above the table of contents.
 ## Requirements
To follow the steps in this guide, you'll need:
* **An existing [database connection](/connect-data/setup) in Omni**
* [**Connection Admin permissions**](/administration/users/permissions) for the connection you want to connect to dbt
* **Permissions in Gitlab** that allow you to add deploy keys
## Configure SSH authentication
1. In your browser, navigate to the GitLab repository you want to connect to Omni.
2. Click the **Code** button.
3. In the modal that displays, locate the **{type_0}** option.
Keep this page open - you'll need it in the next step.
1. In Omni, navigate to **Settings > Connections**.
2. Click the connection you want to use.
3. Click the **dbt** tab.
4. Fill in the following fields:
* **Authentication Method** - Select **SSH (Deploy Key)** from the dropdown.
* **Git SSH URL** - Enter the SSH URL you retrieved in step 1 of this guide
- **Git Branch** - Enter the name of the default branch for the repository. This is usually `main` or `master`.
Avoid naming your branch `omni` or `omnianalytics`. Omni creates temporary branches prefixed with `omni/` and `omnianalytics/` during internal operations like connection testing. A branch named `omni` or `omnianalytics` in your repository will conflict with this and cause validation errors and connection test failures.
- **Folder** - If your repository contains multiple dbt projects, enter the path to the folder that contains the dbt project you want to connect.
- **Enable Virtual Schemas** - Enables the use of virtual schemas, which require additional setup. See [Working with dbt virtual schemas](/integrations/dbt/virtual-schemas) for instructions.
- **Enable dbt Semantic Layer** - Check this box to enable the [dbt Semantic Layer integration](/integrations/dbt/semantic-layer). When enabled, Omni will use the dbt Semantic Layer to pull in metrics and dimensions defined in your dbt project.
- **Auto-generate primary keys and relationships from dbt constraints** - Check this box to allow Omni to generate primary keys and relationships from native dbt constraints.
- **dbt Version** - When set to **Auto** (default), Omni will auto-detect the dbt version from the `require-dbt-version` pin in `dbt_project.yml`. If a usable pin isn't found, Omni defaults to the latest supported version of dbt. Otherwise, you can select a specific version from the list of versions that Omni supports.
5. Click **Save**.
After the dbt connection is created, a **Public Key** will display. Leave this page open - you'll need it in the next step.
If the repository is already connected to Omni through the [Git integration](/integrations/git), skip this step. Omni will use the existing deploy key.
In this step, you'll add the **Public Key** created in step 2 of this guide to your dbt repository as a deploy key.
1. Create a **project deploy key** for the GitLab repository by following [GitLab's documentation](https://docs.gitlab.com/ee/user/project/deploy_keys/#create-a-project-deploy-key).
GitLab recommends using a [service account](https://docs.gitlab.com/user/profile/service_accounts/) when creating a deploy key so that the key will be unaffected if the [user leaves the organization](https://docs.gitlab.com/user/profile/service_accounts/).
2. Fill in the deploy key fields as follows:
* **Title** - Enter a descriptive title to help you identify what the key is used for. For example, *Omni Snowflake Model*
* **Key** - {keyInstructions_0}
* **Grant write permissions to this key** - {writeAccess_0}
3. Click **Add key**.
## Requirements
To follow the steps in this guide, you'll need:
* **An existing [database connection](/connect-data/setup) in Omni**
* [**Connection Admin permissions**](/administration/users/permissions) for the connection you want to connect to dbt
* **Permissions in Gitlab** that allow you to create access tokens
## HTTPS token authentication
1. In your browser, navigate to the GitLab repository you want to connect to Omni.
2. Click the **Code** button.
3. In the modal that displays, locate the **{type_1}** option.
Keep this page open - you'll need it in the next step.
In GitLab, create a project access token with the following scopes:
* **read\_repository**
* **write\_repository**
See [GitLab's documentation](https://docs.gitlab.com/ee/user/project/settings/project_access_tokens.html) for instructions on creating a project access token.
1. In Omni, navigate to **Settings > Connections**.
2. Click the connection you want to use.
3. Click the **dbt** tab.
4. Fill in the following fields:
* **Authentication Method** - Select **HTTPS (Token)** from the dropdown.
* **Git HTTPS URL** - Enter the HTTPS URL you retrieved in step 1 of this guide
* **Access Token** - Paste the access token you created in step 2 of this guide
- **Git Branch** - Enter the name of the default branch for the repository. This is usually `main` or `master`.
Avoid naming your branch `omni` or `omnianalytics`. Omni creates temporary branches prefixed with `omni/` and `omnianalytics/` during internal operations like connection testing. A branch named `omni` or `omnianalytics` in your repository will conflict with this and cause validation errors and connection test failures.
- **Folder** - If your repository contains multiple dbt projects, enter the path to the folder that contains the dbt project you want to connect.
- **Enable Virtual Schemas** - Enables the use of virtual schemas, which require additional setup. See [Working with dbt virtual schemas](/integrations/dbt/virtual-schemas) for instructions.
- **Enable dbt Semantic Layer** - Check this box to enable the [dbt Semantic Layer integration](/integrations/dbt/semantic-layer). When enabled, Omni will use the dbt Semantic Layer to pull in metrics and dimensions defined in your dbt project.
- **Auto-generate primary keys and relationships from dbt constraints** - Check this box to allow Omni to generate primary keys and relationships from native dbt constraints.
- **dbt Version** - When set to **Auto** (default), Omni will auto-detect the dbt version from the `require-dbt-version` pin in `dbt_project.yml`. If a usable pin isn't found, Omni defaults to the latest supported version of dbt. Otherwise, you can select a specific version from the list of versions that Omni supports.
5. Click **Save**.
## Next steps
After you successfully connect your dbt repository, you need to:
1. [Configure your production dbt environment](/integrations/dbt/environments)
2. [Sync dbt with Omni](/integrations/dbt/syncing-dbt)
3. [Set up Virtual Schemas](/integrations/dbt/virtual-schemas). This isn't required to use the dbt integration, but enabling Virtual Schemas before you start building in Omni avoids migrating later.
## Requirements
To follow the steps in this guide, you'll need:
* **An existing [database connection](/connect-data/setup) in Omni**
* [**Connection Admin permissions**](/administration/users/permissions) for the connection you want to connect to dbt
* **Permissions in Gitlab** that allow you to add deploy keys
## Configure SSH authentication
1. In your browser, navigate to the GitLab repository you want to connect to Omni.
2. Click the **Code** button.
3. In the modal that displays, locate the **{type_0}** option.
Keep this page open - you'll need it in the next step.
1. In Omni, navigate to **Settings > Connections**.
2. Click the connection you want to use.
3. Click the **dbt** tab.
4. Fill in the following fields:
* **Authentication Method** - Select **SSH (Deploy Key)** from the dropdown.
* **Git SSH URL** - Enter the SSH URL you retrieved in step 1 of this guide
- **Git Branch** - Enter the name of the default branch for the repository. This is usually `main` or `master`.
Avoid naming your branch `omni` or `omnianalytics`. Omni creates temporary branches prefixed with `omni/` and `omnianalytics/` during internal operations like connection testing. A branch named `omni` or `omnianalytics` in your repository will conflict with this and cause validation errors and connection test failures.
- **Folder** - If your repository contains multiple dbt projects, enter the path to the folder that contains the dbt project you want to connect.
- **Enable Virtual Schemas** - Enables the use of virtual schemas, which require additional setup. See [Working with dbt virtual schemas](/integrations/dbt/virtual-schemas) for instructions.
- **Enable dbt Semantic Layer** - Check this box to enable the [dbt Semantic Layer integration](/integrations/dbt/semantic-layer). When enabled, Omni will use the dbt Semantic Layer to pull in metrics and dimensions defined in your dbt project.
- **Auto-generate primary keys and relationships from dbt constraints** - Check this box to allow Omni to generate primary keys and relationships from native dbt constraints.
- **dbt Version** - When set to **Auto** (default), Omni will auto-detect the dbt version from the `require-dbt-version` pin in `dbt_project.yml`. If a usable pin isn't found, Omni defaults to the latest supported version of dbt. Otherwise, you can select a specific version from the list of versions that Omni supports.
5. Click **Save**.
After the dbt connection is created, a **Public Key** will display. Leave this page open - you'll need it in the next step.
If the repository is already connected to Omni through the [Git integration](/integrations/git), skip this step. Omni will use the existing deploy key.
In this step, you'll add the **Public Key** created in step 2 of this guide to your dbt repository as a deploy key.
1. Create a **project deploy key** for the GitLab repository by following [GitLab's documentation](https://docs.gitlab.com/ee/user/project/deploy_keys/#create-a-project-deploy-key).
GitLab recommends using a [service account](https://docs.gitlab.com/user/profile/service_accounts/) when creating a deploy key so that the key will be unaffected if the [user leaves the organization](https://docs.gitlab.com/user/profile/service_accounts/).
2. Fill in the deploy key fields as follows:
* **Title** - Enter a descriptive title to help you identify what the key is used for. For example, *Omni Snowflake Model*
* **Key** - {keyInstructions_0}
* **Grant write permissions to this key** - {writeAccess_0}
3. Click **Add key**.
## Requirements
To follow the steps in this guide, you'll need:
* **An existing [database connection](/connect-data/setup) in Omni**
* [**Connection Admin permissions**](/administration/users/permissions) for the connection you want to connect to dbt
* **Permissions in Gitlab** that allow you to create access tokens
## HTTPS token authentication
1. In your browser, navigate to the GitLab repository you want to connect to Omni.
2. Click the **Code** button.
3. In the modal that displays, locate the **{type_1}** option.
Keep this page open - you'll need it in the next step.
In GitLab, create a project access token with the following scopes:
* **read\_repository**
* **write\_repository**
See [GitLab's documentation](https://docs.gitlab.com/ee/user/project/settings/project_access_tokens.html) for instructions on creating a project access token.
1. In Omni, navigate to **Settings > Connections**.
2. Click the connection you want to use.
3. Click the **dbt** tab.
4. Fill in the following fields:
* **Authentication Method** - Select **HTTPS (Token)** from the dropdown.
* **Git HTTPS URL** - Enter the HTTPS URL you retrieved in step 1 of this guide
* **Access Token** - Paste the access token you created in step 2 of this guide
- **Git Branch** - Enter the name of the default branch for the repository. This is usually `main` or `master`.
Avoid naming your branch `omni` or `omnianalytics`. Omni creates temporary branches prefixed with `omni/` and `omnianalytics/` during internal operations like connection testing. A branch named `omni` or `omnianalytics` in your repository will conflict with this and cause validation errors and connection test failures.
- **Folder** - If your repository contains multiple dbt projects, enter the path to the folder that contains the dbt project you want to connect.
- **Enable Virtual Schemas** - Enables the use of virtual schemas, which require additional setup. See [Working with dbt virtual schemas](/integrations/dbt/virtual-schemas) for instructions.
- **Enable dbt Semantic Layer** - Check this box to enable the [dbt Semantic Layer integration](/integrations/dbt/semantic-layer). When enabled, Omni will use the dbt Semantic Layer to pull in metrics and dimensions defined in your dbt project.
- **Auto-generate primary keys and relationships from dbt constraints** - Check this box to allow Omni to generate primary keys and relationships from native dbt constraints.
- **dbt Version** - When set to **Auto** (default), Omni will auto-detect the dbt version from the `require-dbt-version` pin in `dbt_project.yml`. If a usable pin isn't found, Omni defaults to the latest supported version of dbt. Otherwise, you can select a specific version from the list of versions that Omni supports.
5. Click **Save**.
## Next steps
After you successfully connect your dbt repository, you need to:
1. [Configure your production dbt environment](/integrations/dbt/environments)
2. [Sync dbt with Omni](/integrations/dbt/syncing-dbt)
3. [Set up Virtual Schemas](/integrations/dbt/virtual-schemas). This isn't required to use the dbt integration, but enabling Virtual Schemas before you start building in Omni avoids migrating later.