> ## Documentation Index
> Fetch the complete documentation index at: https://docs.omni.co/llms.txt
> Use this file to discover all available pages before exploring further.
# Connecting a GitHub dbt repository to Omni
> Connect your GitHub dbt repository to Omni.
export const keyInstructions_0 = "Copy the public key from the Omni dbt settings tab and paste it into this field"
export const writeAccess_0 = "Check this box if you want to push changes made in Omni to the repository"
export const type_2 = "HTTPS"
export const type_1 = "SSH"
export const type_0 = "HTTPS"
Omni supports three methods for connecting to a GitHub-hosted dbt repository:
* **GitHub App authentication** - Uses a GitHub app to perform authentication. Enables commit signing.
* **SSH authentication** — Uses a deploy key to connect Omni to your repository. This is the traditional method and requires configuring a deploy key in your Git provider.
* **HTTPS token authentication** — Uses an access token to authenticate. This method is simpler to set up because it doesn't require deploy keys.
## Select an authentication method
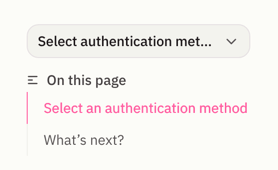
**To view instructions**, select the authentication method you want to use from the **dropdown menu** on the right side of the page, above the table of contents.
 GitHub App authentication is only available for `github.com` repositories. This option only appears if your Omni instance has the GitHub App configured. If you don't see this option and want to use it, reach out to Omni support.
## Requirements
To follow the steps in this guide, you'll need:
* **An existing [database connection](/connect-data/setup) in Omni**
* [**Connection Admin permissions**](/administration/users/permissions) for the connection you want to connect to dbt
## Configure GitHub App authentication
1. In your browser, navigate to the GitHub repository you want to connect to Omni.
2. Click the **Code** button.
3. In the modal that displays, locate the **{type_0}** option.
Keep this page open - you'll need it in the next step.
1. In Omni, navigate to **Settings > Connections**.
2. Click the connection you want to use.
3. Click the **dbt** tab.
4) From the **Authentication Method** dropdown, select **GitHub App**.
5) In the **HTTPS URL** field, copy and paste the repository's HTTPS URL from Step 1.
6) Next to the **Installation ID** field, click the **Install the Omni GitHub App** link.
GitHub will open in another tab in your browser. Leave this page open and finish the app installation in the other tab.
1. In GitHub, select the repository you want to connect.
2. Complete the installation.
3. After you complete the installation, retrieve the app's **installation ID** from the page URL:
GitHub App authentication is only available for `github.com` repositories. This option only appears if your Omni instance has the GitHub App configured. If you don't see this option and want to use it, reach out to Omni support.
## Requirements
To follow the steps in this guide, you'll need:
* **An existing [database connection](/connect-data/setup) in Omni**
* [**Connection Admin permissions**](/administration/users/permissions) for the connection you want to connect to dbt
## Configure GitHub App authentication
1. In your browser, navigate to the GitHub repository you want to connect to Omni.
2. Click the **Code** button.
3. In the modal that displays, locate the **{type_0}** option.
Keep this page open - you'll need it in the next step.
1. In Omni, navigate to **Settings > Connections**.
2. Click the connection you want to use.
3. Click the **dbt** tab.
4) From the **Authentication Method** dropdown, select **GitHub App**.
5) In the **HTTPS URL** field, copy and paste the repository's HTTPS URL from Step 1.
6) Next to the **Installation ID** field, click the **Install the Omni GitHub App** link.
GitHub will open in another tab in your browser. Leave this page open and finish the app installation in the other tab.
1. In GitHub, select the repository you want to connect.
2. Complete the installation.
3. After you complete the installation, retrieve the app's **installation ID** from the page URL:
 The installation ID is the string of numbers after the last forward slash in the page URL.
1. Navigate back to the Omni Git settings page.
2. Finish configuring the integration's settings:
* **Installation ID** - Paste the installation ID you copied from GitHub in the previous step
* **Committer name** - Enter the display name to associate with [signed commits](#configure-commit-signing). **You'll configure commit signing in the next step.**
* **Committer email** - Enter the verified email of the GitHub user to associate with [signed commits](#configure-commit-signing). **You'll configure commit signing in the next step.**
- **Git Branch** - Enter the name of the default branch for the repository. This is usually `main` or `master`.
Avoid naming your branch `omni` or `omnianalytics`. Omni creates temporary branches prefixed with `omni/` and `omnianalytics/` during internal operations like connection testing. A branch named `omni` or `omnianalytics` in your repository will conflict with this and cause validation errors and connection test failures.
- **Folder** - If your repository contains multiple dbt projects, enter the path to the folder that contains the dbt project you want to connect.
- **Enable Virtual Schemas** - Enables the use of virtual schemas, which require additional setup. See [Working with dbt virtual schemas](/integrations/dbt/virtual-schemas) for instructions.
- **Enable dbt Semantic Layer** - Check this box to enable the [dbt Semantic Layer integration](/integrations/dbt/semantic-layer). When enabled, Omni will use the dbt Semantic Layer to pull in metrics and dimensions defined in your dbt project.
- **Auto-generate primary keys and relationships from dbt constraints** - Check this box to allow Omni to generate primary keys and relationships from native dbt constraints.
- **dbt Version** - When set to **Auto** (default), Omni will auto-detect the dbt version from the `require-dbt-version` pin in `dbt_project.yml`. If a usable pin isn't found, Omni defaults to the latest supported version of dbt. Otherwise, you can select a specific version from the list of versions that Omni supports.
3. Click **Save and Test Connection**.
This step is optional.
Authenticating through Omni's GitHub app allows you to enable commit signing. When a user with a verified email adds Omni's public signing key, Omni's commits will show up as **Verified**.
The user with the verified **Committer email** you defined in the previous step must complete the following to configure commit signing:
1. In GitHub, navigate to **Settings > SSH and GPG keys**. **Note**: This is an individual **user's** settings, not the connected repository's settings.
2. Click **New SSH key**.
3. Set the **Key type** to **Signing key**.
4. In the **Key** field, paste the public key from the Omni Git settings page.
5. Click **Add SSH key**.
## Requirements
To follow the steps in this guide, you'll need:
* **An existing [database connection](/connect-data/setup) in Omni**
* [**Connection Admin permissions**](/administration/users/permissions) for the connection you want to connect to dbt
## Configure SSH authentication
1. In your browser, navigate to the GitHub repository you want to connect to Omni.
2. Click the **Code** button.
3. In the modal that displays, locate the **{type_1}** option.
Keep this page open - you'll need it in the next step.
1. In Omni, navigate to **Settings > Connections**.
2. Click the connection you want to use.
3. Click the **dbt** tab.
4. Fill in the following fields:
* **Authentication Method** - Select **SSH (Deploy Key)** from the dropdown.
* **Git SSH URL** - Enter the SSH URL you retrieved in step 1 of this guide
- **Git Branch** - Enter the name of the default branch for the repository. This is usually `main` or `master`.
Avoid naming your branch `omni` or `omnianalytics`. Omni creates temporary branches prefixed with `omni/` and `omnianalytics/` during internal operations like connection testing. A branch named `omni` or `omnianalytics` in your repository will conflict with this and cause validation errors and connection test failures.
- **Folder** - If your repository contains multiple dbt projects, enter the path to the folder that contains the dbt project you want to connect.
- **Enable Virtual Schemas** - Enables the use of virtual schemas, which require additional setup. See [Working with dbt virtual schemas](/integrations/dbt/virtual-schemas) for instructions.
- **Enable dbt Semantic Layer** - Check this box to enable the [dbt Semantic Layer integration](/integrations/dbt/semantic-layer). When enabled, Omni will use the dbt Semantic Layer to pull in metrics and dimensions defined in your dbt project.
- **Auto-generate primary keys and relationships from dbt constraints** - Check this box to allow Omni to generate primary keys and relationships from native dbt constraints.
- **dbt Version** - When set to **Auto** (default), Omni will auto-detect the dbt version from the `require-dbt-version` pin in `dbt_project.yml`. If a usable pin isn't found, Omni defaults to the latest supported version of dbt. Otherwise, you can select a specific version from the list of versions that Omni supports.
5. Click **Save**.
After the dbt connection is created, a **Public Key** will display. Leave this page open - you'll need it in the next step.
If the repository is already connected to Omni through the [Git integration](/integrations/git), skip this step. Omni will use the existing deploy key.
In this step, you'll add the **Public Key** created in step 2 of this guide to your dbt repository as a deploy key.
1. In the GitHub repository, click the **Settings** tab.
2. Click **Deploy keys**, located in the **Security** section of the left navigation.
3. Click **Add deploy key**.
4. Fill in the fields as follows:
* **Title** - Enter a descriptive title to help you identify what the key is used for. For example, *Omni Snowflake Model*
* **Key** - {keyInstructions_0}
* **Allow write access** - {writeAccess_0}
5. Click **Add key**.
## Requirements
To follow the steps in this guide, you'll need:
* **An existing [database connection](/connect-data/setup) in Omni**
* [**Connection Admin permissions**](/administration/users/permissions) for the connection you want to connect to dbt
## HTTPS token authentication
1. In your browser, navigate to the GitHub repository you want to connect to Omni.
2. Click the **Code** button.
3. In the modal that displays, locate the **{type_2}** option.
Keep this page open - you'll need it in the next step.
If the repository belongs to an organization, the organization must have a [personal access token policy](https://docs.github.com/en/organizations/managing-programmatic-access-to-your-organization/setting-a-personal-access-token-policy-for-your-organization) that allows the creation of personal access tokens.
In GitHub, create a fine-grained personal access token with the following permissions for the repository:
* **Contents**: Read and write
* **Metadata**: Read-only (automatically included)
* **Pull requests**: Read and write
See [GitHub's documentation](https://docs.github.com/en/authentication/keeping-your-account-and-data-secure/managing-your-personal-access-tokens#creating-a-fine-grained-personal-access-token) for instructions on creating a fine-grained personal access token.
1. In Omni, navigate to **Settings > Connections**.
2. Click the connection you want to use.
3. Click the **dbt** tab.
4. Fill in the following fields:
* **Authentication Method** - Select **HTTPS (Token)** from the dropdown.
* **Git HTTPS URL** - Enter the HTTPS URL you retrieved in step 1 of this guide
* **Access Token** - Paste the access token you created in step 2 of this guide
- **Git Branch** - Enter the name of the default branch for the repository. This is usually `main` or `master`.
Avoid naming your branch `omni` or `omnianalytics`. Omni creates temporary branches prefixed with `omni/` and `omnianalytics/` during internal operations like connection testing. A branch named `omni` or `omnianalytics` in your repository will conflict with this and cause validation errors and connection test failures.
- **Folder** - If your repository contains multiple dbt projects, enter the path to the folder that contains the dbt project you want to connect.
- **Enable Virtual Schemas** - Enables the use of virtual schemas, which require additional setup. See [Working with dbt virtual schemas](/integrations/dbt/virtual-schemas) for instructions.
- **Enable dbt Semantic Layer** - Check this box to enable the [dbt Semantic Layer integration](/integrations/dbt/semantic-layer). When enabled, Omni will use the dbt Semantic Layer to pull in metrics and dimensions defined in your dbt project.
- **Auto-generate primary keys and relationships from dbt constraints** - Check this box to allow Omni to generate primary keys and relationships from native dbt constraints.
- **dbt Version** - When set to **Auto** (default), Omni will auto-detect the dbt version from the `require-dbt-version` pin in `dbt_project.yml`. If a usable pin isn't found, Omni defaults to the latest supported version of dbt. Otherwise, you can select a specific version from the list of versions that Omni supports.
5. Click **Save**.
## Next steps
After you successfully connect your dbt repository, you need to:
1. [Configure your production dbt environment](/integrations/dbt/environments)
2. [Sync dbt with Omni](/integrations/dbt/syncing-dbt)
3. [Set up Virtual Schemas](/integrations/dbt/virtual-schemas). This isn't required to use the dbt integration, but enabling Virtual Schemas before you start building in Omni avoids migrating later.
## Troubleshooting
If the connection test fails when using **GitHub App** authentication, verify:
* **Installation ID is correct** - The installation ID must be numeric and match the Omni GitHub App installation for your repository or organization. You can find this in your GitHub settings under **Integrations > GitHub Apps > Configure**.
* **GitHub App is installed** - The Omni GitHub App must be installed and granted access to the repository. Check your GitHub organization or repository settings to confirm.
* **Repository URL is correct** - The repository URL must be an HTTPS URL starting with `https://github.com/`.
* **GitHub App is configured in Omni** - Your Omni instance must have the GitHub App configured. If the GitHub App option doesn't appear in the authentication method dropdown, contact your Omni administrator.
If you continue to experience issues, try using **SSH** or **HTTPS token** authentication instead.
The installation ID is the string of numbers after the last forward slash in the page URL.
1. Navigate back to the Omni Git settings page.
2. Finish configuring the integration's settings:
* **Installation ID** - Paste the installation ID you copied from GitHub in the previous step
* **Committer name** - Enter the display name to associate with [signed commits](#configure-commit-signing). **You'll configure commit signing in the next step.**
* **Committer email** - Enter the verified email of the GitHub user to associate with [signed commits](#configure-commit-signing). **You'll configure commit signing in the next step.**
- **Git Branch** - Enter the name of the default branch for the repository. This is usually `main` or `master`.
Avoid naming your branch `omni` or `omnianalytics`. Omni creates temporary branches prefixed with `omni/` and `omnianalytics/` during internal operations like connection testing. A branch named `omni` or `omnianalytics` in your repository will conflict with this and cause validation errors and connection test failures.
- **Folder** - If your repository contains multiple dbt projects, enter the path to the folder that contains the dbt project you want to connect.
- **Enable Virtual Schemas** - Enables the use of virtual schemas, which require additional setup. See [Working with dbt virtual schemas](/integrations/dbt/virtual-schemas) for instructions.
- **Enable dbt Semantic Layer** - Check this box to enable the [dbt Semantic Layer integration](/integrations/dbt/semantic-layer). When enabled, Omni will use the dbt Semantic Layer to pull in metrics and dimensions defined in your dbt project.
- **Auto-generate primary keys and relationships from dbt constraints** - Check this box to allow Omni to generate primary keys and relationships from native dbt constraints.
- **dbt Version** - When set to **Auto** (default), Omni will auto-detect the dbt version from the `require-dbt-version` pin in `dbt_project.yml`. If a usable pin isn't found, Omni defaults to the latest supported version of dbt. Otherwise, you can select a specific version from the list of versions that Omni supports.
3. Click **Save and Test Connection**.
This step is optional.
Authenticating through Omni's GitHub app allows you to enable commit signing. When a user with a verified email adds Omni's public signing key, Omni's commits will show up as **Verified**.
The user with the verified **Committer email** you defined in the previous step must complete the following to configure commit signing:
1. In GitHub, navigate to **Settings > SSH and GPG keys**. **Note**: This is an individual **user's** settings, not the connected repository's settings.
2. Click **New SSH key**.
3. Set the **Key type** to **Signing key**.
4. In the **Key** field, paste the public key from the Omni Git settings page.
5. Click **Add SSH key**.
## Requirements
To follow the steps in this guide, you'll need:
* **An existing [database connection](/connect-data/setup) in Omni**
* [**Connection Admin permissions**](/administration/users/permissions) for the connection you want to connect to dbt
## Configure SSH authentication
1. In your browser, navigate to the GitHub repository you want to connect to Omni.
2. Click the **Code** button.
3. In the modal that displays, locate the **{type_1}** option.
Keep this page open - you'll need it in the next step.
1. In Omni, navigate to **Settings > Connections**.
2. Click the connection you want to use.
3. Click the **dbt** tab.
4. Fill in the following fields:
* **Authentication Method** - Select **SSH (Deploy Key)** from the dropdown.
* **Git SSH URL** - Enter the SSH URL you retrieved in step 1 of this guide
- **Git Branch** - Enter the name of the default branch for the repository. This is usually `main` or `master`.
Avoid naming your branch `omni` or `omnianalytics`. Omni creates temporary branches prefixed with `omni/` and `omnianalytics/` during internal operations like connection testing. A branch named `omni` or `omnianalytics` in your repository will conflict with this and cause validation errors and connection test failures.
- **Folder** - If your repository contains multiple dbt projects, enter the path to the folder that contains the dbt project you want to connect.
- **Enable Virtual Schemas** - Enables the use of virtual schemas, which require additional setup. See [Working with dbt virtual schemas](/integrations/dbt/virtual-schemas) for instructions.
- **Enable dbt Semantic Layer** - Check this box to enable the [dbt Semantic Layer integration](/integrations/dbt/semantic-layer). When enabled, Omni will use the dbt Semantic Layer to pull in metrics and dimensions defined in your dbt project.
- **Auto-generate primary keys and relationships from dbt constraints** - Check this box to allow Omni to generate primary keys and relationships from native dbt constraints.
- **dbt Version** - When set to **Auto** (default), Omni will auto-detect the dbt version from the `require-dbt-version` pin in `dbt_project.yml`. If a usable pin isn't found, Omni defaults to the latest supported version of dbt. Otherwise, you can select a specific version from the list of versions that Omni supports.
5. Click **Save**.
After the dbt connection is created, a **Public Key** will display. Leave this page open - you'll need it in the next step.
If the repository is already connected to Omni through the [Git integration](/integrations/git), skip this step. Omni will use the existing deploy key.
In this step, you'll add the **Public Key** created in step 2 of this guide to your dbt repository as a deploy key.
1. In the GitHub repository, click the **Settings** tab.
2. Click **Deploy keys**, located in the **Security** section of the left navigation.
3. Click **Add deploy key**.
4. Fill in the fields as follows:
* **Title** - Enter a descriptive title to help you identify what the key is used for. For example, *Omni Snowflake Model*
* **Key** - {keyInstructions_0}
* **Allow write access** - {writeAccess_0}
5. Click **Add key**.
## Requirements
To follow the steps in this guide, you'll need:
* **An existing [database connection](/connect-data/setup) in Omni**
* [**Connection Admin permissions**](/administration/users/permissions) for the connection you want to connect to dbt
## HTTPS token authentication
1. In your browser, navigate to the GitHub repository you want to connect to Omni.
2. Click the **Code** button.
3. In the modal that displays, locate the **{type_2}** option.
Keep this page open - you'll need it in the next step.
If the repository belongs to an organization, the organization must have a [personal access token policy](https://docs.github.com/en/organizations/managing-programmatic-access-to-your-organization/setting-a-personal-access-token-policy-for-your-organization) that allows the creation of personal access tokens.
In GitHub, create a fine-grained personal access token with the following permissions for the repository:
* **Contents**: Read and write
* **Metadata**: Read-only (automatically included)
* **Pull requests**: Read and write
See [GitHub's documentation](https://docs.github.com/en/authentication/keeping-your-account-and-data-secure/managing-your-personal-access-tokens#creating-a-fine-grained-personal-access-token) for instructions on creating a fine-grained personal access token.
1. In Omni, navigate to **Settings > Connections**.
2. Click the connection you want to use.
3. Click the **dbt** tab.
4. Fill in the following fields:
* **Authentication Method** - Select **HTTPS (Token)** from the dropdown.
* **Git HTTPS URL** - Enter the HTTPS URL you retrieved in step 1 of this guide
* **Access Token** - Paste the access token you created in step 2 of this guide
- **Git Branch** - Enter the name of the default branch for the repository. This is usually `main` or `master`.
Avoid naming your branch `omni` or `omnianalytics`. Omni creates temporary branches prefixed with `omni/` and `omnianalytics/` during internal operations like connection testing. A branch named `omni` or `omnianalytics` in your repository will conflict with this and cause validation errors and connection test failures.
- **Folder** - If your repository contains multiple dbt projects, enter the path to the folder that contains the dbt project you want to connect.
- **Enable Virtual Schemas** - Enables the use of virtual schemas, which require additional setup. See [Working with dbt virtual schemas](/integrations/dbt/virtual-schemas) for instructions.
- **Enable dbt Semantic Layer** - Check this box to enable the [dbt Semantic Layer integration](/integrations/dbt/semantic-layer). When enabled, Omni will use the dbt Semantic Layer to pull in metrics and dimensions defined in your dbt project.
- **Auto-generate primary keys and relationships from dbt constraints** - Check this box to allow Omni to generate primary keys and relationships from native dbt constraints.
- **dbt Version** - When set to **Auto** (default), Omni will auto-detect the dbt version from the `require-dbt-version` pin in `dbt_project.yml`. If a usable pin isn't found, Omni defaults to the latest supported version of dbt. Otherwise, you can select a specific version from the list of versions that Omni supports.
5. Click **Save**.
## Next steps
After you successfully connect your dbt repository, you need to:
1. [Configure your production dbt environment](/integrations/dbt/environments)
2. [Sync dbt with Omni](/integrations/dbt/syncing-dbt)
3. [Set up Virtual Schemas](/integrations/dbt/virtual-schemas). This isn't required to use the dbt integration, but enabling Virtual Schemas before you start building in Omni avoids migrating later.
## Troubleshooting
If the connection test fails when using **GitHub App** authentication, verify:
* **Installation ID is correct** - The installation ID must be numeric and match the Omni GitHub App installation for your repository or organization. You can find this in your GitHub settings under **Integrations > GitHub Apps > Configure**.
* **GitHub App is installed** - The Omni GitHub App must be installed and granted access to the repository. Check your GitHub organization or repository settings to confirm.
* **Repository URL is correct** - The repository URL must be an HTTPS URL starting with `https://github.com/`.
* **GitHub App is configured in Omni** - Your Omni instance must have the GitHub App configured. If the GitHub App option doesn't appear in the authentication method dropdown, contact your Omni administrator.
If you continue to experience issues, try using **SSH** or **HTTPS token** authentication instead.