The Chat in navigation setting allows you to control whether the Omni Agent appears in the main navigation. For embedded scenarios, you can enable the Chat setting to allow workbook and dashboard AI functionality while disabling Chat in navigation to remove the standalone Omni Agent from the main navigation.
How it works
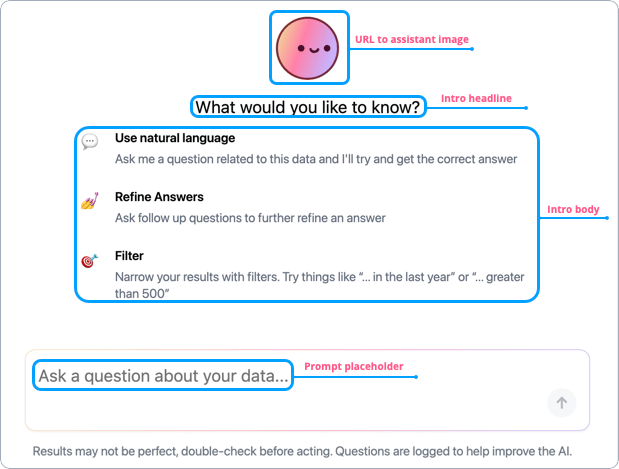
The embedded Omni Agent uses the same pickers and scoping behavior as the native Omni app. When embedding, you can tailor the experience to include only the connections, models, and topics you specify.When embedding dashboards with
mode=SINGLE_CONTENT, the Dashboard Agent uses an inline panel instead of the split-view interface. This prevents users from navigating away from the embedded dashboard, keeping them scoped to the single-content frame.Steps
1
Define connection access
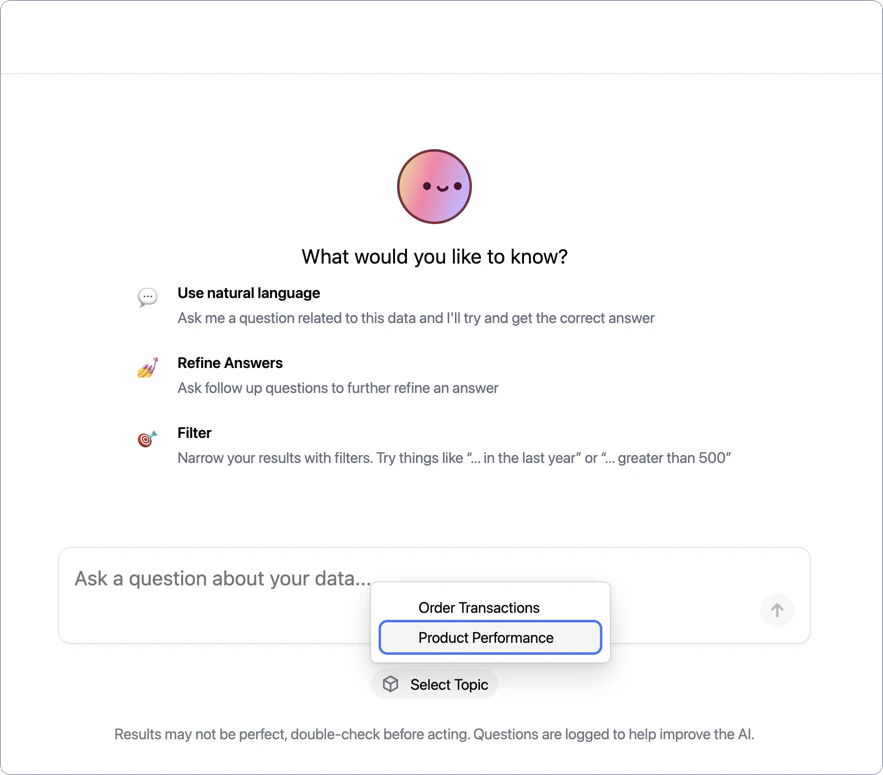
The first step is to decide which connections you want your users to have access to when using the Omni Agent. These connections will display in the Connections picker below the chatbox.Start by retrieving the connections’ unique IDs. Later in this guide, you’ll use the IDs to construct a
connectionRoles parameter and configure the embed session. You can retrieve connection IDs using either of the following methods:From connection settings
From connection settings
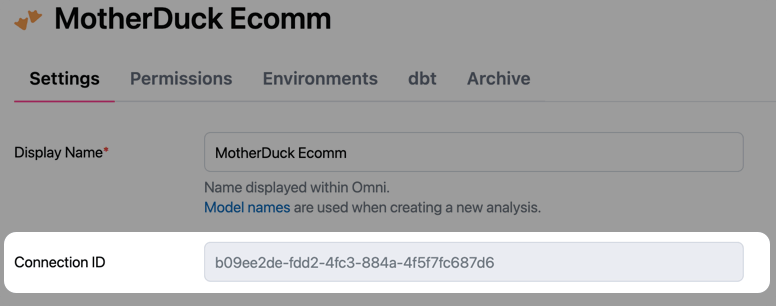
In Omni:
- Navigate to Settings > Connections.
- Click on the connection.
- At the top of the Settings tab, locate the Connection ID field:
Using the API
Using the API
To programmatically retrieve connection IDs, use the List connections API.If you want to retrieve a specific connection - such as a connection specific to a client - use the endpoint’s filtering functionality. In this example, the request will retrieve a connection named Valid requests to the API will return a
Blobs R Us:GET /api/v1/connections
200 OK status and a response body containing connection objects. Each object will the connection’s unique id.2
Curate the topic list
Next, you’ll curate the list of topics you want users to have access to in the topic picker. This is accomplished with the Refer to Scoping AI chat responses for details on how topic configuration affects the picker display and AI behavior.
ai_chat_topics model parameter. This parameter accepts a list of topic names, which will limit access only to the specified topics.In Omni, navigate to the models associated with the connections from step 1. Add the ai_chat_topics parameter and specify the topics that users should have access to:Example model file
You can add sample queries to accessible topics, which will display in the chat interface as clickable questions: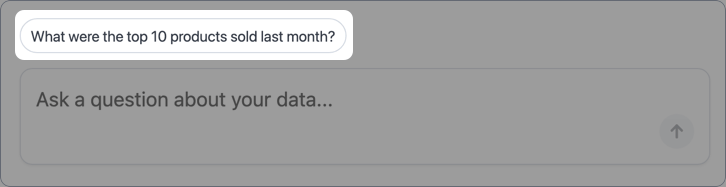
3
Define embed parameters
The next step is to define the embed parameters to create the chat session for the user. Along with the required parameters -
externalId, name, and nonce - set the following parameters:-
contentPath- Set to/chat -
connectionRoles- Use the connection IDs from step 1 of this guide to build an object that specifies the connection roles available to the embed users. For example:
4
Apply your branding
After you’ve successfully configured and created an embed session, the last step is to apply your branding styles. While this last step is optional, it allows you to make the Omni Agent your own and blend it seamlessly with your application.Navigate to AI Hub > General and then click the Branding tab.