Requirements
To follow the steps in this guide, you’ll need:- Omni Organization Admin permissions
- Permissions in Okta that allow you to:
- Access the Admin console
- Add & configure Okta applications
Limitations
- User sessions will expire after 24 hours. This is not currently configurable.
- Users will not be able to click the Omni tile in Okta to log in. This is because Omni’s current integration with Okta is not Identity service provider (IdP) initiated, but SP-initiated.
Setup
Add the Omni application in Okta
- Log in to your Okta Admin console.
- Navigate to Applications > Applications > Browser App Catalog.
- Search for the
Omni Analyticsapplication. - Click Add integration.
- On the page that displays, enter your Omni subdomain. For example, if you log in to
https://blobsrus.omniapp.co, you would enterblobsrus. - Click Save.
Retrieve Okta Omni application details
Navigate to the Okta Omni application and then complete the following:
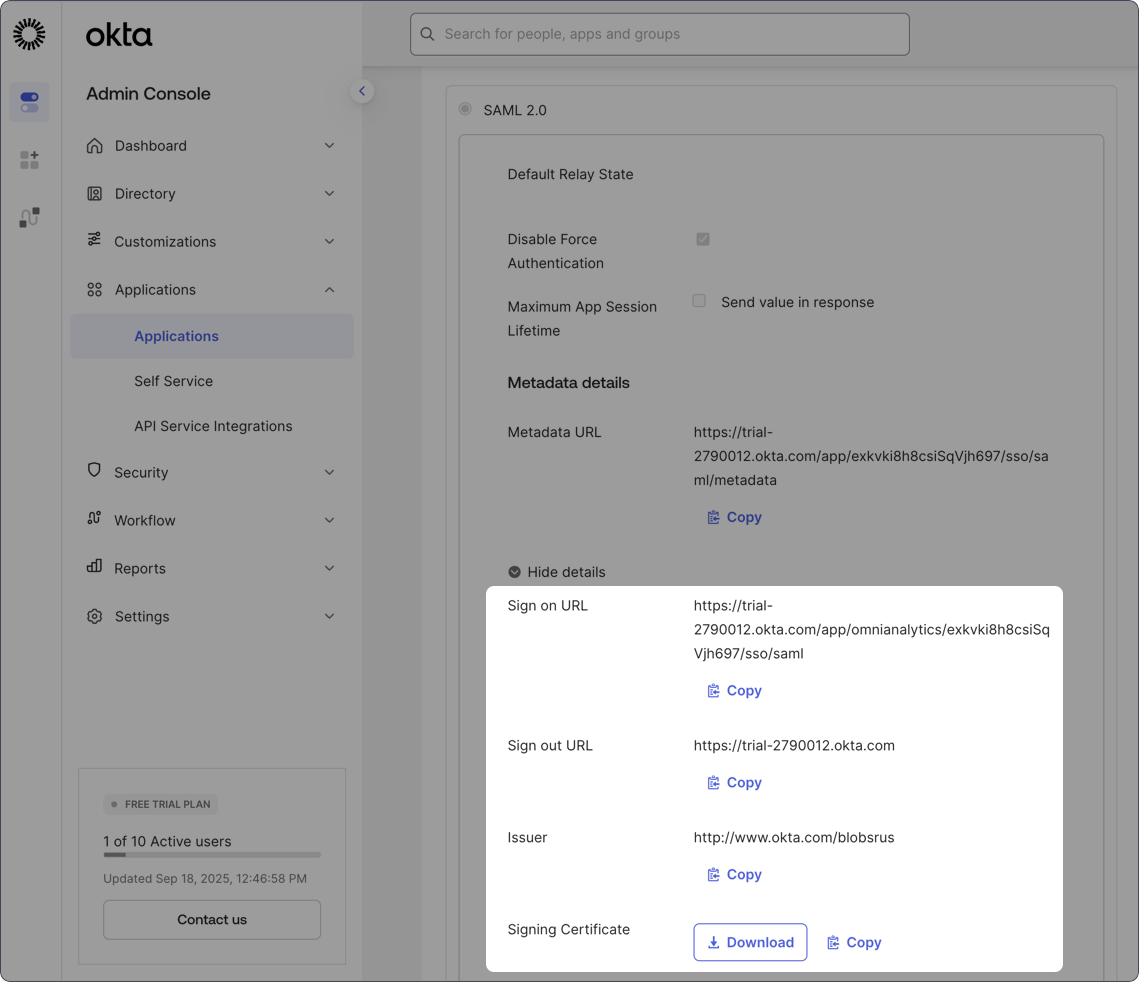
- In the Okta Omni application, open the Sign on tab.
- In the SAML 2.0 section, click More details:
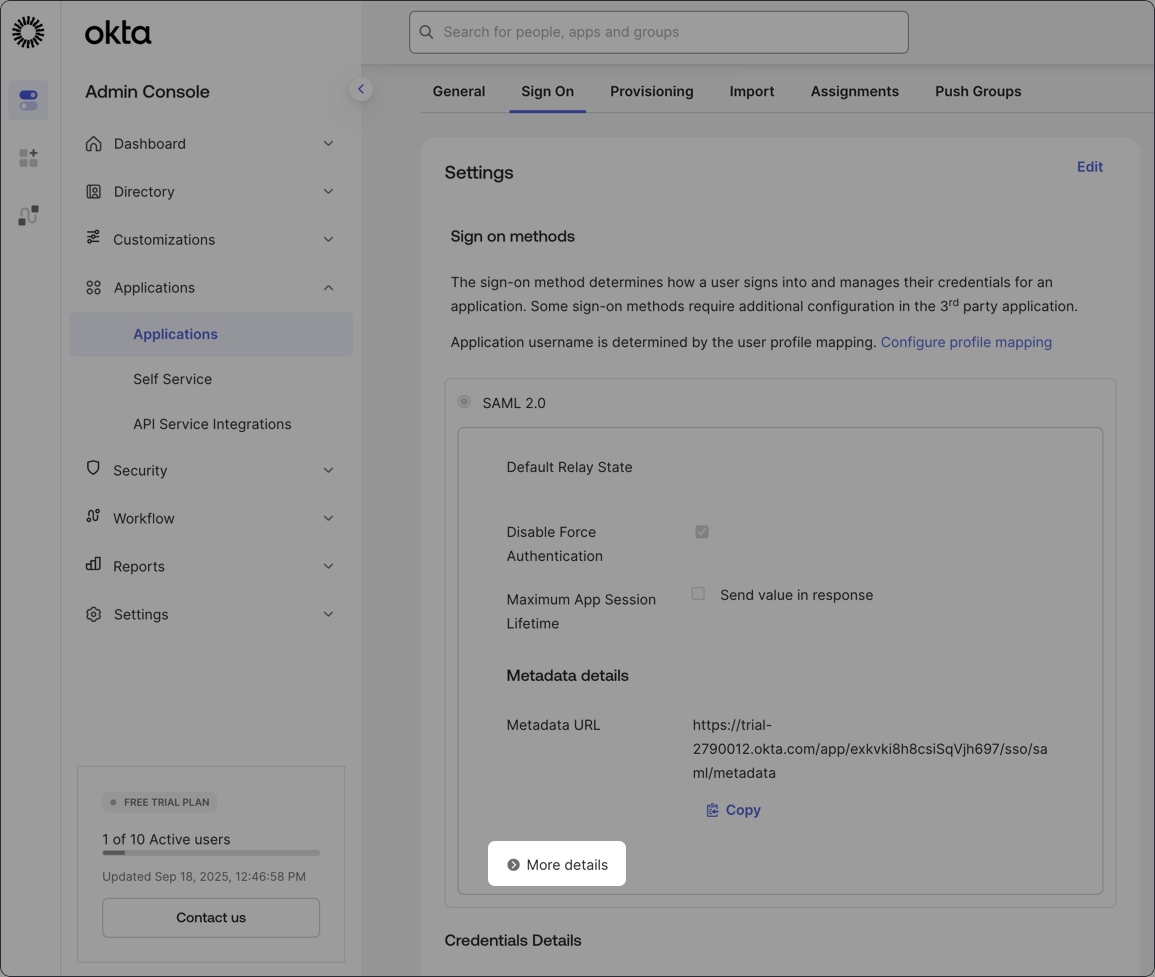
- Keep this section open - you’ll need the Sign on URL, Issuer, and Signing certificate handy to complete the next step.
Assign yourself to the Omni application
In this step, you’ll assign the Okta Omni application to yourself. This will allow you to test the setup in Omni before rolling everything out to your organization.
- In the Okta Omni application, open the Assignments tab.
- Click the Assign button, then Assign to people.
- In the dialog that displays, click the Assign link next to your user.
- You’ll be directed to confirm details about the user, including the email address and display name. Modify these settings as needed.
- When finished, click Save and Go back.
- Click Done.
Configure Omni authentication settings
In Omni, navigate to Settings > Authentication to complete the setup: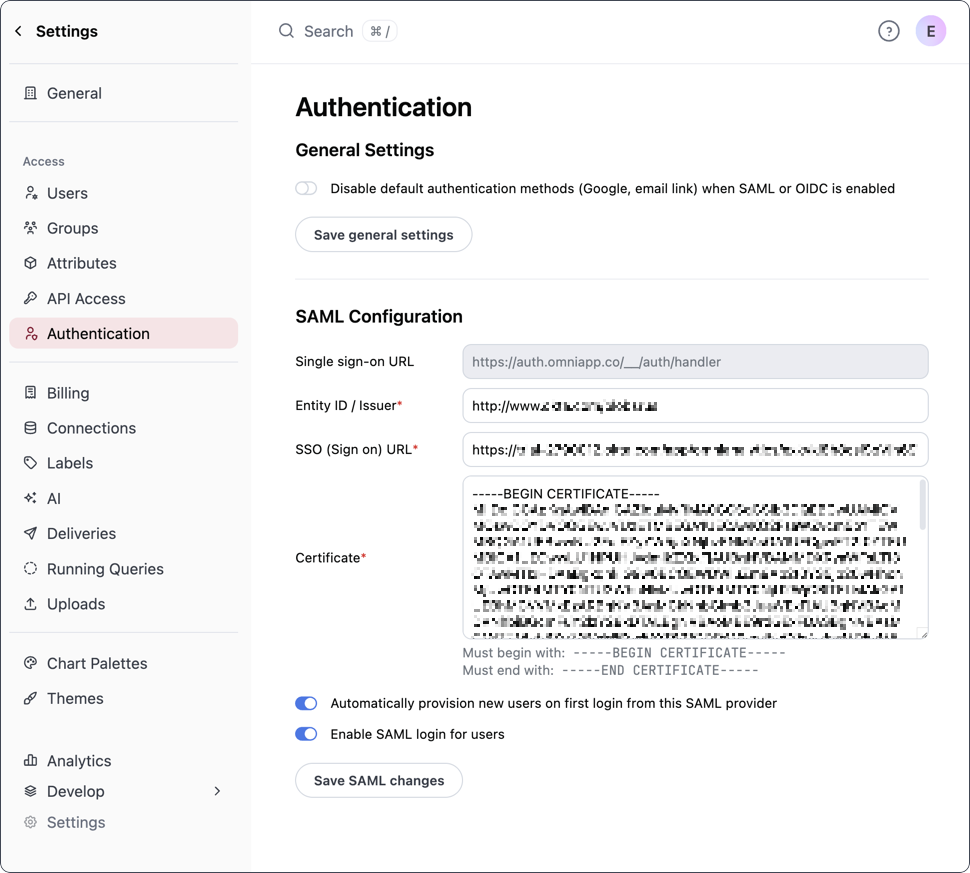
- Entity ID / Issuer - Copy and paste the Issuer value from Okta
- SSO (Sign on) URL - Copy and paste the Sign on URL value from Okta
- Certificate - Use the Copy button next to the Certificate field in Okta, then paste the contents in Omni.
-
Automatically provision new users on first login from this SAML provider - Toggle this setting to on if:
- You want to provision users only when they first access Omni and
- You don’t plan to set up SCIM provisioning
- Enable SAML login - Toggle this setting to on to enable SAML authentication
Test the setup
Test your SAML setup by logging out of Omni. On the Omni login page, you should see a Log in with SAML button. Click the button to log in using SAML.
Assign users to the Okta Omni application
Once you confirm everything is working as expected, you can assign the Okta Omni application to other people and groups in your organization. Not sure what permissions to use? Refer to the Connection permissions guide for more information.In Okta:
- In the Okta Omni application, open the Assignments tab.
- Click the Assign button, then Assign to people.
- In the dialog that displays, click the Assign link next to the user.
- You’ll be directed to confirm details about the user, including the email address and display name. Modify these settings as needed.
- When finished, click Save and Go back.
- Click Done.