Requirements
To follow the steps in this guide, you’ll need:- Omni Organization Admin permissions
-
Permissions in Microsoft Entra that allow you to:
- Access the admin panel
- Add & configure Microsoft Entra applications
- Assign users to applications
Setup
Open the Omni authentication settings
In your Omni instance, navigate to Settings > Authentication and locate the SAML section.Leave this page open - you’ll need it to complete the setup.
Create an Omni application in Entra
- Log in to the Microsoft Entra admin panel.
- Navigate to Applications > Enterprise Applications.
- Click New application, then Create your own application.
- Name the application
Omni. - Select the Integrate any other application you don’t find in the gallery (Non-gallery) option.
- Click Create.
Configure the Entra Omni application
- Click the Entra Omni application you created in the previous step.
- Navigate to the Manage > Single sign-on configuration section.
- Select SAML sign-on as the method.
-
In the Basic SAML configuration section, click Edit and modify these settings:
- Identifier (Entity ID) - Enter the full hostname of your Omni instance, e.g.
blobsrus.omniapp.co. Do not includehttps://. - Reply URL (Assertion Consumer Service URL) - Copy and paste the value of the Single sign-on URL field from the Omni Authentication settings you opened in step 1.
- Identifier (Entity ID) - Enter the full hostname of your Omni instance, e.g.
- Save the changes to the settings.
| Claim 1 | Claim 2 | Claim 3 | |
|---|---|---|---|
| Description | User’s email address | User’s first name | User’s last name |
| Name | email_address | first_name | last_name |
| Namespace | Leave blank | Leave blank | Leave blank |
| Source | Attribute | Attribute | Attribute |
| Source attribute | The attribute you use to identify a user’s email address. Usually user.email or user.mail. | user.first_name | user.surname |
The name for a claim must match exactly the value in the Name row in the above table. For example,
first_name is valid but firstName is not.Assign yourself to the Entra Omni application
In this step, you’ll assign the Entra Omni application to yourself. This will allow you to test the setup in Omni before rolling everything out to your organization.Follow the steps in the Entra documentation to assign yourself to the Omni application.
Download the signing certificate
- In the Entra Omni application’s settings, locate the SAML Certificates section.
- Click the Base64 download link to download the certificate.
- Locate the certificate file on your computer and change the extension to
.txt. This will allow you to open it. - Keep the file open - you’ll need it to complete the next step.
Configure Omni authentication settings
Navigate back to the Omni authentication settings (Settings > Authentication) to complete the setup: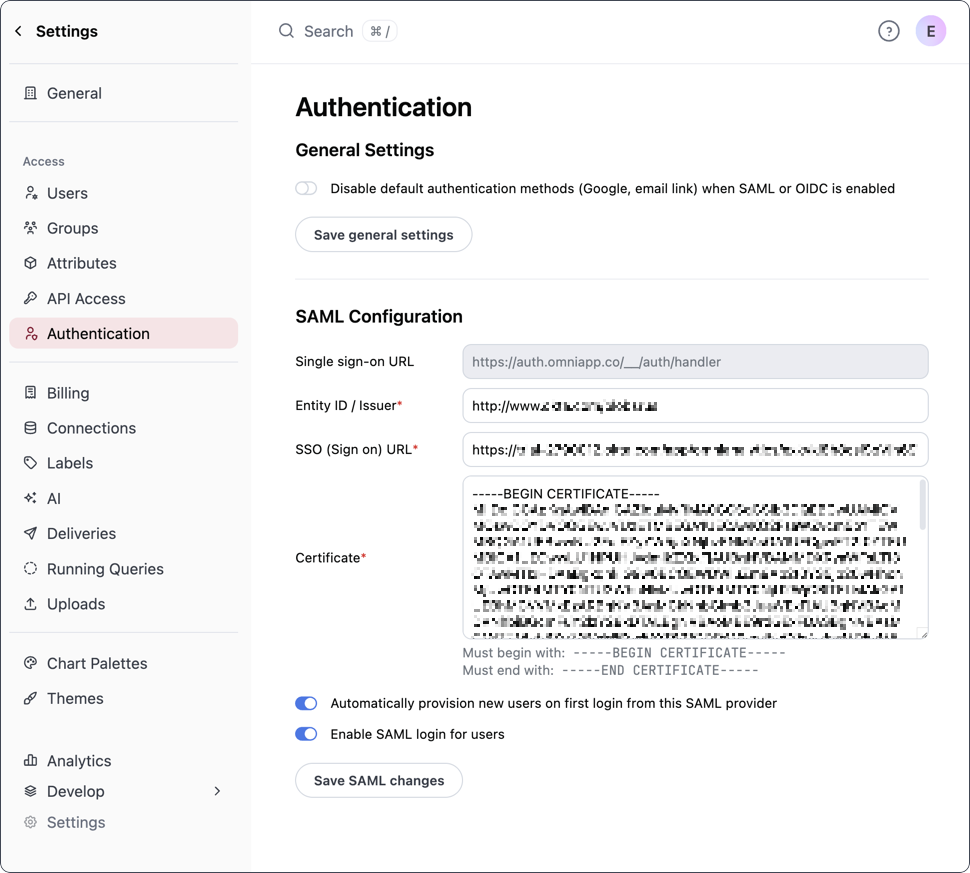
- Entity ID / Issuer - Copy and paste the Microsoft Entra ID Identifier value from Entra
- SSO (Sign on) URL - Copy and paste the Login URL value from Entra
- Certificate - Copy and paste the contents of the certificate you downloaded in step 4.
-
Automatically provision new users on first login from this SAML provider - Toggle this setting to on if:
- You want to provision users only when they first access Omni and
- You don’t plan to set up SCIM provisioning
- Enable SAML login - Toggle this setting to on to enable SAML authentication
Test the setup
Test your SAML setup by logging out of Omni. On the Omni login page, you should see a Log in with SAML button. Click the button to log in using SAML.
Assign users to the Omni application
User groups can be pushed from Microsoft Entra to Omni using SCIM. Check out the Entra-Omni SCIM guide for more information.