> ## Documentation Index
> Fetch the complete documentation index at: https://docs.omni.co/llms.txt
> Use this file to discover all available pages before exploring further.
# Using the MCP Server in Cursor
> Connect your Omni data to Cursor with Omni's MCP Server.
Cursor is an AI-powered code editor that can connect with other tools—like Omni!—with MCP. Once successfully connected, you can interact with your Omni data right in Cursor's interface.
**Looking for the Omni agent skills for Cursor?** See the [Agent skills documentation](/developers/agent-skills) for a broader set of skills beyond querying.
## Requirements
Every person who wants to use the MCP Server must complete the setup.
To follow the steps in this guide, you'll need:
* **A version of [Cursor](https://cursor.sh/) that supports MCP**
* **To have the following enabled in Omni**:
* **The MCP Server AI setting**. An Organization Admin can enable this setting by navigating to [**AI Hub > Setup > General**](/ai/settings/features#mcp-server).
* **Personal access tokens (PATs)**, which are required to use [OAuth to authenticate](/ai/mcp/authentication). An Organization Admin can activate them by going to [**Settings > API Keys > Personal tokens**](/api/authentication#token-types).
## Setup
Choose your authentication method. See the [MCP authentication guide](/ai/mcp/authentication) if you need help selecting a method.
OAuth provides streamlined setup without manually managing API keys.
In Cursor, click **Cursor > Settings > Cursor settings**.
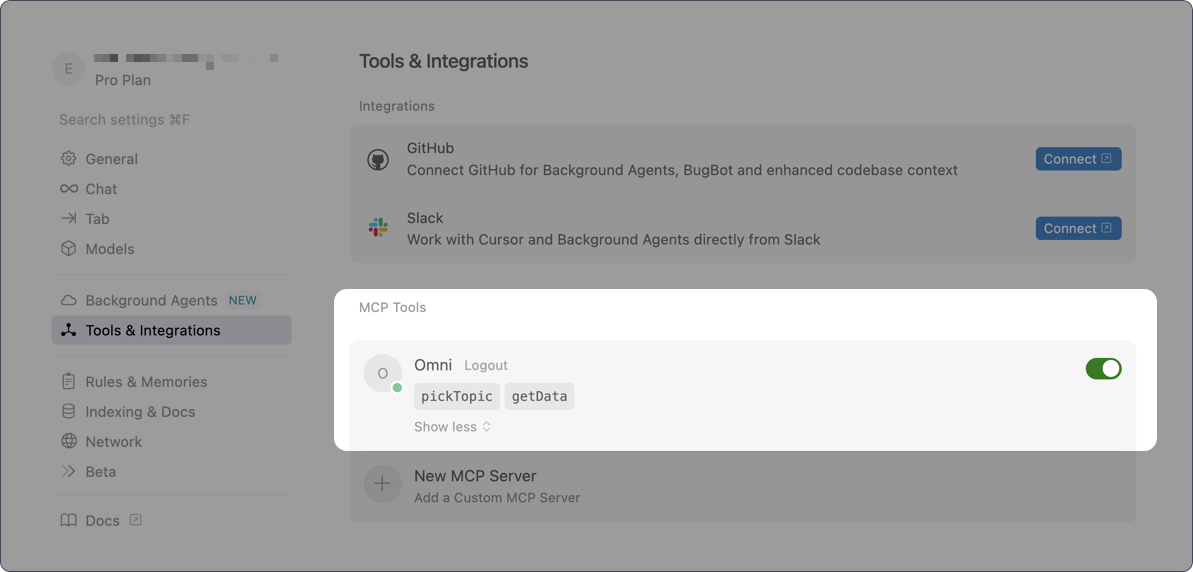
Click **Tools & Integrations** in the settings navigation, then click **New MCP Server** under **MCP Tools**.
Cursor will create an `mcp.json` file. Paste the following:
```json title="mcp.json" theme={null}
{
"mcpServers": {
"Omni": {
"url": "https://callbacks.omniapp.co/callback/mcp"
}
}
}
```
Save the file.
Before you can use the MCP, you'll need to authorize the connection.
1. Click the **Connect** button next to the MCP.
2. Your browser will open and redirect you to an Omni authorization page.
3. Review the requested permissions and click **Authorize**.
Omni will automatically create a [Personal access token](/api/authentication#token-types) and link it to your Omni user account.
At this point, you should be able to use the Omni MCP server in Cursor chats.
 API key authentication gives you direct control over key management.
If you don't have an Omni API key, [create one](/api/authentication) before continuing.
Open the **Command Palette** (`⌘ + Shift + P` on Mac, `Ctrl + Shift + P` on Windows), search for `MCP`, and select **View: Open MCP Settings**.
Click **Tools & Integrations** in the settings navigation, then click **New MCP Server** under **MCP Tools**.
Cursor creates an `mcp.json` file. Paste the following:
```json title="mcp.json" theme={null}
{
"mcpServers": {
"Omni": {
"url": "https:///mcp/https",
"headers": {
"Authorization": "Bearer ",
"X-MCP-Model-ID": "",
"X-MCP-Topic-Name": "",
"X-MCP-User-Required": "",
"X-MCP-User-ID": "",
"X-MCP-Query-All-Views": ""
}
}
}
}
```
* `` - **Required**. Your Omni URL (e.g., `acme.omniapp.co`)
* `` - **Required**. Your [Omni API key](/api/authentication). Cursor also supports [environment variables](https://docs.cursor.com/context/model-context-protocol#authentication) for the key.
* `` - **Optional**. Scope the MCP to a specific model. Find the model ID in the URL when viewing the model:
```txt wrap theme={null}
https://acme.omniapp.co/models/9d9440e5-8522-4507-b092-1ac26ba26673/ide/model
```
* `` - **Optional**. Scope the MCP to a specific topic
* `` - **Optional**. Require a User ID to execute queries with that user's permissions (default: false)
* `` - **Optional**. Execute queries as this user. Get IDs from the [List Users API](/api/users/list-users)
* `` for `X-MCP-Query-All-Views` - **Optional**. Set to `true` to allow the AI to query any view in the model instead of only topics. Requires the model's [`query_all_views_and_fields`](/modeling/models/ai-settings#param-query-all-views-and-fields) setting to be enabled. Defaults to `false`.
Save the file.
Check the server's status in **Settings**:
API key authentication gives you direct control over key management.
If you don't have an Omni API key, [create one](/api/authentication) before continuing.
Open the **Command Palette** (`⌘ + Shift + P` on Mac, `Ctrl + Shift + P` on Windows), search for `MCP`, and select **View: Open MCP Settings**.
Click **Tools & Integrations** in the settings navigation, then click **New MCP Server** under **MCP Tools**.
Cursor creates an `mcp.json` file. Paste the following:
```json title="mcp.json" theme={null}
{
"mcpServers": {
"Omni": {
"url": "https:///mcp/https",
"headers": {
"Authorization": "Bearer ",
"X-MCP-Model-ID": "",
"X-MCP-Topic-Name": "",
"X-MCP-User-Required": "",
"X-MCP-User-ID": "",
"X-MCP-Query-All-Views": ""
}
}
}
}
```
* `` - **Required**. Your Omni URL (e.g., `acme.omniapp.co`)
* `` - **Required**. Your [Omni API key](/api/authentication). Cursor also supports [environment variables](https://docs.cursor.com/context/model-context-protocol#authentication) for the key.
* `` - **Optional**. Scope the MCP to a specific model. Find the model ID in the URL when viewing the model:
```txt wrap theme={null}
https://acme.omniapp.co/models/9d9440e5-8522-4507-b092-1ac26ba26673/ide/model
```
* `` - **Optional**. Scope the MCP to a specific topic
* `` - **Optional**. Require a User ID to execute queries with that user's permissions (default: false)
* `` - **Optional**. Execute queries as this user. Get IDs from the [List Users API](/api/users/list-users)
* `` for `X-MCP-Query-All-Views` - **Optional**. Set to `true` to allow the AI to query any view in the model instead of only topics. Requires the model's [`query_all_views_and_fields`](/modeling/models/ai-settings#param-query-all-views-and-fields) setting to be enabled. Defaults to `false`.
Save the file.
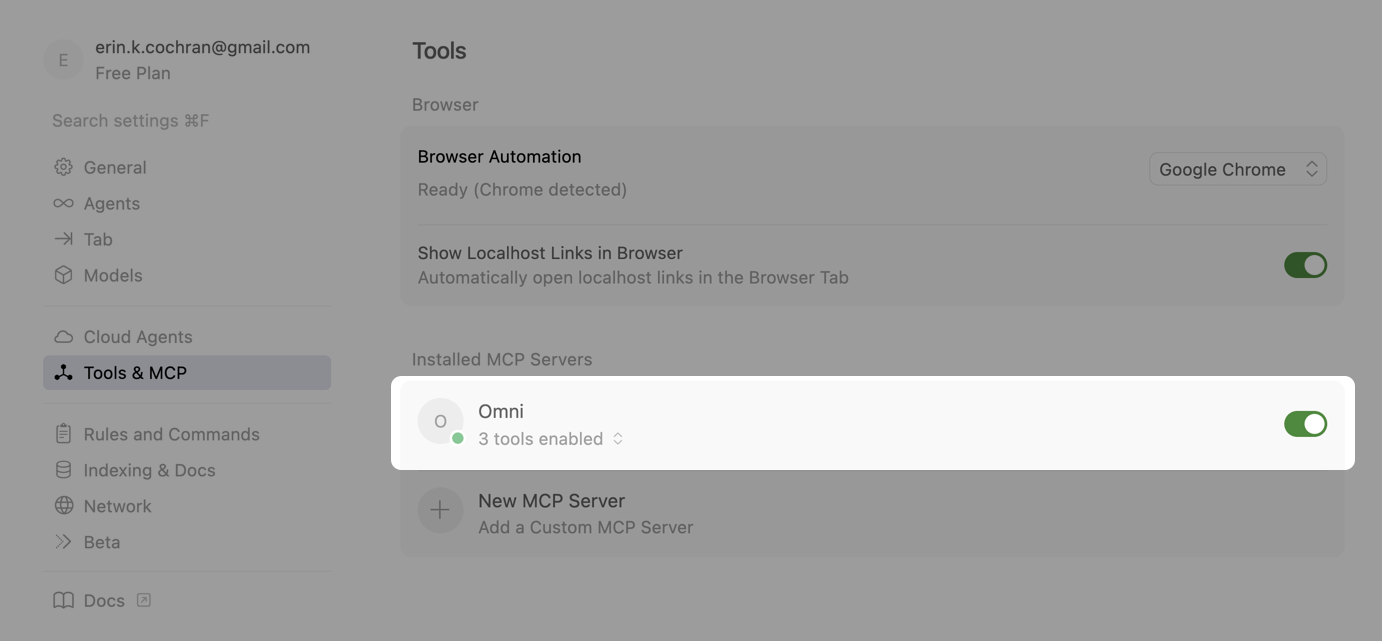
Check the server's status in **Settings**:
 ## Using the MCP
Once the MCP Server is connected, Cursor automatically uses it when you ask questions about your data. You can prompt Cursor to use Omni by referring to it by name or description.
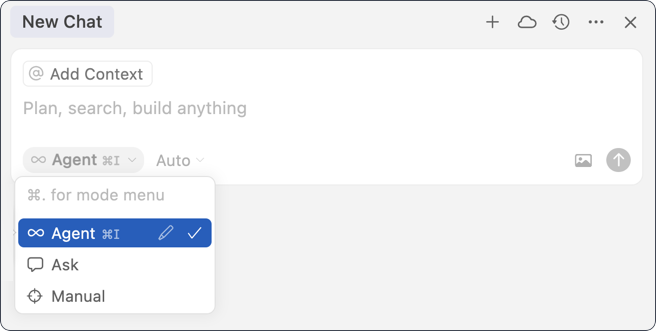
Open the AI pane/chat panel and select **Agent** mode:
## Using the MCP
Once the MCP Server is connected, Cursor automatically uses it when you ask questions about your data. You can prompt Cursor to use Omni by referring to it by name or description.
Open the AI pane/chat panel and select **Agent** mode:
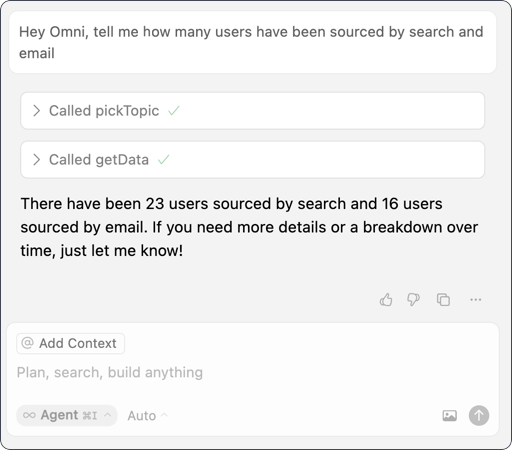
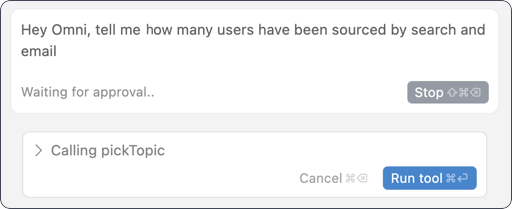
 Enter a prompt, such as `Hey Omni, tell me how many users have been sourced by search and email`.
Each time Cursor uses an MCP tool, you'll be prompted [to approve its usage](https://docs.cursor.com/context/model-context-protocol#tool-approval). Click **Run tool** to proceed.
Enter a prompt, such as `Hey Omni, tell me how many users have been sourced by search and email`.
Each time Cursor uses an MCP tool, you'll be prompted [to approve its usage](https://docs.cursor.com/context/model-context-protocol#tool-approval). Click **Run tool** to proceed.
 You can also use Cursor's [Yolo mode](https://docs.cursor.com/chat/agent#yolo-mode) to automatically run MCP tools without requiring approval.
The MCP Server will pick a model (if not configured) and topic, then run a query to retrieve the data:
You can also use Cursor's [Yolo mode](https://docs.cursor.com/chat/agent#yolo-mode) to automatically run MCP tools without requiring approval.
The MCP Server will pick a model (if not configured) and topic, then run a query to retrieve the data: